How to Crochet Snowflake Christmas Ornaments Pattern – DIY Crafts
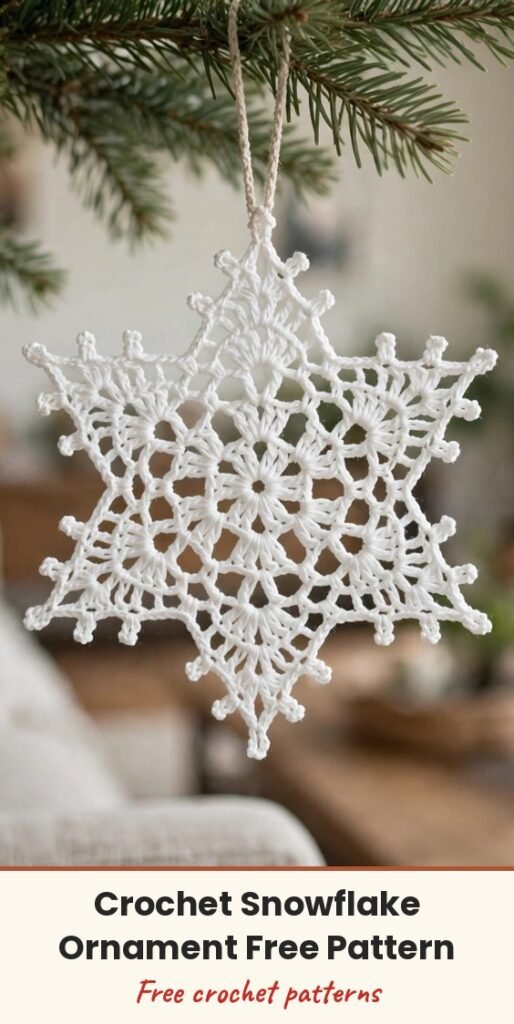
Table of Contents
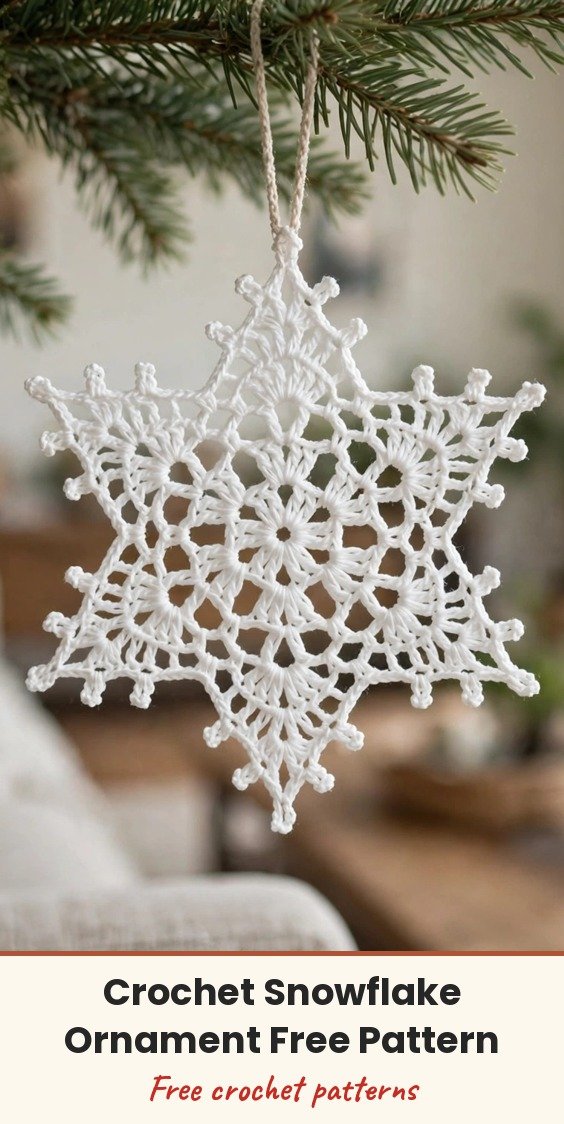
There is nothing quite like a handmade snowflake on the tree, is there? This delicate six-point lace snowflake works up in just three rounds, and once it is blocked and stiffened it holds those crisp points beautifully all season long.
I love making a little stack of these on a quiet evening. Hang one on the tree, tie one onto a wrapped gift, thread one onto a card, or join several together for a garland, they are pretty every single way.
Grab your finest cotton thread and your smallest hook, and let us make some snow!
Materials
- Fine lace weight cotton crochet thread, or 4-ply fingering weight cotton yarn, in white, green, or a colour of your choice
- 1.5 mm to 2.0 mm steel crochet hook, or the size matching your chosen yarn weight
- Tapestry or yarn needle, for weaving in loose ends
- Scissors
- Blocking board and rust-proof pins, optional
- Fabric stiffener, or a 50/50 mix of PVA craft glue and water, optional, for added shape stability
Abbreviations
- MR: magic ring (magic circle)
- ch: chain
- sl st: slip stitch
- sc: single crochet
- dc: double crochet
- ch-sp: chain space
- st(s): stitch(es)
Special Stitches
- Picot: Ch the number of chains stated, then sl st into the first chain made, forming a small loop. In this pattern you will make ch-5 side picots and a tall ch-7 peak picot at the tip of each point.
Gauge & Size
- Finished size: approximately 3.5 to 4 inches (9 to 10 cm) in diameter, when made with cotton thread and blocked properly
- Worked in the round, starting from the centre outward
- Ch-3 at the beginning of a round counts as 1 double crochet (dc)
- Each round ends with a slip stitch to the starting ch-3 or stitch
Snowflake Pattern
Round 1, central star base: Create a magic ring.
Round 1: Ch 3 (counts as 1 dc). Work 2 dc into the ring. Ch 3.
Round 1 continued: Repeat (3 dc, ch 3) into the ring 4 more times.
Round 1 continued: Pull the magic ring tail tightly to close the centre. Sl st into the 3rd chain of the starting ch-3.
Round 1 stitch count: 6 groups of 3 dc, and 6 ch-3 spaces.
Round 2, shell and point setup: Sl st across the next 2 stitches to reach the first ch-3 space.
Round 2: Ch 3 (counts as 1 dc). Work 2 dc into the ch-3 space. Ch 5. Work 3 dc into the same ch-3 space. Ch 1.
Round 2 continued: In each of the remaining 5 ch-3 spaces, work (3 dc, ch 5, 3 dc, ch 1).
Round 2 continued: Sl st into the 3rd chain of the starting ch-3.
Round 2 stitch count: 6 shell clusters, each consisting of 3 dc, ch 5, 3 dc, separated by ch-1 spaces.
Round 3, decorative outer picots and points: Sc directly into the ch-1 space between shells.
Round 3, valley picot: Ch 5, sl st into the first chain made, creating a 5-chain picot loop.
Round 3, work up the first side of the point: In the ch-5 corner space of the shell, work 6 dc.
Round 3 continued: Ch 5, sl st into the first chain, creating a side picot. Work 1 dc into the same ch-5 corner space.
Round 3, peak picot: Ch 7, sl st into the first chain, creating the tall centre point picot. Work 1 dc back into the same ch-5 corner space.
Round 3, work down the second side of the point: Ch 5, sl st into the first chain, creating a side picot. Work 6 dc into the same ch-5 corner space.
Round 3, valley transition: Sc into the next ch-1 space, ch 5, and sl st into the first chain.
Round 3 continued: Repeat the point steps for the remaining 5 shells.
Round 3 continued: Sl st into the first sc of Round 3.
Finishing & Assembly
Fasten off: Cut the yarn, leaving a 4-inch tail. Pull the loop through to secure.
Weave in the ends: Use a yarn needle to thread the tail to the back of the work, weaving it through the stitches. Pull the starting magic ring tail tightly and secure it.
Blocking and stiffening: Lay the snowflake on a blocking mat or foam board. Pin all 6 points, pulling the ch-7 peak picots to form sharp tips. Apply starch, or a 50/50 glue and water mix, to the snowflake. Allow it to dry completely overnight before unpinning.
Hanging loop: If you like, add a chain-20 loop at the top of one point before fastening off, or thread a metallic ribbon through one of the picot tips.
Tips
Keep your tension even as you work, and keep the picots and chain spaces tight and uniform for a polished finish.
Blocking really is essential for lace snowflakes, they often curl or lose their shape until they are pinned flat and stiffened into those crisp, defined points.
For a little sparkle, hold a strand of metallic thread together with your main yarn, or work the final round in a contrasting silver or gold glitter yarn.
Make several snowflakes and connect them along a long chain to create a festive holiday garland.
How to Crochet Snowflake Christmas Ornaments Pattern – DIY Crafts
Materials
Steps
- Work Round 1 centre with 6 groups of 3 dc and ch-3 spaces
- Work Round 2 shells in each ch-3 space
- Work Round 3 picot points around all 6 shells
- Fasten off and weave in ends
- Pin all 6 points flat on blocking board
- Apply stiffener and dry overnight
- Keep picots and chain spaces tight and uniform
- Blocking is essential for crisp defined points
- Hold metallic thread with main yarn for sparkle
- Join several snowflakes on a chain for a garland


