Panda Bear Baby Overalls Free Crochet Pattern
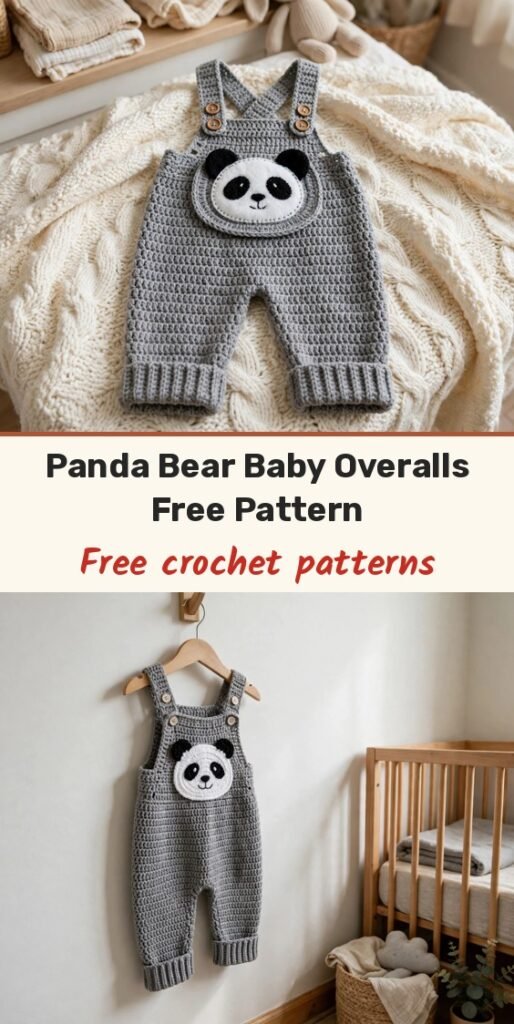
Table of Contents
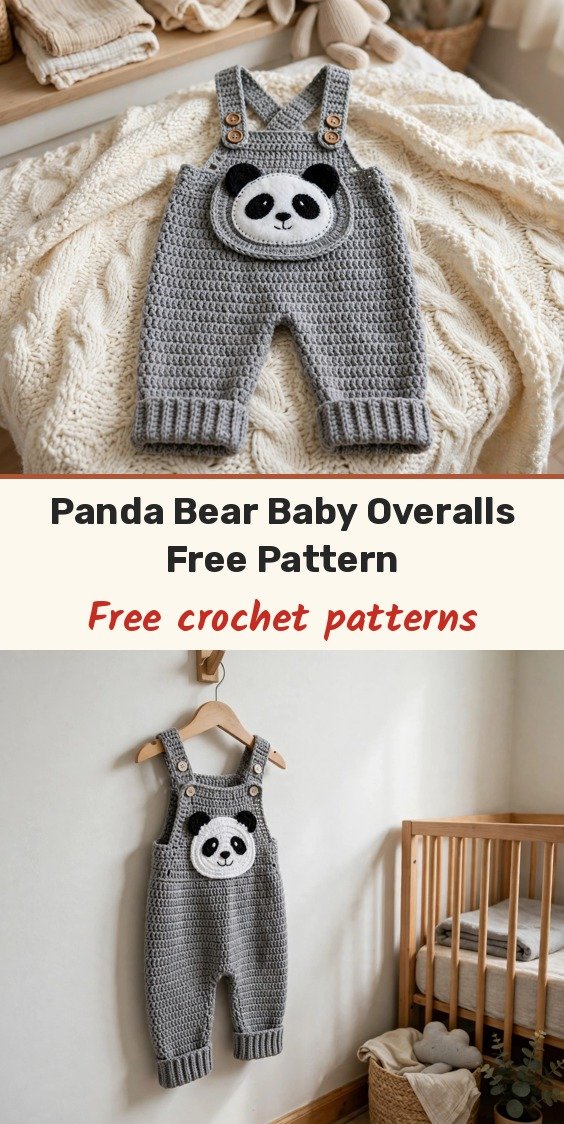
These little panda bear baby overalls melt my heart every time I look at them! A soft grey romper, cute ribbed cuffs, adjustable button straps, and the sweetest panda face applique right on the bib. If you can single crochet and seam, you can absolutely make these.
I know the construction sounds like a lot, but it comes together so logically. We work two identical leg panels from the bottom up, join them with a short chain bridge, then keep going straight up into the body and bib. The panda face is worked separately in the round, mostly simple circles, and sewn on at the end.
The pattern is written for 3 to 6 months, and I have included the source sizing notes for newborn, 6 to 12 months, and 12 to 18 months at the end, so you can make a pair for almost any little one.
Materials
- Approximately 350 yards / 320 meters of grey worsted weight (Category 4) yarn, main colour
- Approximately 25 yards / 23 meters of white worsted weight (Category 4) yarn, for the panda face
- Approximately 15 yards / 14 meters of black worsted weight (Category 4) yarn, for the ears and eye patches
- US G-6 / 4.0mm crochet hook, for the main body
- US E-4 / 3.5mm crochet hook, for the ribbed cuffs and bib edge
- 4 black buttons, approximately 3/4 inch / 19mm diameter
- Tapestry needle, for seaming and weaving in ends
- Scissors
- Stitch markers
- Small amount of black embroidery thread or yarn, for the panda nose and mouth
- 2 black safety eyes, 9mm (optional; embroider instead for infants under 3 years)
Abbreviations
- blo: back loop only
- ch: chain
- ch-sp: chain space
- inc: increase, work 2 single crochet in the same stitch
- MC: main colour, grey
- CA: colour A, white
- CB: colour B, black
- RS: right side
- WS: wrong side
- sc: single crochet
- sc2tog: single crochet two together
- sk: skip
- sl st: slip stitch
- st/sts: stitch / stitches
Special Stitches
- Ribbing stitch: work single crochet in the back loop only on every row. This makes the stretchy, ridged fabric we use for the cuffs and bib edge.
- Magic ring: make a loop with the yarn, leaving a 6-inch tail. Insert your hook through the loop, pull up a working loop and chain 1. Work the required stitches into the ring, then pull the tail to close the ring tightly.
Gauge & Size
- Finished size: 3 to 6 months; chest approximately 17 inches / 43cm, total garment length approximately 12.5 inches / 32cm
- Construction: two leg panels worked flat, joined at the crotch, body and bib worked flat, straps and panda applique made separately and sewn on
- Skill level: Easy to Intermediate
- Gauge: 16 stitches x 18 rows = 4 inches / 10cm in single crochet worked flat, with the G-6 / 4.0mm hook and main colour
Pattern Notes
Chain 1 at the beginning of every row is a turning chain only and is never counted as a stitch.
Work all single crochet rows under both loops of each stitch unless back loop only is specified.
Safety eyes are not recommended for infants under 3 years. Embroider the eyes with black yarn using a satin stitch circle instead.
Leg Panels (Make 2 Identical)
We start with the cuff ribbing. Using main colour and the E-4 / 3.5mm hook, chain 7.
Row 1: Sc in the second ch from hook and in each ch across. Ch 1, turn. (6 sc)
Rows 2 to 18: Sc in blo of each st across. Ch 1, turn. (6 sc)
After Row 18, you have a ribbing strip 18 rows long. Fold it so the short ends meet and slip stitch the short ends together to form a cuff ring. Do not fasten off. Rotate the ring 90 degrees so the long edge faces up.
Now switch to the G-6 / 4.0mm hook for the leg body.
Round 1 (joining round): Working along the long edge of the cuff ribbing, pick up and sc evenly around the top edge of the ribbing ring, working 1 sc per row end along the ribbing. Join with sl st to the first sc to close the round. (18 sc)
From here the leg is worked flat. Flatten the tube and work back and forth across the 18 stitches.
Row 1 (RS): Ch 1, sc in each of the 18 sts across. Ch 1, turn. (18 sc)
Row 2: Sc in each st across. Ch 1, turn. (18 sc)
Row 3: Inc in the first st, sc to the last st, inc in the last st. Ch 1, turn. (20 sc)
Row 4: Sc in each st across. Ch 1, turn. (20 sc)
Row 5: Inc in the first st, sc to the last st, inc in the last st. Ch 1, turn. (22 sc)
Rows 6 to 16: Sc in each st across. Ch 1, turn. (22 sc)
After Row 16, the leg panel should measure approximately 5 inches / 12.5cm from the top of the cuff ribbing. Fasten off the first panel. Do not fasten off the second panel.
Checkpoint: each completed leg panel, including the cuff ribbing, should measure approximately 7 inches / 18cm total, and the working width at the top of the leg is 22 stitches across.
Joining the Legs & Body
With the second leg panel still attached to your yarn and RS facing, we join the two legs and work the body as one flat piece.
Joining Row: Ch 1, sc across the 22 sts of the second panel, ch 2, then sc across all 22 sts of the first panel. Ch 1, turn. (46 sts total)
Row 1 of body: Sc in each of 22 sts, sc in each of 2 ch, sc in each of 22 sts. Ch 1, turn. (46 sc)
Rows 2 to 6: Sc in each st across. Ch 1, turn. (46 sc)
After Row 6, the body above the crotch join should measure approximately 1.5 inches / 4cm.
Front Bib
The centre 16 stitches become the front bib.
Row 1 of bib: With RS facing, count to stitch 16 from the right edge. Skip the first 15 sts, re-attach yarn in stitch 16. Sc in each of the next 16 sts. Ch 1, turn. (16 sc)
Rows 2 to 14: Sc in each st across. Ch 1, turn. (16 sc)
For the bib top edge ribbing, switch to the E-4 / 3.5mm hook.
Row 15: Working in blo, sc in each st across. Ch 1, turn. (16 sc)
Row 16: Working in blo, sc in each st across. Ch 1, turn. (16 sc)
Row 17: Working in blo, sc in each st across. Fasten off. (16 sc)
Checkpoint: the front bib from the crotch join to the top of the ribbed edge should measure approximately 4 inches / 10cm.
Back Yoke
Re-attach main colour to the right edge of the 46-stitch body row, at stitch 1. Sc across the first 15 sts. Ch 1, turn. Fasten off. Repeat for the other 15-stitch group. Then seam the two 15-stitch back side panels together with the bib using mattress stitch along both side edges.
For the back top edge ribbing, re-attach main colour at the back top right edge across the back 30 stitches.
Row 1: Switch to the E-4 / 3.5mm hook. Working in blo, sc in each of 30 sts across. Ch 1, turn. (30 sc)
Row 2: Sc in blo of each st across. Ch 1, turn. (30 sc)
Row 3: Sc in blo of each st across. Fasten off. (30 sc)
Shoulder Straps (Make 2)
Using main colour and the G-6 / 4.0mm hook, chain 37.
Row 1: Sc in the second ch from hook and in each ch across. Ch 1, turn. (36 sc)
Row 2: Sc in each st across. Ch 1, turn. (36 sc)
Row 3: Sc in each st across. Fasten off. (36 sc)
Each strap measures approximately 9 inches / 23cm long. For the buttonhole end, re-attach yarn at one short end of the strap.
Buttonhole Row 1: Ch 1, sc in the first st, ch 2, sk 2 sts, sc in the next st. Ch 1, turn.
Buttonhole Row 2: Sc in the first sc, 2 sc in the ch-2 sp, sc in the last sc. Fasten off. (4 sc)
The buttonhole end attaches to the back of the garment. Sew buttons to the front bib top corners and to the back yoke ribbing, 2 inches / 5cm in from each outer edge.
Side Seams
Lay the garment flat. Using main colour and a tapestry needle, seam the left and right side edges of the body from the underarm down to the crotch join using mattress stitch. Leave the crotch area open at the join row so the garment can be put on.
Panda Face Applique
Main face circle, in white (CA) with the G-6 / 4.0mm hook. Make a magic ring.
Round 1: Ch 1, 6 sc in ring. Pull ring closed. Join with sl st. (6 sc)
Round 2: Ch 1, inc in each st around. Join with sl st. (12 sc)
Round 3: Ch 1, (sc in next st, inc in next st) 6 times. Join with sl st. (18 sc)
Round 4: Ch 1, (sc in next 2 sts, inc in next st) 6 times. Join with sl st. (24 sc)
Round 5: Ch 1, (sc in next 3 sts, inc in next st) 6 times. Join with sl st. (30 sc)
Round 6: Ch 1, (sc in next 4 sts, inc in next st) 6 times. Join with sl st. (36 sc)
Round 7: Ch 1, (sc in next 5 sts, inc in next st) 6 times. Join with sl st. (42 sc)
Fasten off, leaving a long tail for sewing. The completed circle measures approximately 3.5 inches / 9cm in diameter.
Ears, in black (CB), make 2. Make a magic ring.
Round 1: Ch 1, 6 sc in ring. Pull ring closed. Join with sl st. (6 sc)
Round 2: Ch 1, inc in each st around. Join with sl st. (12 sc)
Fasten off, leaving a long tail. Each ear measures approximately 1 inch / 2.5cm in diameter.
Eye patches, in black (CB), make 2. Make a magic ring.
Round 1: Ch 1, 6 sc in ring. Pull ring closed. Join with sl st. (6 sc)
Round 2: Ch 1, (sc in next st, inc in next st) 3 times. Join with sl st. (9 sc)
Fasten off, leaving a long tail. Each eye patch is approximately 3/4 inch / 2cm across.
Finishing & Assembly
Position the two ear circles at the top of the white face circle, at about the 10 o’clock and 2 o’clock positions, half hidden behind the face. Sew in place with the black tails.
Position the two black eye patches on the upper centre of the face, about 1/2 inch / 1.5cm apart. Sew in place.
If using safety eyes, insert them through the centre of each eye patch and through the white face circle, then secure the backings. If embroidering, use black thread to satin stitch a 1/4-inch / 6mm circle in the centre of each eye patch.
Using black embroidery thread or black yarn, embroider a small triangle nose centred on the lower third of the face. Embroider a short curved line downward from the nose tip and two short lines curving upward to form a smile.
Centre the completed panda applique on the bib front, with the top of the face about 1/4 inch / 6mm below the bib ribbing edge. Pin in place. Using white yarn and a tapestry needle, whip stitch around the entire outer edge to attach it firmly.
Weave in all yarn ends securely on the wrong side, threading each tail through at least 1 inch of stitching in two directions before trimming.
For blocking, soak the finished overalls in cool water for 15 minutes, gently squeeze out excess water without wringing, lay flat, shape to measurements, pin the leg cuffs and bib edge flat, and allow to dry completely.
Sew the buttons to the front bib top corners and to the back yoke ribbing using doubled thread. Consider a backing button on the inside for very young infants.
Sizing Notes
For newborn: reduce the leg panel to 16 stitches at the cuff and work only 12 rows before joining. Reduce the bib to 14 stitches and work 12 bib rows. Shorten the straps to 32 chains.
For 6 to 12 months: increase cuff ribbing to 22 rows. Pick up 22 stitches for the leg body. Add increase rows at rows 3, 5, and 7 to reach 28 stitches at the leg top. Work 18 body rows before dividing. Bib: 18 stitches wide, 16 rows tall. Straps: ch 41.
For 12 to 18 months: increase cuff ribbing to 24 rows. Pick up 24 stitches for the leg body. Work increases to reach 30 stitches at the leg top. Work 20 body rows before dividing. Bib: 20 stitches wide, 18 rows tall. Straps: ch 45.
Tips
Choose a soft, machine washable yarn. These overalls will be washed a lot, and practical yarn makes life so much easier for parents.
For care, machine wash on a gentle cycle in cold water and lay flat to dry. Do not tumble dry, and store folded rather than hung to prevent stretching.
Check your gauge before you start. This is a fitted garment, so a quick swatch saves a lot of frogging later.
Panda Bear Baby Overalls Free Crochet Pattern
Materials
Steps
- Work the cuff ribbing and first leg panel to 22 sts
- Make a second identical leg panel, keeping the yarn attached
- Join the legs with a ch-2 bridge and work the body to 46 sts
- Work the front bib and its ribbed top edge
- Work the back yoke and its ribbed edge
- Make 2 shoulder straps with buttonholes and sew on buttons
- Crochet the panda face, ears and eye patches in the round
- Assemble and sew the panda applique onto the bib
- Embroider the eyes instead of safety eyes for babies under 3 years
- Check gauge with a 5-inch swatch, this is a fitted garment
- Choose soft, machine washable yarn for easy care


