Sunset Glow Sunburst Hobo Bag Free Crochet Pattern
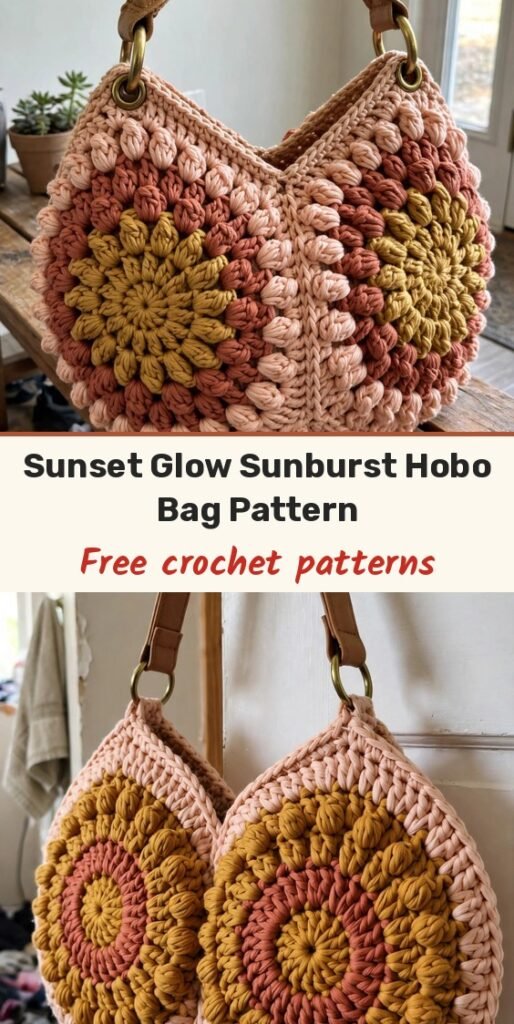
Table of Contents
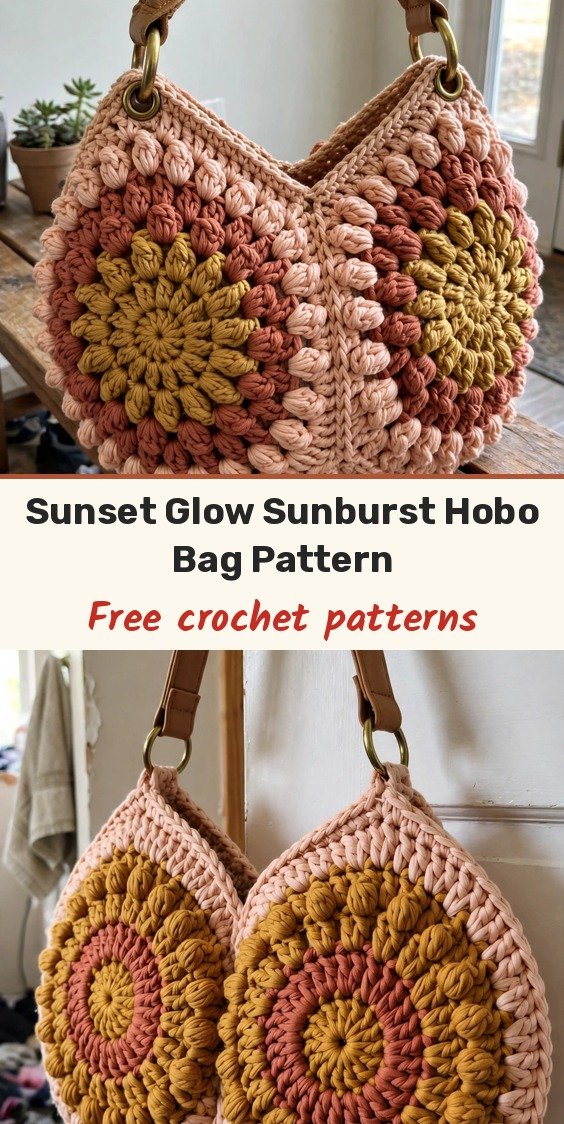
This bag stopped me in my tracks the first time I saw it, and I think it will do the same for you. Two big sunburst panels in mustard gold, terracotta rose and blush peach are covered in plump bobble texture, then seamed together into the sweetest retro hobo shape.
Here is the lovely secret: each panel is just one repeated idea. We work eight wedge sections around a centre, increasing at the tip of every wedge, and fill the wedges with bobbles as the panel grows. Make two panels exactly the same, seam them, and add a leather handle and strap.
It looks like a boutique piece, but if you are comfortable working in the round, you can absolutely make this. I will walk you through every round.
Materials
- Bulky weight (CYCA 5) cotton or cotton-blend yarn in 3 colours: Colour A Mustard Gold approx. 220 yards, Colour B Terracotta Rose approx. 180 yards, Colour C Blush Peach approx. 180 yards (about 580 yards total)
- US K / 6.5mm crochet hook
- Yarn needle for weaving ends
- Stitch markers, at least 8
- 2 D-rings, 1.5 inch, in brass or antique gold tone
- 1 adjustable slider buckle, 1.5 inch, in brass or antique gold tone
- 0.5 yard strip of tan or cognac faux leather, about 1.5 inches wide, for the top handle and crossbody strap
- 8 brass Chicago screws or rivets, 10mm
- 2 small rectangular leather tabs (optional)
- Scissors
- Leather punch or sharp awl
- Lining fabric, 0.5 yard (optional but recommended)
- Sewing needle and thread if adding lining
Abbreviations
- ch: chain
- sl st: slip stitch
- sc: single crochet
- hdc: half double crochet
- dc: double crochet
- bob: bobble stitch (see Special Stitches)
- inc: increase, work 2 stitches in the same stitch
- st/sts: stitch / stitches
- sp: space
- RS: right side
- WS: wrong side
- pm: place marker
- BLO: back loop only
- sk: skip
- rep: repeat
- rnd: round
- beg: beginning
Special Stitches
- Bobble stitch (bob): Yarn over, insert hook into the stitch, yarn over and pull up a loop, yarn over and draw through 2 loops. Repeat that unfinished double crochet 4 more times in the same stitch, until you have 6 loops on your hook. Yarn over and draw through all 6 loops, then chain 1 to close. The closing chain does not count as a stitch, and the bobble counts as 1 stitch. Nudge each bobble toward the right side as you tighten it.
Gauge & Size
- Finished size: approximately 14 inches wide by 12 inches tall at the body, not including handles; depth at base about 3 inches when seamed and filled
- Gauge: 12 stitches and 10 rows = 4 inches in single crochet with a US K / 6.5mm hook; panel measures about 6 inches across after Round 6 and about 10 inches after Round 12
- Construction: two identical sunburst panels worked in joined rounds, seamed around the outer edge with the top left open
- Skill level: Intermediate
Sunburst Centre
Panel (make 2). Both panels are identical, so follow these instructions twice. Using Colour A (Mustard Gold), make a magic ring.
Round 1: Chain 3 (counts as first dc here and throughout the centre section), work 15 dc into the ring. Pull ring closed. Join with sl st to top of beginning ch-3. (16 dc)
Round 2: Chain 1 (does not count as a stitch here and throughout unless stated). Work 2 sc in each stitch around. Join with sl st to first sc. (32 sc)
Fasten off Colour A.
Establishing the Wedges
Now we set up 8 evenly spaced increase points, dividing the 32 stitches into 8 groups of 4. Join Colour A in any stitch.
Round 3: Chain 1. (Sc in next 3 sts, 2 sc in next st) repeat 8 times. Join with sl st to first sc. (40 sc)
Place a marker in each of the 8 increase stitches just made.
Round 4: Chain 1. (Sc in next 4 sts, 2 sc in marked st) repeat 8 times, moving markers to the new increase sts as you go. Join with sl st to first sc. (48 sc)
Round 5: Chain 1. (Sc in next 5 sts, 2 sc in marked st) repeat 8 times, moving markers. Join with sl st to first sc. (56 sc)
Round 6: Chain 1. (Sc in next 6 sts, 2 sc in marked st) repeat 8 times, moving markers. Join with sl st to first sc. (64 sc)
After Round 6, your panel should measure approximately 5 to 6 inches in diameter.
Fasten off Colour A.
Bobble Wedge Rounds
From here the wedges fill with bobbles, while the increase stitch at the tip of each wedge stays a plain sc for clean shaping. Colour sequence: Rounds 7 and 8 in Colour B, Rounds 9 and 10 in Colour C, Rounds 11 and 12 in Colour A, Rounds 13 and 14 in Colour B, Rounds 15 and 16 in Colour C, Rounds 17 and 18 in Colour A. When you change colour, draw the new colour through the final slip stitch that closes the round. Join Colour B in any marked increase stitch.
Round 7: Chain 1. Work the following 8-stitch sequence 8 times around: (2 sc in marked increase st, bob in next st, sc in next st, bob in next st, sc in next st, bob in next st, sc in next st, bob in next st). Join with sl st to first sc. (72 sts)
Move markers to the first sc of each increase pair.
Round 8: Chain 1. Work the following 9-stitch sequence 8 times: (2 sc in marked st, bob, sc, bob, sc, bob, sc, bob, sc). Join with sl st to first sc. (80 sts)
After Round 8, your panel should measure approximately 7 to 7.5 inches in diameter. Fasten off Colour B. Join Colour C.
Round 9: Chain 1. Work the following 10-stitch sequence 8 times: (2 sc in marked st, sc, bob, sc, bob, sc, bob, sc, bob, sc). Join with sl st to first sc. (88 sts)
Round 10: Chain 1. Work the following 11-stitch sequence 8 times: (2 sc in marked st, sc, bob, sc, bob, sc, bob, sc, bob, sc, bob). Join with sl st to first sc. (96 sts)
Fasten off Colour C. Join Colour A.
Round 11: Chain 1. Work the following 12-stitch sequence 8 times: (2 sc in marked st, bob, sc, bob, sc, bob, sc, bob, sc, bob, sc, bob). Join with sl st to first sc. (104 sts)
Round 12: Chain 1. Work the following 13-stitch sequence 8 times: (2 sc in marked st, bob, sc, bob, sc, bob, sc, bob, sc, bob, sc, bob, sc). Join with sl st to first sc. (112 sts)
After Round 12, your panel should measure approximately 10 inches in diameter. Fasten off Colour A. Join Colour B.
Round 13: Chain 1. Work the following 14-stitch sequence 8 times: (2 sc in marked st, sc, bob, sc, bob, sc, bob, sc, bob, sc, bob, sc, bob, sc). Join with sl st to first sc. (120 sts)
Round 14: Chain 1. Work the following 15-stitch sequence 8 times: (2 sc in marked st, sc, bob, sc, bob, sc, bob, sc, bob, sc, bob, sc, bob, sc, bob). Join with sl st to first sc. (128 sts)
Fasten off Colour B. Join Colour C.
Round 15: Chain 1. Work the following 16-stitch sequence 8 times: (2 sc in marked st, bob, sc, bob, sc, bob, sc, bob, sc, bob, sc, bob, sc, bob, sc, bob). Join with sl st to first sc. (136 sts)
Round 16: Chain 1. Work the following 17-stitch sequence 8 times: (2 sc in marked st, bob, sc, bob, sc, bob, sc, bob, sc, bob, sc, bob, sc, bob, sc, bob, sc). Join with sl st to first sc. (144 sts)
Fasten off Colour C. Join Colour A.
Round 17: Chain 1. Work the following 18-stitch sequence 8 times: (2 sc in marked st, sc, bob, sc, bob, sc, bob, sc, bob, sc, bob, sc, bob, sc, bob, sc, bob). Join with sl st to first sc. (152 sts)
Round 18: Chain 1. Work the following 19-stitch sequence 8 times: (2 sc in marked st, sc, bob, sc, bob, sc, bob, sc, bob, sc, bob, sc, bob, sc, bob, sc, bob, sc). Join with sl st to first sc. (160 sts)
After Round 18, your panel should measure approximately 13 to 14 inches in diameter. Fasten off Colour A.
Outer Edge Border
The border stabilises the edge and gives a clean surface for seaming. Join Colour A in any stitch.
Round 19: Chain 1. Sc in each stitch around, working plain sc with no bobbles. Join with sl st to first sc. (160 sc)
Do not fasten off on Panel 1, because you will use this yarn to begin seaming. Fasten off Panel 2, leaving a 12-inch tail for weaving.
Finishing & Assembly
Lay both panels flat with right sides facing outward for a visible seam ridge, or place right sides together for a hidden seam. Mark 8 stitches to the left and 8 stitches to the right of the top centre of the bag on each panel; these 16 stitches stay unworked to form the opening.
Using the working yarn from Panel 1, work a single crochet seam through both layers around the entire outer edge, starting at one top-opening marker and stopping at the second, leaving the 16 top stitches on each panel open. (144 sc seam sts worked through both layers)
Join with sl st and fasten off. Weave in all ends.
Top opening edge: with RS facing and Colour A, join yarn at one corner of the top opening.
Round 1 of opening edge: Chain 1. Sc evenly around the entire top opening, working 1 sc in each open stitch from both panels (approximately 32 sc across each panel side plus 2 sc at each side corner). Join with sl st to first sc. (68 sc)
Round 2 of opening edge: Chain 1. Sc in BLO in each sc around. Join with sl st to first sc. (68 sc)
Fasten off and weave in ends. The BLO round makes a subtle ridge that reinforces the opening.
Handle tabs: cut two pieces of faux leather approximately 1.5 x 3 inches. Fold each in half lengthwise around a D-ring, punch holes through both layers and secure with Chicago screws or rivets. Position one tab on each side of the top opening, about 3.5 inches from centre, attaching through the crochet fabric so the screws pass through multiple layers of yarn.
Top handle: use a leather strap approximately 12 inches long, thread each end through a D-ring, fold the end back about 0.75 inch, punch holes and secure with rivets or Chicago screws.
Crossbody strap: clip a pre-made adjustable leather strap to the left and right D-rings using its swivel clips or lobster clasps.
Optional lining: cut two pieces of lining fabric 15 x 13 inches. Place right sides together and sew around three sides with a 0.5-inch seam allowance, leaving the top open. Trim corners, turn under the top edge 0.5 inch and press. Insert the lining into the bag and hand-sew it to the inside of the top opening edge with a whip stitch, stitching into the BLO ridge.
Tips
Keep firm, even tension on your bobbles. Worked too loosely they collapse, and worked too tightly they cup the panel instead of letting it lie flat.
Wet blocking is best for cotton or cotton-blend yarns: soak the panels for 15 minutes, squeeze out the water without wringing, and pin each panel into a flat, even circle to dry fully before seaming.
To make a smaller bag of about 11 x 10 inches, stop the sunburst shaping at Round 14 (128 sts), work the border round on 128 sts and seam 112 sts, still leaving 16 sts open at the top.
Hand wash the finished bag in cool water with gentle soap, lay flat to dry, and wipe the leather hardware clean with a slightly damp cloth only.
Sunset Glow Sunburst Hobo Bag Free Crochet Pattern
Materials
Steps
- Work the sunburst centre of Panel 1, Rounds 1 to 2, reaching 32 sc
- Establish the 8 wedge increases, Rounds 3 to 6, reaching 64 sc
- Work the bobble wedge rounds 7 to 18 in the 3-colour sequence, reaching 160 sts
- Work the plain sc border round 19
- Repeat for Panel 2
- Block both panels flat
- Seam the panels together with sc, leaving 16 sts open at the top of each panel
- Work the 2-round top opening edge
- Make the leather handle tabs, top handle and crossbody strap and attach
- Keep bobbles firm and even so they pop without cupping the panel
- Move your markers to the new increase stitch every round
- Block the panels into flat circles before seaming
- Stop at Round 14 for a smaller 11 x 10 inch bag


