Crochet Grinch Ornament Pattern – Christmas Amigurumi Tutorial – DIY Crafts
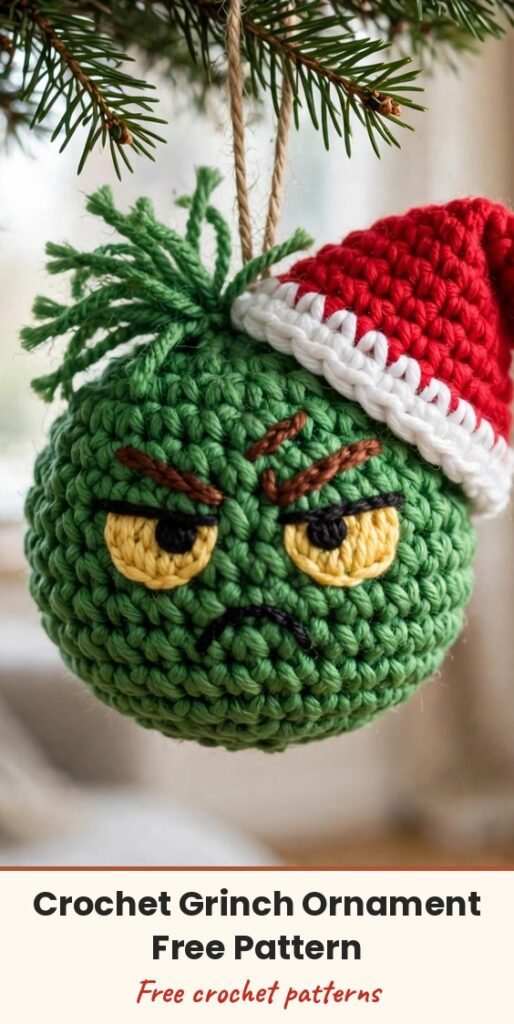
Table of Contents
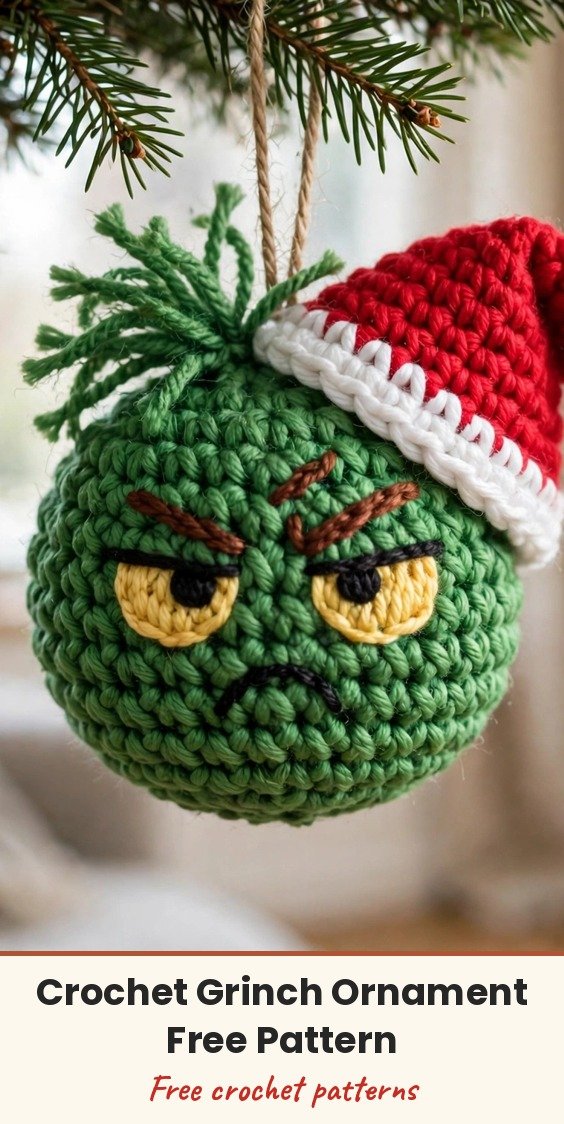
Every tree needs a little mischief, and this small green Grinch brings plenty of it. He is worked in one continuous piece, head and body together, then finished with embroidered eyebrows, a cheeky smirk, and a tilted Santa hat that makes the whole ornament.
The shaping is simple single crochet with increases and decreases, so the real fun is in the face. Place those safety eyes carefully and check them from the front before you lock them in; on a face this small, one stitch of spacing changes the whole expression.
Materials
- DK or worsted weight yarn in grass green, approximately 8.5 g
- DK or worsted weight yarn in white, approximately 1.75 g
- DK or worsted weight yarn in red, approximately 2 g
- Black embroidery thread
- 3 mm crochet hook (or a 4 mm hook for the larger version)
- 2 x 7 mm safety eyes
- Yarn needle
- Embroidery needle
- Stitch markers
- Polyfill stuffing
Abbreviations
- st: stitch
- ch: chain
- sc: single crochet
- sl st: slip stitch
- inc: increase; work 2 sc in one stitch
- dec: invisible decrease; crochet 2 stitches together through the front loops
- BLO: back loop only
Gauge & Size
- Finished size: approximately 4 to 4.5 inches tall with worsted weight yarn and a 4 mm hook
- Changing the yarn or hook changes the finished size; choose safety eyes in proportion to the head
- Gauge: keep stitches tight so the stuffing does not show through
Grinch Pattern
Body and Head (Green Yarn)
Round 1: Form a magic ring, crochet 8 sc into the ring, pull the ring closed, and place a stitch marker in the first stitch. (8 sts)
Round 2: Work 2 sc in each st around. (16 sts)
Round 3: [1 sc, inc] around; repeat 8 times. (24 sts)
Round 4: Work 1 sc in each st around. (24 sts)
Round 5: Work 1 sc in each st around. (24 sts)
Round 6: [5 sc, inc] around; repeat 4 times. (28 sts)
Round 7: Work 1 sc in each st around. (28 sts)
Round 8: Work 1 sc in each st around. (28 sts)
Round 9: Work 9 sc, inc, 4 inc, 6 sc, 4 inc, 5 sc around. (36 sts)
Rounds 10-13: Work 1 sc in each st around. (36 sts)
Eye Placement
Stretch the loop on your hook slightly so the stitches do not unravel, then remove the hook. Find the area between Rounds 9 and 10 and position the safety eyes approximately 4 stitches apart, keeping the gap centered between the increased areas. Check the face from the front before securing the eyes. If you prefer embroidered eyes, leave the sockets empty and add the eyes later with embroidery thread.
Shape and Close the Head
Begin filling the body with polyfill, adding the stuffing gradually so the shape becomes firm without stretching the stitches.
Round 14: [1 sc, 1 dec] around; repeat 12 times. (24 sts)
Round 15: [2 sc, 1 dec] around; repeat 6 times. (18 sts)
Round 16: [1 sc, 1 dec] around; repeat 6 times. (12 sts)
Add more stuffing to the remaining portion of the body, checking that the head keeps its shape without becoming overly firm.
Round 17: Dec all the way around; repeat 6 times. (6 sts)
Pull the yarn tail through the remaining stitches and cinch the opening closed. Secure the end with a knot, then weave the tail through the stitches and tie it off securely.
Face Details
Eyebrows: Using green yarn, create a slanted, slightly arched eyebrow above each safety eye. Sew two straight stitches above each eye, beginning near the inner corner and extending outward, then wrap the thread around the straight stitches to build up the eyebrow.
Nose and Mouth: Use black embroidery floss. Place a small straight stitch for the nose between Rounds 10 and 11, centered between the eyes. From beneath the nose, add another longer line extending approximately three rounds downward. For the mouth, add smaller curved lines at the sides, extending halfway toward the nose area, and add two straight stitches outward for the characteristic smirk.
Eye Highlights: Use white yarn to add a small semi-circle or two small white stitches near the upper or lower edge of each eye.
Santa Hat
Round 1: With white yarn, form a magic ring and crochet 6 sc into the ring. (6 sts)
Round 2: [1 sc, 1 inc]; repeat 3 times. (9 sts)
Round 3: Work 1 sc in each st around. (9 sts)
Round 4: [1 sc, 1 dec]; repeat 3 times, changing to red yarn on the final decrease. (6 sts)
Round 5: Work slip stitches in the back loops only around. (6 sts)
Round 6: Work 1 sc in each st around in BLO. (6 sts)
Round 7: Work an inc in each st around. (12 sts)
Round 8: Work 1 sc in each st around. (12 sts)
Round 9: [1 sc, 1 inc] around. (18 sts)
Round 10: [2 sc, 1 inc] around. (24 sts)
Change to white yarn.
Round 11: Work slip stitches in each back loop around. (24 sts)
Round 12: [Ch 2, sl st in the next st]; repeat around, then tie off and leave a long yarn tail for sewing.
Finishing & Assembly
Stuff the hat lightly with polyfill, then use the long white yarn tail to sew it onto the head. Rather than centering it perfectly, tilt the hat gently toward one side for that playful look, securing it with small stitches and weaving the yarn back through the fabric so the attachment stays firm but hidden.
For a hanging loop, secure a small loop of leftover yarn at the top of the hat and tie the end inside the hat so the knot stays hidden. Test the loop with the finished ornament before trimming the yarn.
Finish by checking that both safety eyes are secure, the eyebrows angle evenly, the mouth sits centered beneath the nose, and all yarn tails are hidden.
Tips
- Check eye placement from the front before locking the safety eyes in; symmetry matters a lot on this small face.
- Avoid packing the hat too firmly; a lightly stuffed hat is easier to bend and tilt naturally.
- Adjust the eyebrow angle or mouth shape slightly for a different expression, keeping the eyes in proportion to the head.
Crochet Grinch Ornament Pattern – Christmas Amigurumi Tutorial – DIY Crafts
Materials
Steps
- Work the green body and head in rounds 1-13
- Place the safety eyes between rounds 9 and 10, about 4 stitches apart
- Stuff and close the head in rounds 14-17
- Embroider the eyebrows, nose, mouth and eye highlights
- Crochet the Santa hat in white and red
- Stuff the hat lightly and sew it on at a tilt
- Add a hanging loop at the top of the hat
- Check the eyes from the front before securing them; one stitch changes the expression
- Stuff gradually so the shape is firm without stretching stitches
- Tilt the hat to one side instead of centering it perfectly