Crochet Gingerbread Man Pattern To Add A Festive Touch
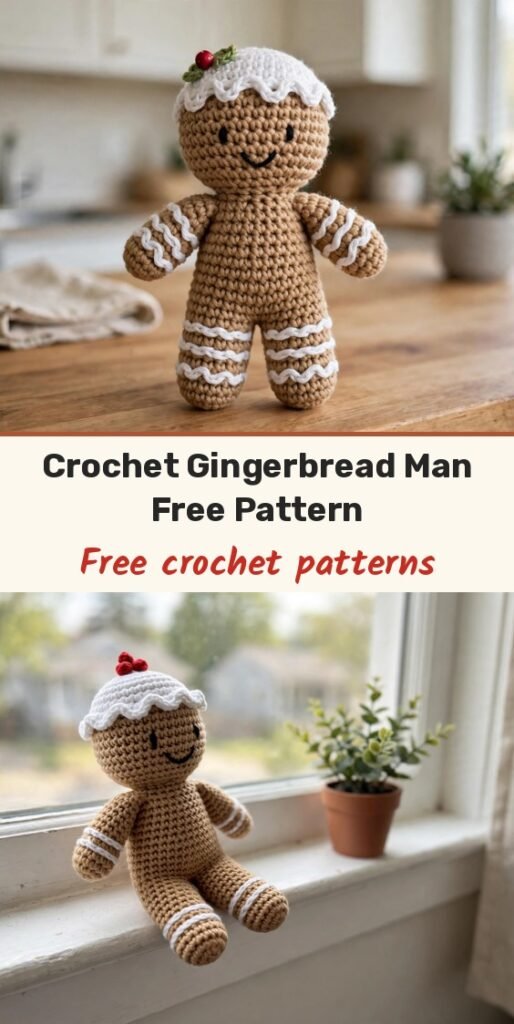
Table of Contents
Is there anything sweeter than a little gingerbread man at Christmas? This cuddly fellow is worked almost entirely without sewing, his legs and arms are joined right in as you crochet, so he comes together neatly and is perfect for newer crocheters.
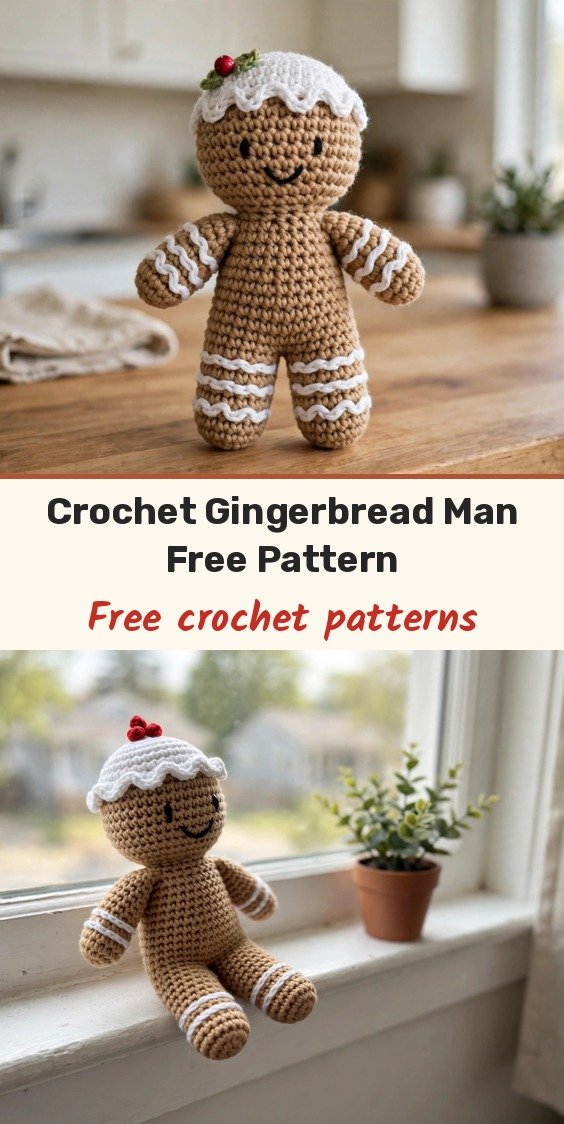
He has the classic cookie shape, a round head, little arms and legs, and the cutest white icing details, plus a sugar icing cap with a berry and leaf on top. At about 10 to 12 cm tall he is lovely on a mantel or shelf, and he makes a wonderful handmade gift or ornament too.
We will start with the legs, then the arms, then the body, and the head grows straight on from the body. Let us bake him up in yarn!
Materials
- DK or light worsted amigurumi yarn, 60% organic cotton and 40% acrylic, 50 g and 145 m, in a main colour (MC): beige
- White yarn, for the icing stripes, buttons and cap
- Small amounts of red yarn, for the berry
- Small amounts of green yarn, for the leaf
- Small amounts of black and pink yarn, for face embroidery
- Red and white yarn, for the scarf
- 2 mm (US B-1) crochet hook
- Polyester fiberfill stuffing
- Safety eyes, 1 pair
- Yarn needle
- Stitch marker, optional
- Scissors
- Glue, optional, for decorations
Abbreviations
- MC: main colour
- mr: magic ring
- ch: chain
- sc: single crochet
- inc: increase, 2 sc in the same stitch
- dec: decrease, sc worked over 2 stitches
- st(s): stitch(es)
- Rnd: round
- sl st: slip stitch
- FLO: front loops only
Special Stitches
- Sealing arms and legs: Fold the piece in half, ch 1, and work sc through both layers to close.
- Icing drips: Chains followed by sc and sl st to create decorative drips along the edge of the icing cap.
Gauge & Size
- Finished size: approximately 10 to 12 cm tall
- Gauge: 8 sc and 8 rows = approximately 2 cm, using the suggested yarn and hook
- Gauge is not critical, but keep stitches tight for the best structural results
- Work in spiral rounds unless stated otherwise, and use a stitch marker if needed. Stuff limbs and body lightly, do not overfill.
Legs Pattern
Make 2 legs in the main colour, with a white stripe.
Round 1: Work 6 sc into a mr.
Round 2: Inc in each stitch around. (12 sts)
Round 3: 1 sc in each stitch around. (12 sts) Switch to white yarn in the last stitch.
Round 4: With white yarn, 1 sc in each stitch around. (12 sts) Switch back to MC in the last stitch.
Round 5: [1 sc in next 2 sts, 1 dec] repeat 3 times. (9 sts)
Lightly stuff the leg at this stage.
Round 6: 1 sc in next 4 sts, 1 dec, 1 sc in last 3 sts. (8 sts)
Round 7: 1 sc in each stitch around. (8 sts)
Round 8: Insert the hook into the first stitch, pull the work loop through, fold the leg in half, ch 1, work 4 sc through both layers to seal. (4 sts) Fasten off and hide the yarn end.
Arms Pattern
Make 2 arms in the main colour, with a white stripe.
Round 1: Work 6 sc into a mr.
Round 2: [1 sc, 1 inc] repeat 3 times. (9 sts) Switch to white yarn in the last stitch.
Round 3: With white yarn, 1 sc in each stitch around. (9 sts) Switch back to MC in the last stitch.
Round 4: 1 sc in each stitch around. (9 sts)
Round 5: [1 sc, 1 dec] repeat 3 times. (6 sts)
Lightly stuff the arm now.
Round 6: 1 sc in each stitch around. (6 sts)
Round 7: Fold the arm in half, ch 1, work 3 sc through both layers to seal. (3 sts) Fasten off and hide the yarn end.
Body and Head Pattern
Work the body in the main colour, joining the legs and arms in as you go. The head continues directly from the body, do not cut the yarn.
Round 1: Work 6 sc into a mr.
Round 2: Inc in each stitch around. (12 sts)
Round 3: [1 sc, 1 inc] repeat 6 times. (18 sts)
Round 4: [1 sc in next 5 sts, 1 inc] repeat 3 times. (21 sts)
Round 5, attaching the legs: 1 sc in next 3 sts along the body, 1 sc in next 4 sts through both the first leg and the body, 1 sc in next 7 sts along the body, 1 sc in next 4 sts through both the second leg and the body, 1 sc in last 3 sts along the body. (21 sts total)
Round 6: 1 sc in each stitch around. (21 sts)
Round 7: [1 dec, 1 sc in next 5 sts] repeat 3 times. (18 sts)
Round 8: 1 sc in each stitch around. (18 sts)
Round 9, attaching the arms: 1 sc in next 3 sts along the body, 1 sc in next 3 sts through both the first arm and the body, 1 sc in next 6 sts along the body, 1 sc in next 3 sts through both the second arm and the body, 1 sc in last 3 sts along the body. (18 sts total)
Round 10: [1 dec, 1 sc in next stitch] repeat 6 times. (12 sts)
Stuff the body thoroughly.
Round 11, head: Work in FLO: [1 sc, 1 inc] repeat 6 times. (18 sts)
Round 12: [1 sc, 1 inc, 1 sc] repeat 6 times. (24 sts)
Round 13: [1 sc in next 3 sts, 1 inc] repeat 6 times. (30 sts)
Rounds 14 to 19: 1 sc in each stitch around. (30 sts each round)
Insert the safety eyes between Rounds 15 and 16, leaving 6 to 7 stitches between them for expression.
Round 20: [1 sc in next 3 sts, 1 dec] repeat 6 times. (24 sts)
Round 21: [1 sc, 1 dec, 1 sc] repeat 6 times. (18 sts)
Stuff the head now.
Round 22: [1 sc, 1 dec] repeat 6 times. (12 sts)
Round 23: 6 dec around. (6 sts)
To finish: Work 1 sl st, close the opening with a yarn needle, and embroider the facial features.
Decorations Pattern
Sugar buttons: Wrap the white yarn end around itself 4 times and pull gently to produce a soft, puffy knot. Sew or glue to the body.
Sugar icing cap, Round 1: 6 sc into a mr. (6 sts)
Sugar icing cap, Round 2: Inc in each stitch around. (12 sts)
Sugar icing cap, Round 3: [1 sc, 1 inc] repeat 6 times. (18 sts)
Sugar icing cap, Round 4: [1 sc, 1 inc, 1 sc] repeat 6 times. (24 sts)
Sugar icing cap, Round 5: [1 sc in next 3 sts, 1 inc] repeat 6 times. (30 sts)
Sugar icing cap, Round 6: 1 sc in each stitch around. (30 sts)
Sugar icing cap, Round 7, icing drips: Ch 4, turn, skip 1 ch, 1 sc in next 3 chs, 1 sl st in base, 1 sl st in next base stitch.
Icing drips continued: Ch 2, turn, skip 1 ch, 1 sc in next ch, 1 sl st in base, 1 sl st in next base stitch.
Icing drips continued: Ch 3, turn, skip 1 ch, 1 sc in next 2 chs, 1 sl st in base, 1 sl st in next base stitch.
Icing drips continued: Ch 2, turn, skip 1 ch, 1 sc in next ch, 1 sl st in base, 1 sl st in next base stitch.
Icing drips continued: Ch 4, turn, skip 1 ch, 1 sc in next 3 chs, 1 sl st in base, 1 sl st in next base stitch.
Icing drips continued: Ch 2, turn, skip 1 ch, 1 sc in next ch, 1 sl st in base, 1 sl st in next base stitch.
Icing drips continued: Ch 3, turn, skip 1 ch, 1 sc in next 2 chs, 1 sl st in base, 1 sl st in next 2 base stitches.
Icing drips continued: Ch 2, turn, skip 1 ch, 1 sc in next ch, 1 sl st in base, 1 sl st in next base stitch.
Icing drips continued: Ch 3, turn, skip 1 ch, 1 sc in next 2 chs, 1 sl st in base, 1 sl st in next 3 base stitches.
Icing drips continued: Ch 2, turn, skip 1 ch, 1 sc in next ch, 1 sl st in base, 1 sl st in next base stitch.
Icing drips continued: Ch 4, turn, skip 1 ch, 1 sc in next 3 chs, 1 sl st in base, 1 sl st in next base stitch.
Icing drips continued: Ch 2, turn, skip 1 ch, 1 sc in next ch, 1 sl st in base, 1 sl st in next base stitch.
Icing drips continued: Ch 3, turn, skip 1 ch, 1 sc in next 2 chs, 1 sl st in base, 1 sc in last 2 base stitches.
Sew or glue the cap to the top of the head.
Berry, Round 1: 6 sc into a mr. (6 sts)
Berry, Round 2: Inc in each stitch around. (12 sts)
Berry, Rounds 3 to 4: 1 sc in each stitch around. (12 sts)
Berry, Round 5: 6 dec around. (6 sts) Work 1 sl st, and close the opening with a needle.
Leaf: Ch 4, turn, skip 1 ch, 1 sl st in each of the next 3 chs.
Sew or glue the berry and leaf to the icing cap.
Scarf: Using two strands, wrap white yarn over the hook (2 loops on hook), pull the red yarn through both loops, and repeat until the scarf reaches your desired length.
Finishing & Assembly
Attach the decorations as desired: the sugar icing cap, berry, leaf, scarf and buttons. Sew or glue them in place, as you prefer, for a clean finish.
Embroider a smile and cheeks with black and pink yarn, and check that the safety eyes sit evenly before you finish.
Tips
Change colours in the last stitch of the round before, completing the final pull-through with the new colour, for neat stripes on the legs and arms.
Stuff the legs and arms lightly before you seal them, a little goes a long way at this small size.
Stuff the body thoroughly at Round 10, before the head grows on, so your gingerbread man stands up nicely and keeps his shape.
All of the decorations are optional, so have fun making him your own with different scarf and button colours.
Crochet Gingerbread Man Pattern To Add A Festive Touch
Materials
Steps
- Crochet and seal 2 legs with white stripe
- Crochet and seal 2 arms with white stripe
- Work body Rounds 1 to 10 joining legs and arms in
- Continue into head Rounds 11 to 23 and add eyes
- Crochet icing cap with drips berry and leaf
- Add sugar buttons and scarf
- Embroider face and attach decorations
- Complete last pull-through with new colour for neat stripes
- Stuff legs and arms lightly before sealing them
- Stuff body thoroughly at Round 10 before head grows on
- Decorations are optional - sew or glue as preferred


