How To Crochet Gingerbread Coasters & Christmas Ornaments
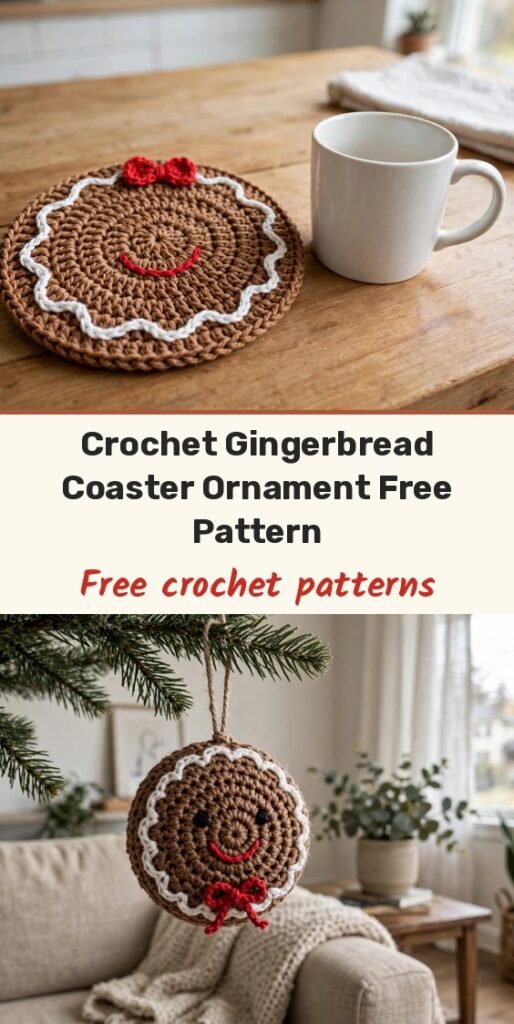
Table of Contents
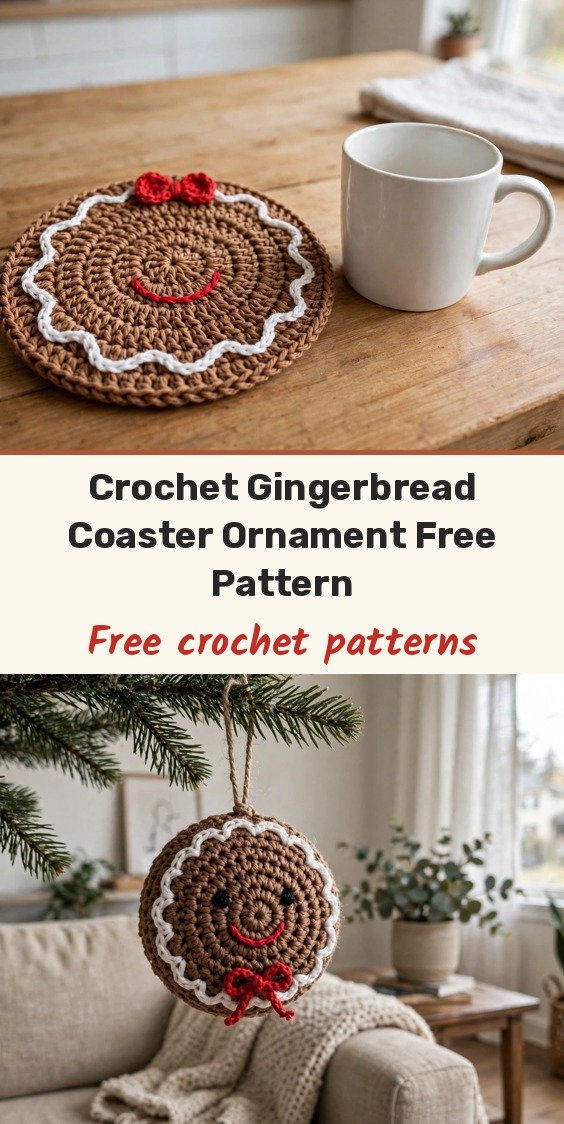
One cheerful gingerbread, two festive jobs — set your Christmas mug on him as a coaster, or add a little loop and hang him on the tree as an ornament. I am Amy, and I adore a pattern that earns its keep like this, with a simple round body, snowy surface-crochet icing, and the sweetest tiny bow.
The body grows from a magic ring in just four rounds of double crochet, so the base is quick. All the character comes at the end: white icing around the edge, red embroidery for the smile, safety or felt eyes, and that bow placed wherever suits your finish.
Materials
- Brown yarn, for the main body
- White yarn, for the surface crochet icing
- Red yarn, for the smile, bow and details
- Crochet hook appropriate for your chosen yarn weight
- Yarn needle, for weaving in ends and sewing pieces
- 8 mm safety eyes, for a Christmas ornament
- Felt fabric, as a substitute for safety eyes when making a functional drink coaster
- Optional: second gingerbread piece or felt fabric, for covering the backside
- Scissors
Abbreviations
- ch = chain
- st(s) = stitch(es)
- sl st = slip stitch
- sc = single crochet
- hdc = half double crochet
- dc = double crochet
- inc = increase, working 2 stitches into the same stitch or space
- MR = magic ring
- Rnd / Row = round or row
Gauge & Size
- Gauge: not stated; finished dimensions depend on your yarn weight and hook size
- Finished size: intended to work well as either a festive drink coaster or a hanging Christmas ornament
- For an ornament, add a chain loop at the top edge before fastening off; for a flat coaster, simply finish the final round cleanly
Gingerbread Pattern
Make the Gingerbread Body
Round 1: Make a magic ring, ch 1 to secure it, ch 3, work 10 dc into the magic ring, pull the starting tail firmly to close the ring, then sl st into the first dc to join. (10 dc)
Round 2: Ch 3, work 2 dc in the same joining stitch, then work an inc (2 dc in each st) around, joining with a sl st in the first dc. (20 dc)
Round 3: Ch 3, work an inc (2 dc) in every stitch around, then sl st into the first dc to join. (40 dc)
Round 4: Ch 3, work 1 dc in the same space, then 1 inc in the next stitch; repeat the sequence of 1 dc, 1 inc around the outer edge and join with a sl st in the first dc.
After Round 1, pull the centre closed before moving on. During the increase rounds, keep checking that the circle is spreading evenly rather than cupping upward.
Add the White Icing
Create a slip knot with white yarn and insert it between the bars or posts of the stitches from the final outer round.
Insert the hook into the next adjacent space between the bars, yarn over, pull the yarn up through the fabric, and pull it directly through the active loop on the hook. Repeat this surface-crochet movement around the face perimeter until the white outline is complete.
Fasten off and weave in the white yarn ends neatly. Keep the white yarn sitting on the surface rather than pulling it deeply into the brown stitches, and watch your tension so the brown base stays flat.
Shape the Decorative Bow
Bow: Ch 17; beginning in the second ch from the hook, work 1 sl st, 1 sc, 1 hdc, 1 dc in each of the next 2 sts, 1 hdc, 1 sc, and 1 sl st; work a sl st into the same space to transition, then continue along the opposite side of the foundation chain with 1 sc, 1 hdc, 1 dc in each of the next 2 sts, 1 hdc, 1 sc, and 1 sl st; repeat the symmetric pattern once more down the remaining edge, beginning with sl st, sc, hdc, 2 dc, hdc, sc, and finishing with a final sl st in the last chain space; fasten off, leaving a long yarn tail for sewing.
Fold the two outer edges of the crocheted band inward toward the centre. Use the long yarn tail to sew the two central edges together securely.
Wrap the remaining yarn tail tightly around the middle about 5–6 times to cinch the bow and create its small centre knot. Secure the yarn firmly before trimming or hiding the remaining end.
Finishing & Assembly
Insert the 8 mm safety eyes into the upper face area, or use cut-out felt pieces when making the item as a functional coaster. Use red yarn to embroider the smiling mouth and other red accents.
Place the finished bow either around the neck/collar area or closer to the bottom edge of the gingerbread, and sew it securely in position.
For a coaster, fasten off cleanly after completing the body and decorative details.
For a Christmas ornament, create an extended chain loop at the top edge before cutting the main body yarn. Slip stitch back into the base of the loop, then fasten off securely.
Before covering the underside, snip any remaining loose tails and weave them securely into the stitches. If you want the back to look finished, make a second matching gingerbread base and attach it back-to-back by sewing or gluing, or attach a circular piece of felt to the rear to cover exposed knots.
Tips
Check Round 4 as you go — alternate the single double crochet and increase consistently so the edge stays even.
For a coaster, use felt eyes and keep the bow placement clear of the drinking surface.
For an ornament, placing the bow higher leaves more of the body visible beneath it.
How To Crochet Gingerbread Coasters & Christmas Ornaments
Materials
Steps
- Crochet gingerbread body Rounds 1-4
- Add white surface-crochet icing
- Make and cinch the decorative bow
- Add eyes, red smile and bow
- Finish as coaster or add hanging loop for ornament
- Pull the magic ring centre firmly closed
- Keep surface crochet on the surface so the base stays flat
- Use felt eyes for a functional coaster


