Free Crochet Christmas Tree Keychain For Any Gift
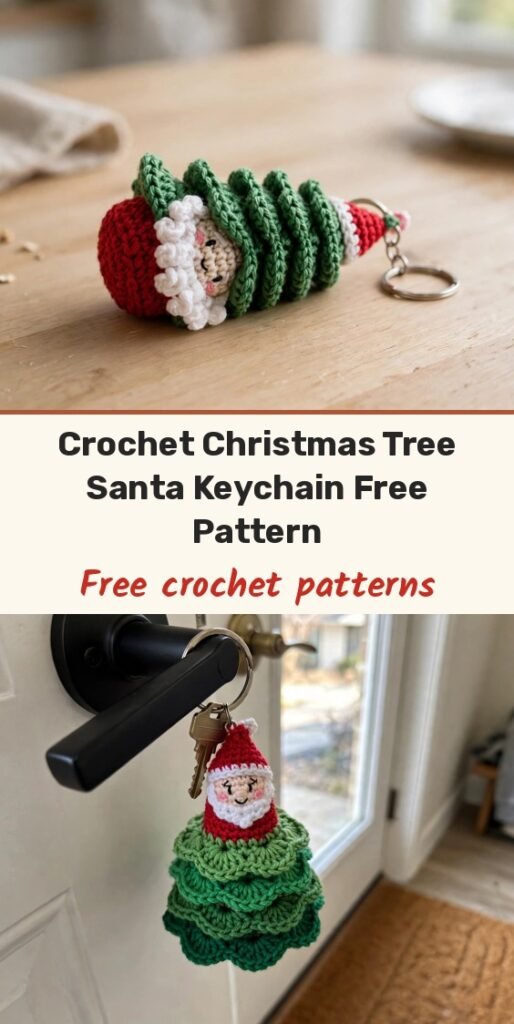
Table of Contents
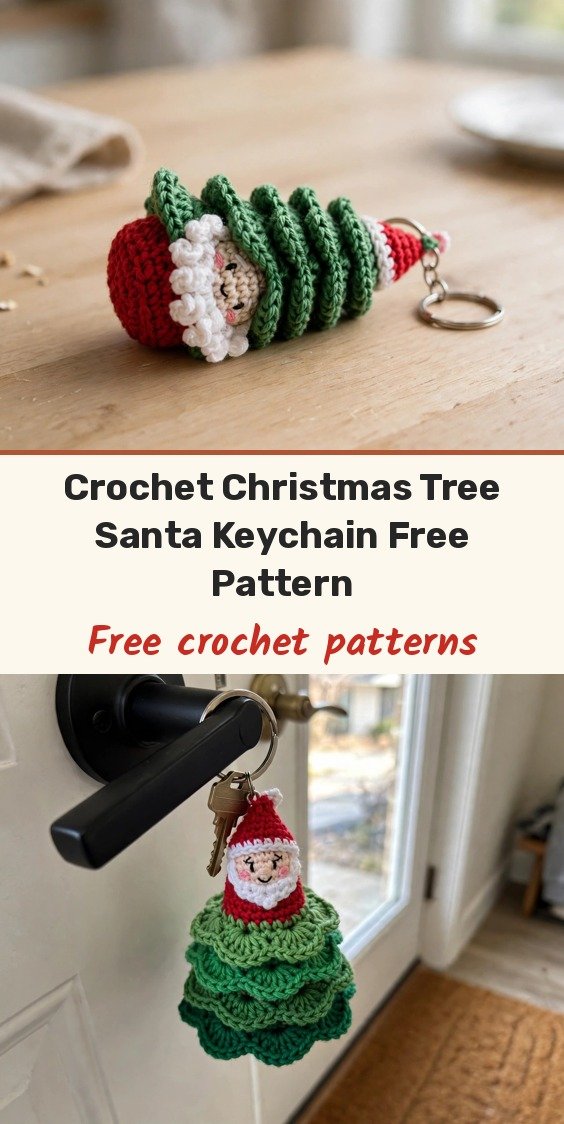
Hi, I’m Amy, and this little Santa tree keychain makes me giggle every time I finish one. It is a stacked character — two green tree tiers, a red Santa suit, a beige face with a white beard, and a tiny pom-pom hat on top — all in a keychain about 11 cm tall.
Do not let the pieces worry you. Each one is small, uses basic increases and decreases, and is crocheted separately. When they are all done, we simply stack and sew them from the bottom up, add a little stuffing, and attach the keychain.
Materials
- Cotton yarn, 2 mm, in beige or skin tone
- Cotton yarn in white, red, light green, dark green, and brown
- 2.5 mm crochet hook
- Polyester fiberfill stuffing
- Yarn needle and scissors
- Black safety eyes or black thread for eyes
- Keychain ring or lanyard
Abbreviations
- MR / mr — magic ring
- ch — chain
- sc — single crochet
- hdc — half double crochet
- dc — double crochet
- inc — 2 sc in the same stitch
- dec — sc 2 stitches together
- slst — slip stitch
- sk — skip stitch
Gauge & Size
- Finished size: approximately 11 cm high x 6 cm wide
- Unless noted, each round ends with a slst into the first stitch and begins with ch 1
- Skill level: Easy to Intermediate, worked in separate pieces
Santa Head
Round 1 (beige): MR, 6 sc, slst. (6)
Round 2: Ch 1, 6 inc, slst. (12)
Round 3: Ch 1, 12 sc, slst. (12)
Round 4: Ch 1, (sc, inc) x 6, slst. (18)
Rounds 5–6: Ch 1, 18 sc, slst. (18)
Round 7: Ch 1, [slst, 2 dc in next stitch, slst] x 6, fasten off and weave in the end.
Beard
Row 1: Slip knot, ch 11.
Row 2: Sk 1, slst, sc, hdc, sc, 2 slst, sc, hdc, sc, slst, fasten off leaving a long tail for sewing.
Santa Body
Round 1 (red): MR, 6 sc, slst. (6)
Round 2: Ch 1, 6 inc, slst. (12)
Round 3: Ch 1, (sc, inc) x 6, slst. (18)
Round 4: Ch 1, 18 sc, slst. (18)
Round 5: Ch 1, (sc, inc, sc) x 6, slst. (24)
Rounds 6–7: Ch 1, 24 sc, slst. (24)
Round 8: Ch 1, [slst, 2 dc in next stitch, slst] x 8, fasten off leaving a tail for sewing.
With white yarn and a needle, embroider small vertical lines around the lower edge of the body.
Tree Layer 1
Round 1 (light green): MR, 6 sc, slst. (6)
Round 2: Ch 1, 6 inc, slst. (12)
Round 3: Ch 1, (sc, inc) x 6, slst. (18)
Round 4: Ch 1, (sc, inc, sc) x 6, slst. (24)
Round 5: Ch 1, 24 sc, slst. (24)
Round 6: Ch 1, (3 sc, inc) x 6, slst. (30)
Rounds 7–8: Ch 1, 30 sc, slst. (30)
Round 9: Ch 1, [slst, 2 dc in next stitch, slst] x 10, fasten off.
Embroider small vertical white lines around the lower edge.
Tree Layer 2
Round 1 (dark green): MR, 6 sc, slst. (6)
Round 2: Ch 1, 6 inc, slst. (12)
Round 3: Ch 1, (sc, inc) x 6, slst. (18)
Round 4: Ch 1, (sc, inc, sc) x 6, slst. (24)
Round 5: Ch 1, (3 sc, inc) x 6, slst. (30)
Round 6: Ch 1, 30 sc, slst. (30)
Round 7: Ch 1, (2 sc, inc, 2 sc) x 6, slst. (36)
Rounds 8–9: Ch 1, 36 sc, slst. (36)
Round 10: Ch 1, [slst, 2 dc in next stitch, slst] x 12, fasten off.
Embroider small vertical white lines around the lower edge.
Trunk and Hat
Trunk Round 1 (brown): MR, 6 sc, slst. (6)
Trunk Round 2: Ch 1, 6 inc, slst. (12)
Trunk Rounds 3–12: Ch 1, 12 sc, slst, fasten off and stuff lightly. (12)
Hat Round 1 (white, pom-pom): MR, 6 sc, slst. (6)
Hat Round 2: Ch 1, (sc, inc) x 3, slst. (9)
Hat Round 3: Ch 1, (sc, dec) x 3, slst, stuff the pom-pom slightly. (6)
Hat Round 4 (change to red): Ch 1, 6 sc, slst. (6)
Hat Round 5: Ch 1, (sc, inc) x 3, slst. (9)
Hat Round 6: Ch 1, 9 sc, slst. (9)
Hat Round 7: Ch 1, (sc, inc, sc) x 3, slst. (12)
Hat Rounds 8–9: Ch 1, 12 sc, slst. (12)
Hat Round 10 (change to white): (Ch 1, slst in next stitch) x 12, fasten off leaving a long tail for sewing.
Finishing & Assembly
Insert the brown trunk inside the bottom of the dark green layer and sew it securely in place.
Stack the light green layer over the dark green layer and sew together, adding a little fiberfill as you go.
Stack the red body over the light green layer and sew in place.
Sew the white beard beneath the centre of the beige head, add safety eyes or embroidered eyes just above the beard, then sew the head on top of the red layer.
Sew the hat onto the top of the head, then attach the keychain ring or lanyard securely to the tip of the hat.
Tips
Finish and count each piece before you start sewing — the different final counts are what create the tiered tree shape.
Add different-coloured French knots to the tree layers as tiny ornaments, or leave off the keychain and use it as a standing ornament.
Free Crochet Christmas Tree Keychain For Any Gift
Materials
Steps
- Crochet the beige Santa head and white beard
- Crochet the red Santa body and embroider white lines
- Crochet light green and dark green tree layers
- Crochet the brown trunk and red-and-white hat
- Stack and sew layers from the bottom up with stuffing
- Attach face, beard, hat and keychain ring
- Count each piece before assembly - counts create the tiers
- Add French knots as tiny ornaments if you like
- Leave off the keychain to use it as an ornament


