Mint Green Rose Baby Romper Free Crochet Pattern
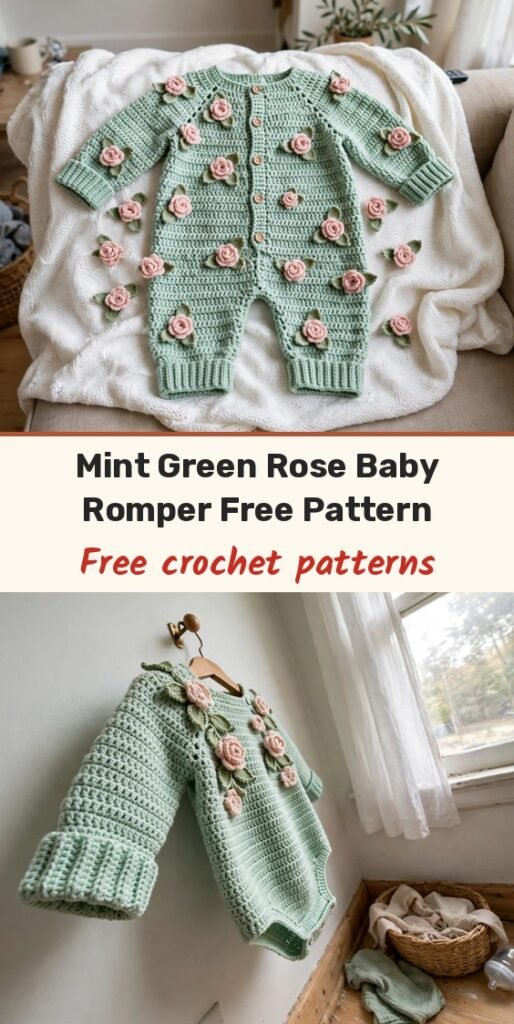
Table of Contents
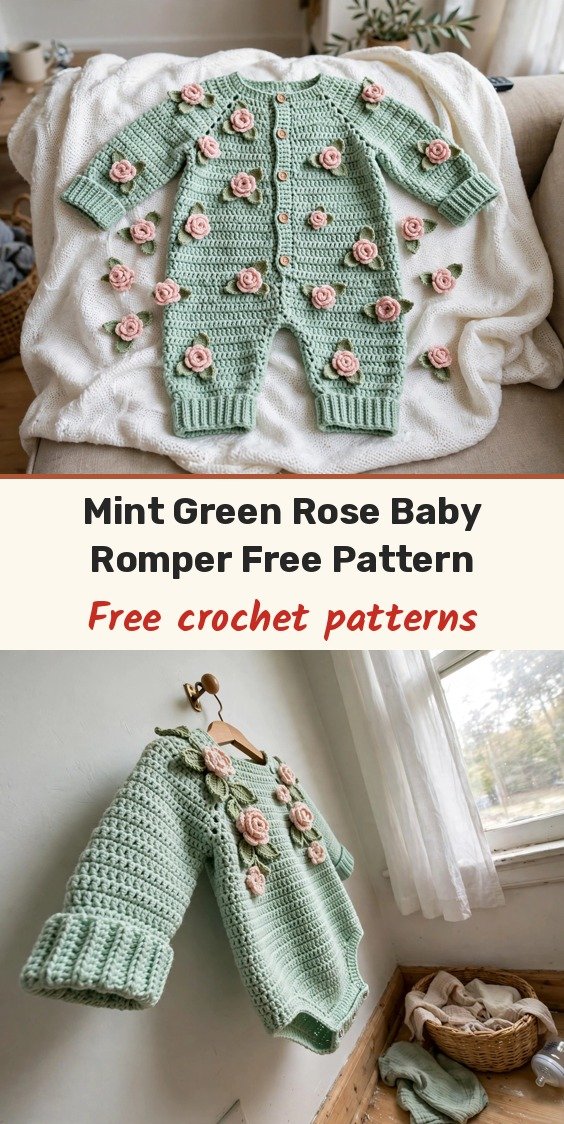
This sweet mint green romper keeps little ones cosy from shoulder to ankle, and I just love how special it looks! We work it top-down in single crochet through the back loop only, so the fabric gets those lovely knit-like ridges, then we add raglan shaping, ribbed cuffs, shoulder ruffles, and tiny rolled roses with sage leaves scattered all over.
The roses are worked separately and sewn on at the end, which means you can place as many as you like, exactly where you like them. The romper is written for three sizes — newborn (0 to 3 months), 3 to 6 months, and 6 to 12 months — and all instructions are written for the 3 to 6 month size, with newborn adjustments in parentheses and 6 to 12 month adjustments in brackets: Newborn (3 to 6 months) [6 to 12 months].
It is an intermediate to advanced make, about 12 to 18 hours plus 2 to 4 hours for the roses, but if we take it section by section, we will get there together beautifully.
Materials
- Worsted weight yarn in soft mint green (Yarn A): approximately 650 (750) [850] yards
- Worsted weight yarn in blush pink (Yarn B), for roses: approximately 50 (60) [70] yards
- Worsted weight yarn in sage green (Yarn C), for leaves: approximately 30 (35) [40] yards
- US G-6 (4.0 mm) crochet hook for main body
- US F-5 (3.75 mm) crochet hook for ribbing and cuffs
- 3 to 4 white or pearl buttons, approximately 5/8 inch diameter
- Tapestry needle for seaming and attaching motifs
- At least 8 stitch markers
- Scissors and a row counter (recommended)
Abbreviations
- ch: chain
- sc: single crochet
- BLO: back loop only
- dc: double crochet
- hdc: half double crochet
- sl st: slip stitch
- sc2tog: single crochet two together
- inc: increase, 2 sc in the same stitch
- st/sts: stitch / stitches
- RS: right side
- WS: wrong side
- pm: place marker
- sm: slip marker
Special Stitches
- Raglan increase: in the marked stitch work 1 sc, ch 1, 1 sc. This adds 2 stitches at each raglan point per row (8 stitches total per increase row) and creates a small decorative eyelet along the raglan line.
- BLO texture: every single crochet is worked through the back loop only unless stated otherwise, creating horizontal ridges on the right side.
Gauge & Size
- Finished sizes: Newborn chest 16 in, length shoulder to ankle 20 in; 3 to 6 months chest 17.5 in, length 22 in; 6 to 12 months chest 19 in, length 24 in
- Gauge: 16 stitches and 20 rows = 4 inches in single crochet worked in back loop only, with G-6 hook and Yarn A
- Construction: top-down flat pieces — yoke, divide for body and sleeves, legs with ribbed ankle cuffs, button placket, seamed at the end
- Skill level: Intermediate to Advanced
Rose Motif Pattern
With Yarn B and G-6 hook, ch 16.
Row 1: Sc in second ch from hook, sc in each ch across. (15 sc)
Row 2: Ch 3, turn. Working in front loops only, (2 dc in next st) across all 15 sts. (30 dc)
Fasten off, leaving a long tail. Roll the strip tightly from one end to the other, keeping the flat bottom edge as the base, and stitch through the base several times to secure the rose shape. Make 20 (24) [28] roses total.
Leaf Cluster Pattern
With Yarn C, ch 6.
Row 1: Sl st in second ch from hook, sc in next ch, hdc in next ch, sc in next ch, sl st in last ch. (5 sts, one leaf made)
Ch 6 again from the base.
Row 2: Sl st in second ch from hook, sc in next ch, hdc in next ch, sc in next ch, sl st in last ch. (5 sts, second leaf made)
Fasten off, leaving a tail for sewing. Make 20 (24) [28] leaf clusters total.
Yoke Pattern
With Yarn A and G-6 hook, ch 43 (47) [51].
Foundation row (WS): Sc in second ch from hook, sc in each ch across, turn. 42 (46) [50] sc.
Set up raglan markers. The stitches divide as follows: Right back 6 (7) [8] sts; Right sleeve cap 6 (6) [6] sts; Front 18 (20) [22] sts; Left sleeve cap 6 (6) [6] sts; Left back 6 (7) [8] sts. Place markers at each division point.
Row 1 (RS): Ch 1, turn. Work BLO sc to 1 st before first marker, Raglan Increase in marked st, sm, BLO sc across sleeve to 1 st before next marker, Raglan Increase in marked st, sm, BLO sc across front to 1 st before next marker, Raglan Increase in marked st, sm, BLO sc across sleeve to 1 st before next marker, Raglan Increase in marked st, sm, BLO sc to end. Turn. 50 (54) [58] sts.
Row 2 (WS): Ch 1, turn. BLO sc across all sts, moving markers as you pass them. Turn. 50 (54) [58] sts.
Repeat Rows 1 and 2, working increases on RS rows only, until yoke measures 3.5 (4) [4.5] inches from foundation, ending with a WS row.
After 14 (16) [18] RS increase rows, your stitch counts per section should be: Right back 20 (23) [26] sts; Right sleeve cap 34 (38) [42] sts; Front 46 (52) [58] sts; Left sleeve cap 34 (38) [42] sts; Left back 20 (23) [26] sts. Total: 154 (174) [194] sts.
Divide & Body Pattern
Next row (RS): Ch 1, turn. BLO sc across 20 (23) [26] right back sts. Ch 3 (for underarm bridge), skip the 34 (38) [42] right sleeve sts (place on stitch holder or scrap yarn). BLO sc across 46 (52) [58] front sts. Ch 3, skip the 34 (38) [42] left sleeve sts (place on holder). BLO sc across 20 (23) [26] left back sts. Turn.
Next row (WS): Ch 1, turn. BLO sc across all sts including 3 sc worked into each ch-3 bridge. Turn. 92 (104) [116] sc.
Continue working flat in BLO sc without increases or decreases until body measures 5 (5.5) [6] inches from underarm divide, ending with a WS row.
Legs Pattern
Identify the centre of your 92 (104) [116] sts. The front half consists of the first 46 (52) [58] sts.
Row 1 (RS): Ch 1, turn. BLO sc across 22 (25) [28] sts for right front leg. Leave remaining sts unworked. Turn. 22 (25) [28] sc.
Continue in BLO sc on these 22 (25) [28] sts until leg measures 5 (5.5) [6] inches from division row, ending with a WS row.
Ankle Ribbing: Switch to F-5 hook.
Row 1: Ch 8. Sc in second ch from hook, sc in each ch across. (7 sc) Sl st into first 2 sts of leg edge to anchor. Turn.
Row 2: Working in BLO, sc across 7 sts. Turn.
Row 3: BLO sc across 7 sts, sl st into next 2 sts of leg edge. Turn.
Repeat Rows 2 and 3 until ribbing spans entire ankle width. Fasten off. Seam ribbing ends together.
Left Front Leg: Rejoin Yarn A at centre front with RS facing.
Row 1 (RS): Ch 1. BLO sc across remaining 24 (27) [30] sts. Turn. 24 (27) [30] sc.
Continue in BLO sc until leg measures 5 (5.5) [6] inches from division, ending with a WS row, then work ankle ribbing same as right front leg. Fasten off.
Work the back body exactly as the front body, dividing at centre and working right back leg and left back leg identically.
Sleeves Pattern
Transfer held right sleeve sts onto G-6 hook. Rejoin Yarn A at underarm centre with RS facing.
Set up: Work 2 sc into the underarm bridge sts to join cleanly. 36 (40) [44] sts total.
Row 1 (RS): Ch 1, turn. BLO sc across all sts. Turn. 36 (40) [44] sc.
Row 2 (WS): Ch 1, turn. BLO sc across. Turn. 36 (40) [44] sc.
Work straight in BLO sc until sleeve measures 3 (3.5) [4] inches from underarm, ending with a WS row.
Sleeve taper (dec row): Ch 1, turn. Sc2tog over first 2 sts, BLO sc to last 2 sts, sc2tog. Turn. 34 (38) [42] sc.
Work 5 rows straight.
Repeat dec row. 32 (36) [40] sc.
Work 4 rows straight.
Repeat dec row one final time. 30 (34) [38] sc.
Continue straight until sleeve measures 6 (6.5) [7] inches from underarm, ending with a WS row.
Wrist Ribbing: Switch to F-5 hook and work ribbing same as ankle ribbing. Work second sleeve same as first.
Placket, Neckline & Ruffles
The button placket is worked along the centre front opening from neckline down 3 (3.25) [3.5] inches. With RS facing and G-6 hook, join Yarn A at top right of centre front opening.
Placket band (right side, buttonholes): Ch 1. Work sc evenly down the right edge, approximately 1 sc per row end. You should have approximately 15 (17) [18] sc. Turn.
Row 2: Ch 1. BLO sc across. Turn.
Row 3 (buttonhole row): Ch 1. Sc 2, (ch 1, sk 1 st, sc 3) repeat 3 times, sc to end. Turn.
Row 4: Ch 1. Sc across, working 1 sc into each ch-1 sp. Turn.
Row 5: Ch 1. BLO sc across. Fasten off.
Left placket band: With RS facing, join Yarn A at bottom left of opening. Work sc evenly up left edge. Work 2 rows of BLO sc. Fasten off.
Neckline Edging: With RS facing and G-6 hook, join Yarn A at top right of neckline. Work 1 round of sc evenly around entire neckline, including tops of placket bands. Sl st to first sc to join. Fasten off.
Ruffles: With RS facing and G-6 hook, join Yarn A at the base of one raglan seam where sleeve meets body.
Ruffle row: Ch 3 (counts as first dc). Work 2 dc into same st. (Work 3 dc into next st) across entire raglan seam line. Fasten off.
Repeat on all four raglan seam lines.
Finishing & Assembly
Seam the left side seam of front body to left side seam of back body using whipstitch, RS facing outward, then seam the right side seam the same way.
Seam the inseam of each leg: with RS together, align front and back leg edges and whipstitch from ankle cuff upward to crotch. Then seam the crotch closed with RS together, and seam any gap at the underarm bridges.
Wet block the finished garment by soaking in cool water for 15 minutes, pressing out excess water in a towel, and pinning flat to finished measurements. Allow to dry completely before attaching rose motifs.
Arrange the roses across the body, sleeves and yoke in a scattered pattern, roughly 2 to 2.5 inches apart in a diagonal grid. Secure each rose through its flat base with 6 to 8 stitches, knotting on the WS, and position each leaf cluster behind and slightly beside its rose.
Mark button placement on the left placket band to align with the buttonholes, and sew each button securely with a double strand of Yarn A.
Tips
Take your time with the raglan increases, and count your stitches after each increase row — mistakes are so easy to fix early!
Make a few extra roses before attaching, so your rolling tension is nice and even on the ones you keep.
For care, machine wash cold on a gentle cycle and lay flat to dry. Do not iron directly on the rose motifs.
For easier nappy changes, you can add a size 16 or 20 sew-on snap at the crotch — such a handy little extra.
Mint Green Rose Baby Romper Free Crochet Pattern
Materials
Steps
- Make 20 (24) [28] rolled roses and matching leaf clusters
- Work the raglan yoke top-down in BLO single crochet
- Divide sleeves from body and work the body flat
- Split into front and back legs with ribbed ankle cuffs
- Work both sleeves with taper shaping and wrist ribbing
- Add the button placket, neckline edging and raglan ruffles
- Seam, block, then sew on roses, leaves and buttons
- Count stitches after every raglan increase row
- Make a few practice roses to settle your rolling tension
- Block the romper fully dry before attaching the roses
- Use the same yarn for seaming so seams blend in


