Easy Crochet Christmas Wind Spinner Ornament Pattern
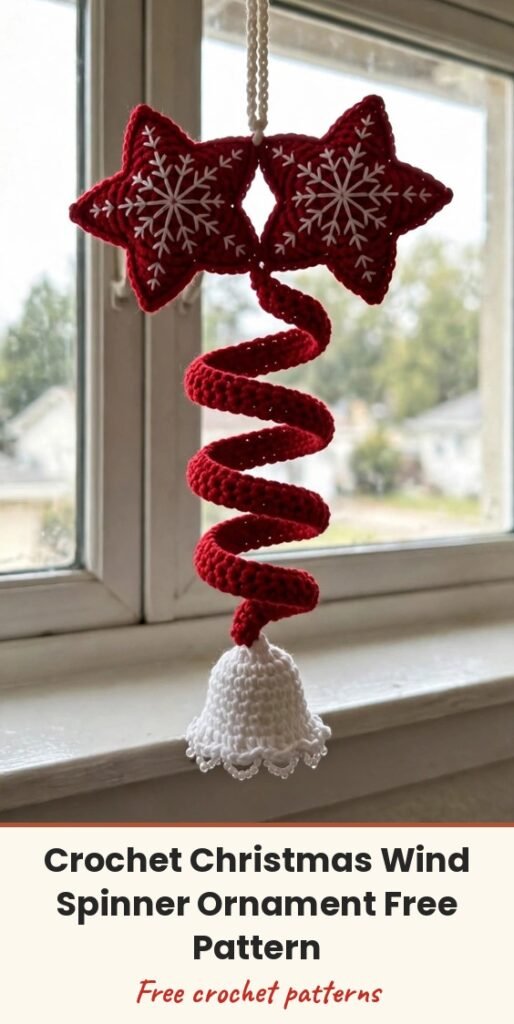
Table of Contents
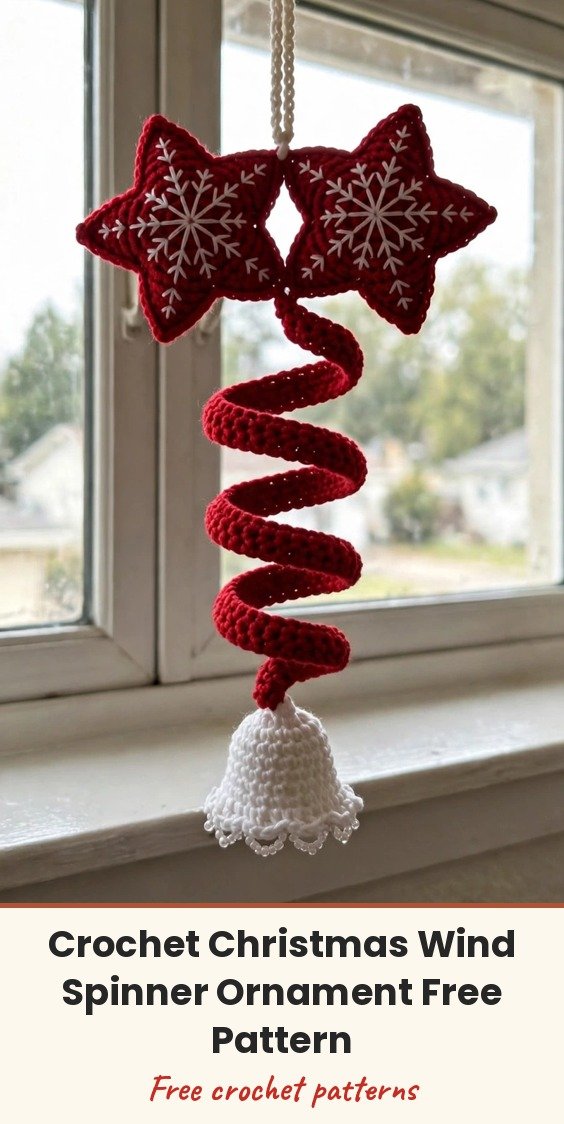
Hi, I am Amy, and this wind spinner is pure Christmas movement — a curled red spiral that twirls under two embroidered stars, with a tiny white bell and a couple of beads finishing it off. It looks elaborate, but every part is made separately, so you can settle in and enjoy one small piece at a time.
The magic is in the spiral itself: the stitches grow taller as you work, and that gradual change is what makes the strip curl all on its own. Keep the traditional red, white and green, or remix the colours and embroider snowflakes or holly instead — each spinner comes out with its own personality.
Materials
- 3-ply yarn in red
- 3-ply yarn in white
- 3-ply yarn in green
- 2.5 mm or 2.75 mm crochet hook
- Tapestry needle
- Decorative beads
- Glue
Abbreviations
- ch: chain
- st / sts: stitch / stitches
- sl st: slip stitch
- sc: single crochet
- hdc: half double crochet
- dc: double crochet
- sk: skip
- inc: increase — 2 stitches worked into the same stitch
- nxt: next
- rep: repeat
- rnd: round
Gauge & Size
- Finished piece: a lightweight hanging ornament for a Christmas tree or festive display
- The spiral, two stars and bell are each made separately, then layered and attached from the top down
- Keep tension reasonably even on the spiral, but do not pull too tightly — the strip needs flexibility to curl
Spiral Wind Spinner Body
Foundation Chain: With red yarn, chain 27.
Row 1: Sk 3 sts, work 2 dc in each of the next 10 sts, 2 hdc in each of the next 10 sts, then 2 sc in each of the next 5 sts.
Row 2: Ch 1, turn, then work 2 sc in each of the next 10 sts.
Row 3: Work 2 hdc in each of the next 20 sts.
Row 4: Work 2 dc in each of the next 20 sts.
Finish the spiral: Fasten off and weave in the ends. Gently shape and curl the crocheted strip until it forms the spiral tail. If the spiral looks too flat, give it a little more hand-shaping rather than forcing a sharp bend — the gradual change from sc to hdc to dc creates the curved effect.
Christmas Star Motifs
Make 2 stars using red yarn. Each star begins with a magic ring.
Foundation: Make a magic ring with red yarn.
Round 1: Ch 3, work 17 dc into the ring, then join with a sl st.
Round 2: Ch 5, working down the chain, sk 1 st, 1 sl st, 1 sc, 1 hdc, and 1 dc; sk 2 sts on the centre circle, then work 1 sl st; repeat around to form all the star points, then sl st to finish and fasten off.
Embroider the stars: Use white yarn to embroider a snowflake motif onto the centre of each red star. Keep the embroidery light and even so the star points remain clearly visible.
White Bell
Foundation: Make a magic ring with white yarn.
Round 1: Ch 1, work 10 sc into the ring, then join with a sl st.
Round 2: Ch 1, work [1 sc, sc inc] around, then join with a sl st.
Round 3: Ch 1, work 1 sc in each st around, joining with a sl st.
Round 4: Ch 1, work 1 sc in each st around, joining with a sl st.
Round 5: Ch 1, work 1 sc in each st around, joining with a sl st.
Last Round — Flared Edge: Ch 1, work [1 sc, sc inc] around, then join with a sl st. This final increase round opens the lower edge, so keep the increases evenly distributed so the bell flares evenly.
Embroider the bell: Use green yarn to embroider small holly leaves and red yarn to add berry French knots.
Finishing & Assembly
Step 1 — Add the hanging loop: Attach a length of white yarn to the top point of one star and form a secure loop large enough to hang the finished ornament.
Step 2 — Layer the stars: Place the two embroidered stars back-to-back with the hanging loop positioned securely between them. Glue the stars together so the loop is held neatly in place. Check from the front and side before the glue sets — the points should sit evenly over one another.
Step 3 — Attach the spiral: Thread a decorative bead onto the upper tail of the red spiral spinner. Secure the spiral directly beneath the star so it hangs vertically from the centre.
Step 4 — Attach the bell: Secure the bottom of the spiral to the top of the crocheted white bell, adding another decorative bead at the connection point.
Weave in any remaining ends, check the embroidered details are secure, and give the spiral a final gentle curl before hanging.
Tips
- Try green-and-white stripes on the spiral instead of the traditional red combination for a different look.
- Embroider small snowflakes, holly leaves or other seasonal details onto the stars to match your tree.
- Check star alignment before the glue sets completely — a centred loop makes the finished ornament look much neater.
Easy Crochet Christmas Wind Spinner Ornament Pattern
Materials
Steps
- Chain 27 and work the spiral in 4 rows of increasing stitch heights
- Shape and curl the spiral strip by hand
- Make 2 red stars and embroider white snowflakes
- Crochet the white bell and embroider holly and berries
- Add a hanging loop and glue the stars back-to-back
- Attach the spiral under the stars with a bead
- Attach the bell at the bottom of the spiral with a bead
- Do not pull spiral stitches too tight - the strip needs flexibility to curl
- Keep bell increases evenly distributed so the flare stays even
- Check star points align before the glue sets
- Embroider lightly so the star points stay clearly visible


