Christmas Granny Square Handbag Free Crochet Pattern
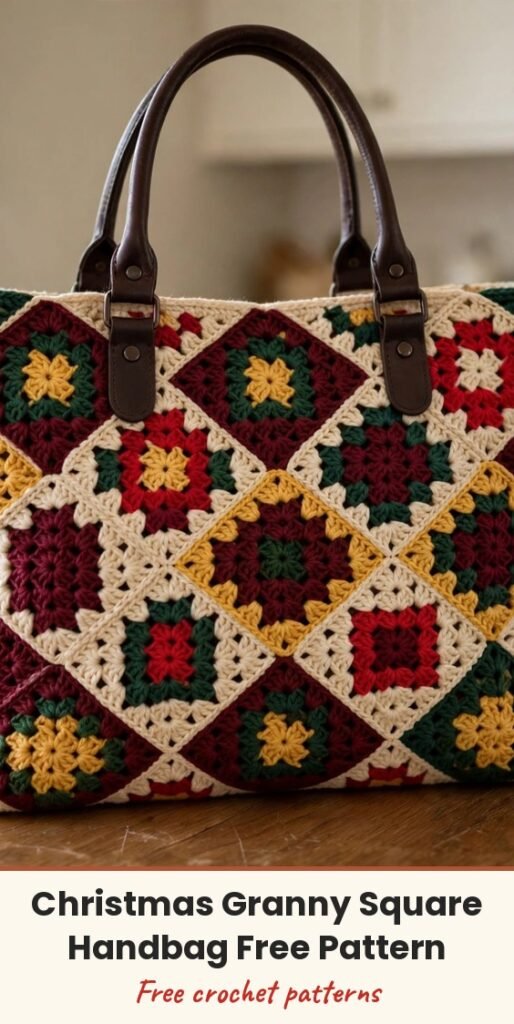
Table of Contents
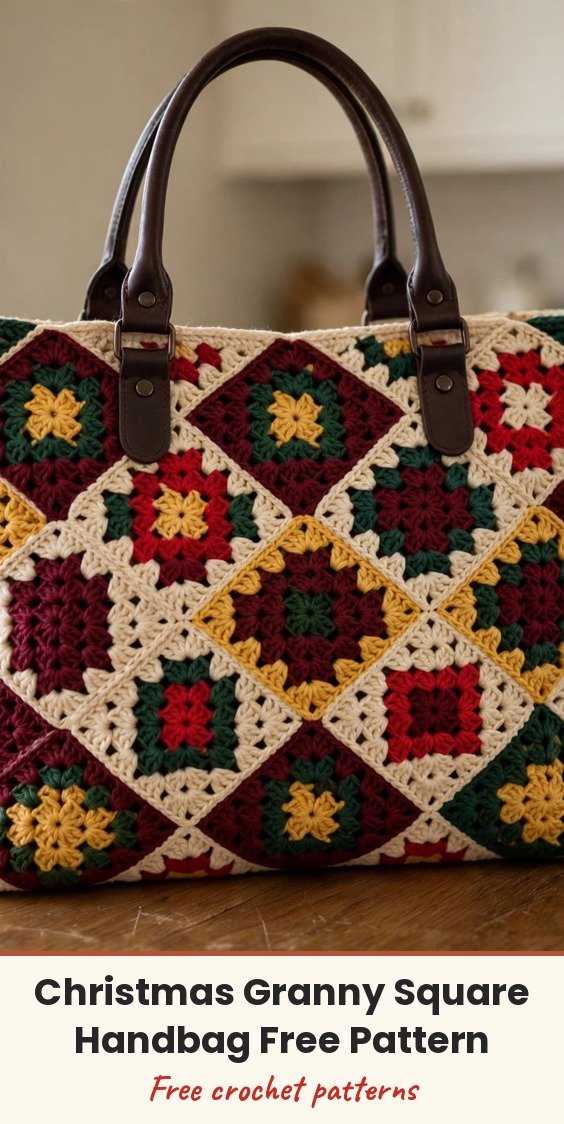
Hi, I’m Amy, and oh, this bag stopped me in my tracks. Classic granny squares set on point like diamonds, in burgundy, forest green, golden yellow, cream, and red, with a ribbed top band and leather handles — it looks far more complicated than it is, and it gets compliments everywhere.
We make 18 full squares and 12 half-squares, join them into front and back panels, add side gussets for depth, and finish with ribbing and hardware. If you are comfortable with granny squares and colour changes, you can absolutely do this — just block as you go and take the joining slowly.
Materials
- Worsted weight yarn, Colour A Burgundy: 420 yards (385 m)
- Worsted weight yarn, Colour B Forest Green: 110 yards (100 m)
- Worsted weight yarn, Colour C Golden Yellow: 110 yards (100 m)
- Worsted weight yarn, Colour D Cream: 90 yards (82 m)
- Worsted weight yarn, Colour E True Red: 90 yards (82 m)
- US H-8 / 5.0 mm crochet hook
- Tapestry needle, blocking mats and rust-proof pins, stitch markers
- 2 pre-made green leather bag handles with D-rings, about 12 inches each
- 8 x 8 mm gold rivets or Chicago screws
- Decorative charm on a lobster clasp (optional)
- Lining fabric, about 0.5 yard cotton (optional but recommended), plus sewing needle and thread
Abbreviations
- blo — back loop only
- ch — chain
- ch-sp — chain space
- dc — double crochet
- mc — magic circle
- rep — repeat
- rnd — round
- sc — single crochet
- sk — skip
- sl st — slip stitch
- sp — space
- st / sts — stitch / stitches
- yo — yarn over
- RS / WS — right side / wrong side
Gauge & Size
- One full granny square (4 rounds): 3.75 x 3.75 inches (9.5 x 9.5 cm) after blocking
- Ribbing in sc blo: 16 stitches = 4 inches, 18 rows = 4 inches
- Finished bag: about 13.5 inches wide x 11.5 inches high, 3.5 inches deep, handle drop about 6 inches
- Skill level: Intermediate
- Join with a sl st unless otherwise stated; block your swatch square before measuring
Colour Sequences
Type X Square (front: top-centre, centre-left, bottom-centre, and back mirror): Round 1 Colour D, Round 2 Colour E, Round 3 Colour B, Round 4 Colour A.
Type Y Square (front centre and back centre): Round 1 Colour C, Round 2 Colour E, Round 3 Colour B, Round 4 Colour A.
Type Z Square (front: top-left, top-right, centre-right, bottom-left, bottom-right, and back mirror): Round 1 Colour E, Round 2 Colour C, Round 3 Colour D, Round 4 Colour A.
Each panel uses 9 full squares: front panel is 3 Type X + 1 Type Y + 5 Type Z, back panel is the same, for 18 full squares total, plus 12 half-squares (6 per panel).
Half-Square colours: Round 1 partial Colour C, Round 2 partial Colour B, rows to triangle in Colour A.
Full Granny Square
Round 1: With the Round 1 colour, make a magic circle, ch 3 (counts as first dc here and throughout Round 1 only), work 2 dc into the mc, ch 2, repeat (3 dc into mc, ch 2) 3 times, join with sl st to top of beginning ch-3, pull mc snug, fasten off. (12 dc, 4 ch-2 corner spaces)
Round 2: Join the Round 2 colour with a standing dc into any ch-2 corner space, work (2 dc, ch 2, 3 dc) into the same space, ch 1, repeat [(3 dc, ch 2, 3 dc) into next corner space, ch 1] 3 times, join with sl st to top of first dc, fasten off. (24 dc, 4 ch-2 corners, 4 ch-1 side spaces)
Round 3: Join the Round 3 colour with a standing dc into any ch-2 corner space, work (2 dc, ch 2, 3 dc) into the same space, ch 1, work 3 dc into next ch-1 side space, ch 1, repeat [(3 dc, ch 2, 3 dc) into next corner, ch 1, 3 dc into next side space, ch 1] 3 times, join, fasten off. (36 dc, 4 ch-2 corners, 8 ch-1 spaces)
Round 4: Join Colour A with a standing dc into any ch-2 corner space, work (2 dc, ch 2, 3 dc) into the same space, ch 1, work 3 dc into next ch-1 space, ch 1, work 3 dc into next ch-1 space, ch 1, repeat [(3 dc, ch 2, 3 dc) into next corner, ch 1, (3 dc into next ch-1 space, ch 1) twice] 3 times, join, fasten off. (48 dc, 4 ch-2 corners, 12 ch-1 spaces)
Make 18 full squares in total and block each to 3.75 inches square.
Half-Square
Foundation (Colour C): Make a magic circle, ch 3 (counts as dc), work 2 dc into mc, ch 2, work 3 dc into mc, ch 2, work 3 dc into mc, do not join, fasten off Colour C. (9 dc, 2 ch-2 spaces)
Row 1 (RS, Colour B): Join Colour B into the first ch-2 space, ch 3 (counts as dc), work 2 dc into the same space, ch 1, work 3 dc loosely across the centre area, ch 1, work (3 dc, ch 2, 3 dc) into the second ch-2 corner space, turn, fasten off. (15 dc, 1 ch-2 corner)
Row 2 (Colour A): Join Colour A at the flat beginning edge, ch 1, sc evenly across the two legs of the triangle, working 3 sc into each corner ch-2 space and 1 sc into each dc and skipping all ch-1 spaces, work 1 sc into the final stitch, do not work across the hypotenuse yet, fasten off.
Hypotenuse Edging (Colour A): Reattach Colour A at one tip, ch 1, work sc evenly across the long diagonal edge, about 1 sc per 2 dc rows, ending with an even number of stitches, fasten off and block to two 3.75-inch legs.
Make 12 half-squares in total.
Joining the Squares
Lay out each panel in the on-point arrangement on a flat surface.
Join squares in diagonal rows with a flat slip stitch join, starting with the bottom-corner square.
For each join, place two squares WS together with RS facing out, and with Colour A sl st through the back loop of the edge stitch on both squares at once across the entire shared edge, working sl st, ch 1, sl st to mirror each ch-2 corner space, then fasten off.
At 4-square intersections, tack the centre by working a sl st through all 4 corner ch-2 spaces.
Join all diagonal rows into a 3-by-3 grid, attach the half-squares to the outer edges, and repeat for the back panel.
Side Gussets and Assembly
Gusset Foundation (make 2): Ch 15.
Gusset Row 1: Dc into the 4th ch from the hook, dc in each ch across, turn. (13 dc)
Gusset Row 2: Ch 3 (counts as dc), dc in each stitch across, turn. (13 dc)
Repeat Row 2 until the strip measures about 34 inches (86 cm), then work one round of sc all around the perimeter in Colour A with 3 sc in each corner, fasten off.
With RS outward, hold a gusset strip against a side edge of the front panel WS to WS and join with the flat sl st method along the two side edges and bottom edge, repeat to join the same strip to the back panel, and repeat with the second gusset so the top stays open.
Ribbed Top Band
Pick-up Row (Colour A): Starting at one back corner, work sc evenly around the entire top opening, about 1 sc per dc across panels and 1 sc per end-row along gussets, join with sl st to first sc. (approximately 120 sc)
Ribbing Round 1: Ch 1, work 1 sc blo in each sc around, join with sl st to first sc. (120 sc)
Repeat Ribbing Round 1 for a total of 8 rounds, fasten off and weave in ends.
Finishing & Assembly
Mark handle points 3 inches in from each side edge on the front top, about 5 inches apart, and repeat on the back.
Thread each leather handle D-ring strap through the ribbed band at the marked points, fold the strap end inside, reinforce with a small scrap leather square, and set the rivets — 8 rivets in total.
For the rope accent, cut about 60 inches of Colour A yarn and wrap it tightly in a spiral around a handle, securing the ends under the wraps or with a little glue, and clip the charm onto a D-ring if using.
Add the optional lining if you like. Hand wash in cool water, lay flat to dry, and store in a dust bag to protect the leather.
Tips
Gauge matters here — even a small difference per square multiplies across the panel, so block your first square and measure before making all 18.
Take your time with blocking and joining; those two steps are what make the bag look truly polished.
Christmas Granny Square Handbag Free Crochet Pattern
Materials
Steps
- Make 18 full granny squares in Types X, Y and Z
- Make 12 half-squares
- Block all motifs to 3.75 inches
- Join squares on point into front and back panels
- Crochet and join two side gussets
- Work the ribbed top band for 8 rounds
- Attach leather handles with rivets
- Block your swatch square before making all 18
- Join with flat slip stitch through back loops only
- Take time with blocking and joining for a polished finish


