Dusty Rose Granny Square Mini Dress Free Crochet Pattern
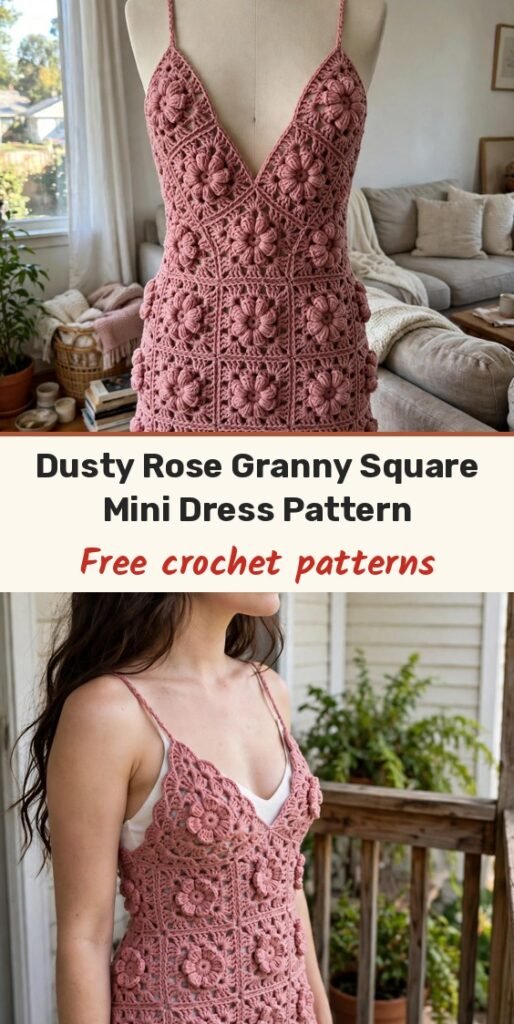
Table of Contents
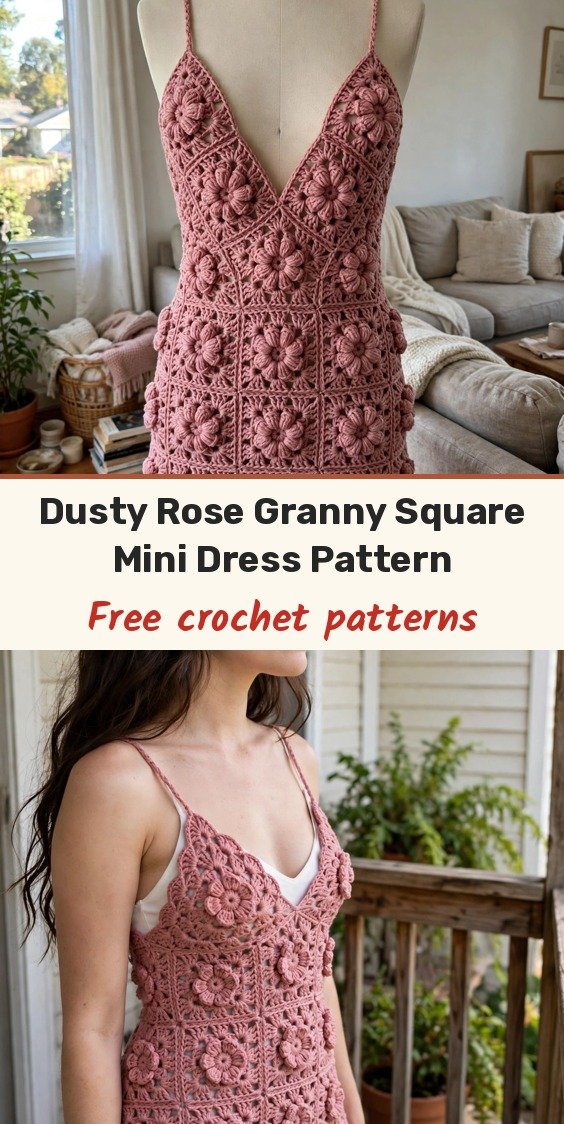
Got some gorgeous cotton yarn sitting in your stash that you have been waiting to use for something truly special? This is your sign to finally pull it out! This dusty rose granny square mini dress is the perfect project to show off that beautiful skein. You will create individual floral granny squares with raised puff stitch centers, then join them into a fitted, body-skimming silhouette with a deep V-neckline shaped by clever placement of half-squares and quarter-squares rather than complicated decreases.
I will not sugarcoat it: this is an intermediate to advanced project that asks for comfort with joining motifs, reading a layout, and thinking spatially about garment construction. But if you have made granny square blankets or bags before and you are ready for a wearable challenge, you absolutely have the skills. The individual squares work up quickly once you find your rhythm, and the joining is meditative once you understand the layout.
For size Small we will make approximately 52 full squares plus 4 half-squares and 4 quarter-squares. Plan on about 40 to 60 hours, and remember: you are creating a custom-fitted garment from scratch. Because of the lace-like openwork, the dress is designed to be worn over a slip or bodysuit.
Materials
- Approximately 1,000 yards of DK weight (CYCA #3) yarn, 100 percent cotton or cotton blend, in dusty rose (about 6 balls of a 24/7 style cotton)
- US E/4 (3.5mm) crochet hook, for squares and main body
- US D/3 (3.25mm) crochet hook, for straps and edging
- Yarn needle, for weaving ends
- At least 12 stitch markers
- Measuring tape
- Blocking board and rust-proof pins
- Scissors
- Slip or bodysuit, for wearing
Abbreviations
- beg: beginning
- ch: chain
- ch-sp: chain space
- dc: double crochet
- hdc: half double crochet
- rep: repeat
- rnd: round
- RS: right side
- sc: single crochet
- sk: skip
- sl st: slip stitch
- sp: space
- st/sts: stitch / stitches
- WS: wrong side
- yo: yarn over
Special Stitches
- Puff Stitch (puff st): yarn over, insert hook into indicated stitch or space, yarn over and pull up a loop to about 1/2 inch height. Repeat 3 more times into the same stitch or space (9 loops on hook). Yarn over and pull through all 9 loops. Chain 1 to close.
- 3-dc Cluster (3-dc cl): yarn over, insert hook into indicated stitch or space, yarn over and pull up a loop, yarn over and pull through 2 loops (2 loops remain on hook). Repeat twice more into the same stitch or space (4 loops on hook). Yarn over and pull through all 4 loops.
- Shell Stitch: work 5 dc into the same stitch or space.
- Scallop Border Stitch: slip stitch into indicated stitch, chain 3, work 4 dc into same stitch, slip stitch into the stitch 4 stitches forward.
- Join-As-You-Go (JAYG): when joining the final round of a new square to a completed square, replace each corner or side chain space with a slip stitch into the corresponding chain space of the adjacent completed square. This creates a flat, seamless join on the right side.
Gauge & Size
- Finished size (Small): bust 32 to 34 inches, waist 26 to 28 inches, hip 34 to 36 inches, total length about 30 inches from shoulder strap to hem
- Gauge: one full granny square = 4 inches x 4 inches after blocking, with the US E/4 (3.5mm) hook; 18 hdc x 14 rows = 4 inches
- Construction: floral granny squares joined into a tube, bodice shaped with half and quarter squares, scalloped hem
- Skill level: Intermediate to Advanced
Full Granny Square Pattern (Make 52)
All squares are worked in rounds with the right side always facing; do not turn unless instructed. Block every square to exactly 4 inches square before joining. Ch 6, sl st to first ch to form a ring.
Round 1 (RS): Ch 1, work 12 sc into ring, sl st to first sc to join. (12 sc)
Round 2: Ch 1, sc in same st, ch 2, (puff st in next sc, ch 2) 11 times, puff st in same st as first sc, ch 2, sl st to first sc to join. (12 puff sts, 12 ch-2 sps)
This round creates the raised petal effect of the floral center. The puff stitches fan outward beautifully once the next round is worked.
Round 3: Sl st into first ch-2 sp, ch 3 (counts as first dc), 2 dc in same ch-2 sp, ch 1, (3 dc in next ch-2 sp, ch 1) 11 times, sl st to top of ch-3 to join. (12 groups of 3 dc, 12 ch-1 sps)
Round 4: Sl st into sp between ch-3 and next dc, ch 3 (counts as first dc), dc in same sp, ch 1, sk next dc, (2 dc in sp between groups, ch 1, sk 3 dc) 11 times, sl st to top of ch-3 to join. (24 dc, 12 ch-1 sps)
Round 5: Sl st into first ch-1 sp, ch 3 (counts as first dc), 2 dc in same ch-1 sp, ch 1, (3 dc in next ch-1 sp, ch 1) 11 times, sl st to top of ch-3 to join. (36 dc, 12 ch-1 sps)
After Round 5 you have a circular motif. Round 6 transforms it into a square by creating 4 corner spaces.
Round 6: Sl st into first ch-1 sp, ch 3 (counts as first dc), 2 dc in same sp, ch 2, 3 dc in same sp (corner made), ch 1, sk next ch-1 sp, 3 dc in next ch-1 sp, ch 1, sk next ch-1 sp, ((3 dc, ch 2, 3 dc) in next ch-1 sp (corner made), ch 1, sk next ch-1 sp, 3 dc in next ch-1 sp, ch 1, sk next ch-1 sp) rep twice more, sl st to top of ch-3. (4 corners with ch-2 sps, 8 side ch-1 sps, 48 dc total)
Round 7: Sl st to corner ch-2 sp, ch 3, 2 dc in corner sp, ch 2, 3 dc in same corner sp, ch 1, 3 dc in next ch-1 sp, ch 1, 3 dc in next ch-1 sp, ch 1, ((3 dc, ch 2, 3 dc) in corner ch-2 sp, ch 1, 3 dc in next ch-1 sp, ch 1, 3 dc in next ch-1 sp, ch 1) rep for remaining 2 corners, sl st to top of ch-3. (4 corners, 12 side ch-1 sps, 60 dc total)
Fasten off and weave in ends. Block each square to exactly 4 inches x 4 inches.
Half-Square Motif (Make 4)
These fill the upper corners of the bodice front at the V-neck, and measure 4 inches wide x 2 inches tall after blocking. Ch 16.
Row 1 (RS): Dc in 4th ch from hook, dc in next ch, ch 1, sk 1 ch, 3 dc in next ch, ch 1, sk 1 ch, (3 dc, ch 2, 3 dc) in next ch (center corner), ch 1, sk 1 ch, 3 dc in next ch, ch 1, sk 1 ch, 3 dc in last 3 ch. Turn. (4 groups of 3 dc, 1 center corner)
Row 2 (WS): Ch 3, 2 dc in first ch-1 sp, ch 1, 3 dc in next ch-1 sp, ch 1, (3 dc, ch 2, 3 dc) in corner ch-2 sp, ch 1, 3 dc in next ch-1 sp, ch 1, 3 dc in last sp. Turn.
Row 3: Ch 3, 2 dc in first ch-1 sp, ch 1, 3 dc in next ch-1 sp, ch 1, 3 dc in next ch-1 sp, ch 1, (3 dc, ch 2, 3 dc) in corner ch-2 sp, ch 1, 3 dc in next ch-1 sp, ch 1, 3 dc in next ch-1 sp, ch 1, 3 dc in last sp. Fasten off.
Quarter-Square Motif (Make 4)
These fill the center bottom of the V and the side triangular gaps, and measure about 2 inches x 2 inches. Ch 4, sl st to form a ring.
Round 1 (RS): Ch 3, 2 dc in ring, ch 2, 3 dc in ring, ch 2, sl st to top of ch-3. Fasten off. (2 groups of 3 dc, 2 ch-2 sps)
Joining & Assembly
Join all squares using the Join-As-You-Go method on the final round, or use a slip stitch flat seam after blocking: hold two blocked squares with wrong sides together and slip stitch through the outermost dc of both squares along one edge.
Work in this order. First, join all skirt squares into 8 vertical strips of 5 squares each. Join the 8 strips side by side to form a tube, leaving one seam open until the bodice is attached. Join the 4 bodice back lower squares into a strip and attach it to the top of the skirt back, then join the second row of bodice back squares on top. Join the 4 bodice front lower squares to the top of the skirt front. Attach the half-squares and quarter-squares to form the V-neckline front upper row. Finally, close the remaining side seam.
Scalloped Hem Border
Setup Round: With RS facing, attach yarn to any bottom corner ch-2 sp, ch 1. Work sc evenly along the entire bottom edge, working 3 sc into each corner ch-2 sp and 1 sc into each dc and each ch-1 sp across. Join with sl st to first sc. Adjust count to 140 sc.
Round 1: Ch 1, sc in each sc around. Sl st to first sc. (140 sc)
Round 2 (scallop round): (Sl st in next st, ch 3, 4 dc in same st, sl st in st 4 sts forward) 28 times. (28 scallops)
Fasten off and weave in ends.
Neckline Edging & Straps
Neckline setup round: with RS facing, attach yarn to the right shoulder point of the back neckline, ch 1. Work sc evenly around the entire neckline edge including the V-front, working 3 sc into each outer corner and sc2tog at the inner V-point. Join with sl st to first sc.
Round 1: Ch 1, sc in each sc around, working sc2tog at the inner V-point again. Join with sl st. Fasten off.
Straps: attach yarn to the top right front bodice edge, about 1.5 inches from the center V-point. Ch 50 (or to your desired length), sl st in 2nd ch from hook and in each ch across. Fasten off, and attach securely at both ends with a yarn needle. Repeat for the left strap.
Finishing & Assembly
Weave in all yarn ends thoroughly. Wet-block the finished dress by soaking it in cool water for 20 minutes, pressing out the excess water in a towel without wringing, and pinning it to the final measurements. Allow it to dry completely.
Try the dress on over a slip or bodysuit to check the fit. If any seams pull or gap, reinforce them with additional slip stitches on the inside. For care, hand wash in cool water with gentle detergent, do not wring, lay flat to dry, and store folded rather than hanging to prevent stretching.
Tips
Please do not skip the gauge swatch on this project. This is a fitted garment, and even small variations in square size compound across 52 squares into a dress that does not fit. Work at least 2 full squares, block them, and measure before committing.
Cotton is strongly recommended here: it gives the drape, stitch definition and breathability this fitted style needs. Avoid stretchy or textured yarns, because granny square construction needs dimensional stability to keep your motifs consistent.
Read through all the instructions before starting, seriously. Understanding the layout and construction order will save you from ripping back later.
Dusty Rose Granny Square Mini Dress Free Crochet Pattern
Materials
Steps
- Crochet and block 52 full floral granny squares to exactly 4 inches each
- Make 4 half-squares and 4 quarter-squares for the V-neckline shaping
- Join the skirt squares into 8 strips of 5, then join the strips into a tube
- Join and attach the bodice back and front square rows
- Attach the half and quarter squares to form the V-neckline, then close the side seam
- Work the scalloped hem border over a 140 sc setup round
- Edge the neckline and add the two chain straps
- Wet block the finished dress to measurements and dry completely
- Never skip the gauge swatch: small square size differences compound across 52 squares
- Block every square before joining to prevent puckering and distorted seams
- Use cotton for drape and stitch definition; avoid stretchy or textured yarns
- Read the full joining order before starting so the layout makes sense


