Make Angry Slouchy Santa Hat Owl Plushie Bag Charm (Grinch Owl)
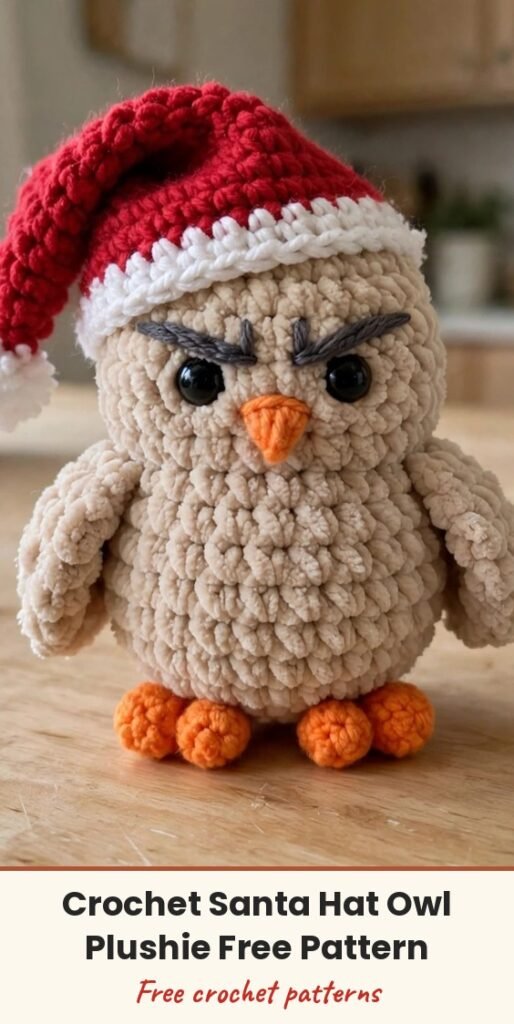
Table of Contents
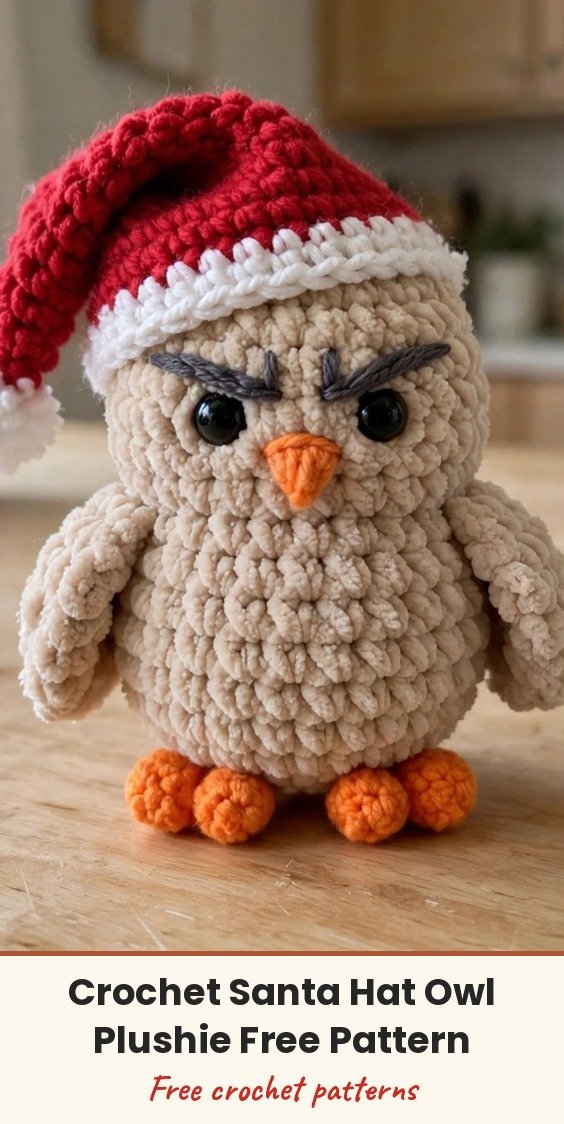
Oh, this little owl has the funniest grumpy face, and I just love him for it! He is a tiny no-sew plush worked from the bottom up, so his feet, tail, body, wings and head all grow in one seamless piece, and then he gets a slouchy Santa hat to finish his holiday look.
Because the tail is built right into the back, he stands up all by himself on a shelf, and he is just the right size to hang on a bag as a charm too. The plush yarn makes him soft and squishy, and those furrowed brows give him so much personality.
Work the owl first with the bigger hook, then make the little hat with the smaller hook and pop it on at the end. Let us get started!
Materials
- Plush or chenille yarn, super bulky, 100 g and 120 m, in a main body colour: light brown or beige, or peach or grey
- Plush yarn in bright orange or yellow, for the feet and beak
- Sport or DK weight cotton-acrylic yarn in dark charcoal or black, for embroidered feather details
- DK weight yarn in a main hat colour, Yarn A
- White yarn, Yarn B, for the hat brim and top bobble
- 4.5 mm crochet hook, for the plush body
- 2.5 mm crochet hook, for the hat
- 10 mm black safety eyes, 1 pair
- Fiberfill stuffing
- Tapestry or yarn needle with a wide eye
- Stitch marker
- Scissors
- Hot glue gun and lighter, optional, for securing plush yarn ends
Abbreviations
- MR: magic ring
- ch: chain
- sc: single crochet
- inc: increase, 2 sc in the same stitch
- dec: decrease, single crochet 2 stitches together
- dc: double crochet
- sl st: slip stitch
- FLO: front loops only
- BLO: back loops only
- st(s): stitch(es)
- [ … ] x N: repeat the bracketed sequence N times
Special Stitches
- Bobble (foot): 2-dc cluster in the same stitch. Yarn over, insert hook into stitch, draw up a loop, yarn over, pull through 2 loops. Yarn over, insert hook into the same stitch, draw up a loop, yarn over, pull through 2 loops. Yarn over and pull through all 3 loops on the hook, then ch 1 to secure.
Gauge & Size
- Finished size: approximately 6.5 cm (2.5 inches) tall
- Gauge is not critical for this plush, keep your stitches tight so the stuffing does not show
- Construction: owl worked seamlessly from the bottom up, hat worked separately and attached at the end
Owl Body Pattern
Use the 4.5 mm hook and plush yarn in the main body colour.
Round 1: Ch 2, work 9 sc in the 2nd chain from the hook, or 9 sc in a MR. [9]
Round 2: 9 inc. [18]
Round 3 (feet round): [2 sc, inc] x 2. [6]
Round 3 continued: Work 2 sc. In the next stitch work 1 sc, and on the 2nd sc of the increase, pull through the yellow yarn on the final yarn over.
Round 3 continued: In the next stitch, work a yellow Bobble (2-dc cluster), securing with ch 1 in the main colour.
Round 3 continued: Work 1 sc, 2 inc, 1 sc, switching to yellow on the last loop.
Round 3 continued: In the next stitch, work a yellow Bobble, securing with ch 1 in the main colour.
Round 3 continued: [2 sc, inc] x 2. [24]
Cut the yellow yarn tails, knot them inside, and gently singe the ends with a lighter to stop fraying.
Round 4 (tail round): In the FLO of the 1st stitch, centred on the back, work (1 sl st, ch 3, 4 dc, ch 3, 1 sl st) all in that same front loop to form the standing tail flap.
Round 4 continued: Continuing in both loops around, work 23 sc. [24]
Round 5: Work 1 sc into the remaining back loop behind the tail flap from Round 4.
Round 5 continued: Work 23 sc around in both loops. [24]
Round 6 (wings round): Work 7 sc.
Round 6, Wing 1: In the FLO of the next stitch, work (1 sc, 3 dc, ch 3, 1 sl st) all into the front loop.
Round 6 continued: Work 9 sc across the front.
Round 6, Wing 2 (mirrored): In the FLO of the next stitch, work (1 sl st, ch 3, 3 dc, 1 sc) all into the front loop.
Round 6 continued: Work 6 sc to the end of the round. [24]
Round 7: Work 24 sc around, working into the remaining back loops behind both wings, and into both loops elsewhere. [24]
Round 8 (decrease round): [2 sc, dec] x 6. [18]
Rounds 9 to 10 (2 rounds): 18 sc around. [18]
Insert the 10 mm safety eyes between Rounds 7 and 8, spaced 4 to 5 stitches apart, centred evenly above the feet and 1 stitch inward from each wing. Secure the safety backings inside.
Firmly stuff the body with fiberfill, pressing down toward the base so the bottom stays flat and sits neatly on its feet and tail.
Round 11: Work approximately 7 sc until you reach the right side edge of the head. Flatten the top opening so the front and back edges line up horizontally. You will now crochet across both layers at once.
Round 11, Ear 1: Ch 3, insert the hook through both layers of the first stitch, 1 sl st.
Round 11 continued: Work 8 to 9 sc across the top, joining both layers together.
Round 11, Ear 2: In the final corner stitch, ch 3, 1 sl st into the corner.
Fasten off, leaving a 25 cm yarn tail for facial embroidery.
Santa Hat Pattern
Use DK weight yarn and the 2.5 mm hook. Start with Yarn A, the main hat colour.
Round 1: 6 sc in a magic ring. (6)
Round 2: Sc in each stitch around. (6)
Round 3: 5 sc, inc. (7)
Round 4: 6 sc, inc. (8)
Round 5: 7 sc, inc. (9)
Round 6: 8 sc, inc. (10)
Round 7: 9 sc, inc. (11)
Round 8: 10 sc, inc. (12)
Round 9: 11 sc, inc. (13)
Round 10: 12 sc, inc. (14)
Round 11: (6 sc, inc) x 2. (16)
Round 12: (7 sc, inc) x 2. (18)
Round 13: (8 sc, inc) x 2. (20)
Round 14: (9 sc, inc) x 2. (22)
Round 15: (10 sc, inc) x 2. (24)
Round 16: 23 sc, inc. (25)
Brim: Switch to white yarn, keeping the 2.5 mm hook.
Round 17: Sc in each stitch around. (25)
Round 18: 24 sc, inc. (26)
Round 19: (12 sc, inc) x 2. (28)
Fasten off invisibly and weave in the ends for the hat body.
Top bobble: Using white yarn and the 2.5 mm hook, attach the white yarn directly to the top tip (the Round 1 magic ring) of the hat with a slip stitch.
Work 1 bobble stitch directly into the tip. Ch 1 to lock the bobble in place.
Fasten off, pull tight, and weave in all remaining loose yarn ends.
Finishing & Assembly
Brows: Thread the remaining plush body tail onto your tapestry needle. Bring the needle out diagonally above the eye and stitch downward across the top-inner edge of each eye to form the signature determined, furrowed owl eyebrows. Knot and hide the yarn tail inside the body.
Beak: Thread a strand of yellow or orange plush yarn. Embroider a neat inverted triangle or V stitch centred directly between the eyes. Tie off the tails together and hide them inside the body.
Chest feathers: Thread a strand of dark charcoal or black cotton yarn. Embroider small, scattered V stitches (chevrons) across the belly and a couple on the back to mimic plumage feathers. Tie off and conceal the ends.
Attaching the hat: Angle the slouchy Santa hat over one ear and fix it in place on the head, stitching or gluing around the base so it sits firmly.
Tips
Use a stitch marker in plush yarn, the stitches are so soft and fuzzy that the start of the round is easy to lose.
Stuff firmly toward the base before closing the head, that flat bottom plus the built-in tail is what lets your owl stand on his own.
Knot and tuck the yellow foot yarn tails inside the body right away, so they never peek out later.
Take your time with the eyebrows, they are the whole grumpy expression, so check both sides match before you hide the tail.
Make Angry Slouchy Santa Hat Owl Plushie Bag Charm (Grinch Owl)
Materials
Steps
- Work owl base Rounds 1 to 5 with feet and tail
- Work wings and body Rounds 6 to 10
- Add safety eyes and stuff firmly
- Close head Round 11 forming both ears
- Crochet Santa hat body Rounds 1 to 16
- Work white brim Rounds 17 to 19 and top bobble
- Embroider brows beak and chest feathers
- Angle hat over one ear and secure
- Use a stitch marker in fuzzy plush yarn so you do not lose the round start
- Stuff firmly toward the base so the owl stands on feet and tail
- Knot yellow foot tails inside the body right away
- Match both embroidered brows before hiding the tail


