Lavender Puff Stitch Baby Dress Free Crochet Pattern
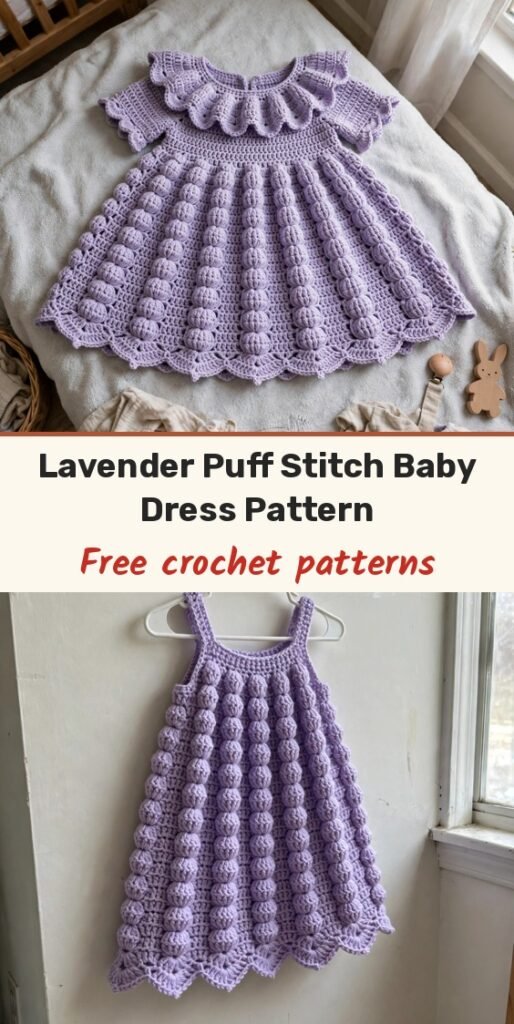
Table of Contents
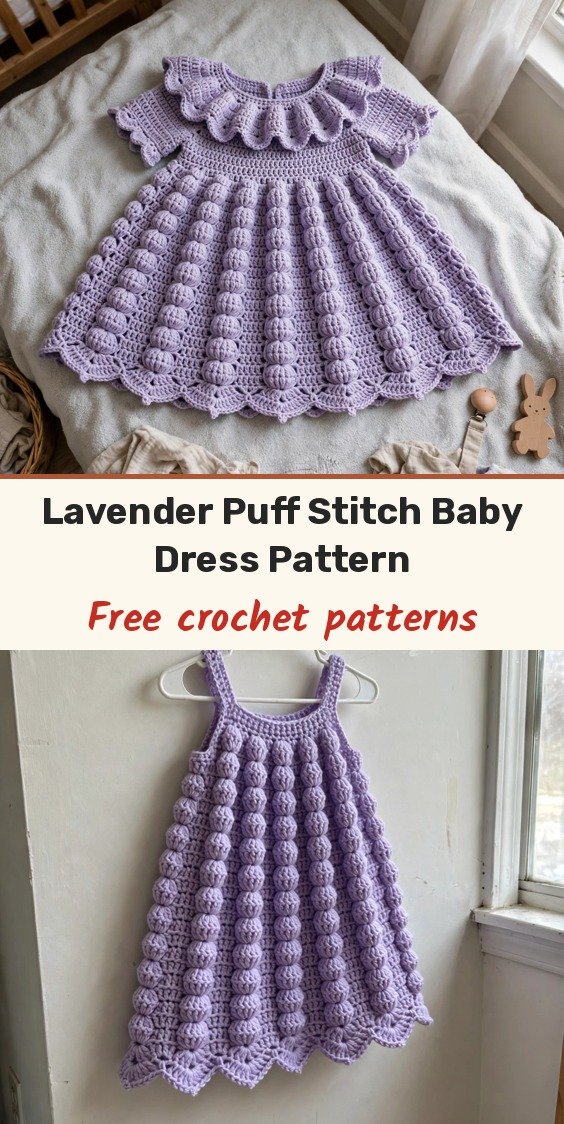
I cannot resist a puff stitch, and this little lavender dress is covered in them! Neat columns of puffs run down the skirt like tiny lavender buds, the collar fans out into sweet scallops, and two wooden buttons close the back.
We will start with the back button band, work the yoke in rounds down to the armholes, then let the skirt bloom out before finishing with the collar. Everything is written for size 6 to 12 months.
The finished dress has a chest of about 17 inches and measures roughly 13 inches from shoulder to hem, just right for a first birthday or a special photo day.
Materials
- 350 to 400 yards DK weight yarn (Weight 3) in soft lavender
- US G-6 / 4.0mm (4 mm) crochet hook
- 2 wooden buttons, approximately 12mm
- Yarn needle
- Stitch markers
- Scissors
- Measuring tape
Abbreviations
- ch: chain
- sl st: slip stitch
- sc: single crochet
- dc: double crochet
- ps: puff stitch (see Special Stitches)
- st(s): stitch or stitches
- rep: repeat
- RS: right side
- WS: wrong side
- beg: beginning
- sp: space
Special Stitches
- Puff stitch (ps): yarn over, insert hook into the stitch, yarn over and pull up a loop (3 loops on hook). Working into the same stitch, yarn over, insert hook, yarn over and pull up a loop (5 loops on hook). Repeat once more (7 loops on hook). Yarn over and pull through all 7 loops, then chain 1 to close the puff. The closing chain 1 does not count as a separate stitch unless the pattern states otherwise.
Gauge & Size
- Finished size: 6 to 12 months; chest approximately 17 inches (43 cm), length shoulder to hem approximately 13 inches (33 cm), skirt circumference at hem approximately 36 inches (91 cm)
- Gauge: 18 dc and 10 rows = 4 inches (10 cm) in double crochet; 4 puff stitches and 6 rounds = 4 inches (10 cm) in the puff stitch pattern
- Construction: back button band worked flat, yoke and skirt in joined rounds, collar added last, two-button back closure
- Skill level: Confident beginner to intermediate
Back Button Band & Yoke Pattern
We begin at the back neckline and work downward. The back band gives us a neat overlap for the buttons.
Chain 51.
Row 1 (RS): Sc in 2nd ch from hook and in each ch across. Turn. (50 sc)
Row 2 (WS, button loop row): Ch 1, sc in first 46 sts. (Ch 2, skip next 2 sts, sc in next 2 sts) twice to create two button loops on one side. Turn. (46 sc, 2 ch-2 loops)
Round 3: Ch 3 (counts as first dc here and throughout the yoke), dc in same st as join. Dc in next 10 sts, 2 dc in next st, dc in next 12 sts, 2 dc in next st, dc in next 10 sts, 2 dc in next st, dc in next 12 sts, 2 dc in last st. Join with sl st to top of beg ch-3. (60 dc)
Round 4: Ch 3, dc in same st, dc in next 14 sts, 2 dc in next st, dc in next 14 sts, 2 dc in next st, dc in next 14 sts, 2 dc in next st, dc in last st, keeping the back band overlapped at the join. (64 dc)
Round 5: Ch 3, dc in same st, dc in next 8 sts, 2 dc in next st, (dc in next 16 sts, 2 dc in next st) twice, dc in next 7 sts, 2 dc in last st. (72 dc)
Round 6: Ch 3, dc in each st around, working 2 dc in the corner increase stitch of the previous round at each of the four raglan points. (76 dc)
Round 7: Ch 3, dc in same st, (dc in next 18 sts, 2 dc in next st) 3 times, dc in remaining sts, 2 dc in last st. (80 dc)
Round 8: Ch 3, dc in each st around, working 2 dc at each raglan point as established. (84 dc)
Round 9: Ch 3, dc in same st, (dc in next 20 sts, 2 dc in next st) 3 times, dc in remaining sts, 2 dc in last st. (88 dc)
Round 10: Ch 3, dc in each st around. (88 dc)
Round 11: Ch 3, dc in each st around. (88 dc)
Round 12: Ch 3, dc in each st around. At this point the yoke measures approximately 3.5 inches (9 cm) from the neckline edge, with a chest circumference of about 17 inches (43 cm) when joined. (88 dc)
Round 13 (armhole shaping): Ch 3, dc in next 29 sts (front, 30 sts including the ch-3), skip next 14 sts (armhole), ch 14 loosely, dc in next 30 sts (back), skip next 14 sts (second armhole), ch 14 loosely. Join with sl st to top of beg ch-3. (88 sts total including chains)
Round 14: Ch 3, (dc in next st, 2 dc in next st) around the entire body, working into each ch of the armhole chains as you reach them. Join with sl st. (108 dc)
The skirt now flares gently from this increased round.
Skirt Pattern
Round 15: Ch 3, dc in next 2 sts, (ps in next st, dc in next 3 sts) around. Join with sl st to top of beg ch-3. The ch-3 counts as the first dc of the first group. (27 ps, 81 dc)
Round 16: Ch 3, dc in each st around, working dc into the top of each ps. Join with sl st. (108 dc)
Round 17: Ch 3, dc in next 2 sts, ps in next st (aligning the puff above the puff two rounds below), dc in next 3 sts, (ps in next st, dc in next 3 sts) around. (27 ps, 81 dc)
Round 18: Repeat Round 16. (108 dc)
Rounds 19 through 28: Continue alternating Round 15 (puff round) and Round 16 (plain dc round), working puffs on Rounds 19, 21, 23, 25 and 27 and plain dc on Rounds 20, 22, 24, 26 and 28. Each round finishes with 108 sts (27 ps and 81 dc on puff rounds, 108 dc on plain rounds).
By Round 28 the skirt measures approximately 7 inches (18 cm) from the armhole join, and the hem circumference is approximately 36 inches (91 cm) with a gentle A-line flare.
Round 29 (scallop hem): Ch 1, sc in first st. (Skip 1 st, 5 dc in next st, skip 1 st, sc in next st) around. Join with sl st to first sc. Fasten off. (27 scallops)
Collar Pattern
With RS facing and the dress held neckline-up, join yarn at the right back neck edge, at the point where the back band meets the first neck stitch.
Round 1: Ch 1, sc evenly around the entire neckline opening, working into the row ends of the back band and the top of each neck stitch. Work approximately 1 sc per stitch or row end, easing around the corners. Join with sl st to first sc. (Approximately 50 to 54 sc; use 52 as a working guide)
Round 2: Ch 1, (sc in next st, 2 sc in next st) around. Join with sl st. (Approximately 78 sc if you began with 52)
Round 3: Ch 1, sc in each st around, working approximately 1 decrease at the centre back to settle the collar count at an even multiple. Join with sl st. (60 sc target for the fan round)
Round 4 (fan scallops): Ch 1, sc in first st. (Skip 2 sts, 5 dc in next st, skip 2 sts, sc in next st) around. Join with sl st to first sc. (20 fans if working over 120 sts of fan repeats; adjust to 10 repeats of the 6-st pattern over 60 sc equals 20 fans worked as skip 2, shell, skip 2, sc)
Round 5: Ch 1, sc in each sc and in the centre (3rd) dc of each fan around. Join with sl st to first sc. Fasten off and weave in all ends.
Finishing & Assembly
Position the two wooden buttons on the underside of the back band so each aligns with a ch-2 loop. Sew each button firmly with yarn or strong thread, knotting on the WS. Fasten the dress by passing each button through its ch-2 loop.
Try the dress on a doll or model if possible: the collar must sit flat and the skirt must clear the nappy line.
Weave in all remaining tails with the yarn needle, following the direction of the stitches on the WS for at least 1 inch (2.5 cm) in two directions. Lightly steam block the finished dress, shaping the scallop collar and hem with your fingers and pinning the skirt scallops open while it cools. Do not press the puff stitches flat.
Tips
To adjust the size, add or remove increase rounds in the yoke before the armhole round, keeping 4 increase points per increase round, and then add or remove plain dc and puff rounds in the skirt to reach your preferred length.
Work puffs with a slightly loose tension so they stay plump, and always close each puff with a chain 1 before moving on.
Wash gently in cool water and dry flat. A short steam refresh brings the puffs and scallops back to life without flattening them.
Lavender Puff Stitch Baby Dress Free Crochet Pattern
Materials
Steps
- Work the back button band with two ch-2 button loops
- Work the yoke in rounds, increasing to 88 dc by Round 9
- Shape the armholes in Round 13 and increase the skirt to 108 dc
- Alternate puff stitch and plain dc rounds through Round 28
- Finish the skirt with the Round 29 scallop hem
- Work the five-round scalloped collar around the neckline
- Sew on the two wooden buttons and weave in all ends
- Steam block lightly, keeping the puff stitches plump
- Close every puff stitch with a chain 1 so the columns stay aligned
- Keep puff tension slightly loose for plump texture
- Settle the collar count to 60 sc before the fan round
- Never press the puff stitches flat when blocking