Sunset Ombre Granny Square Baby Romper Free Crochet Pattern
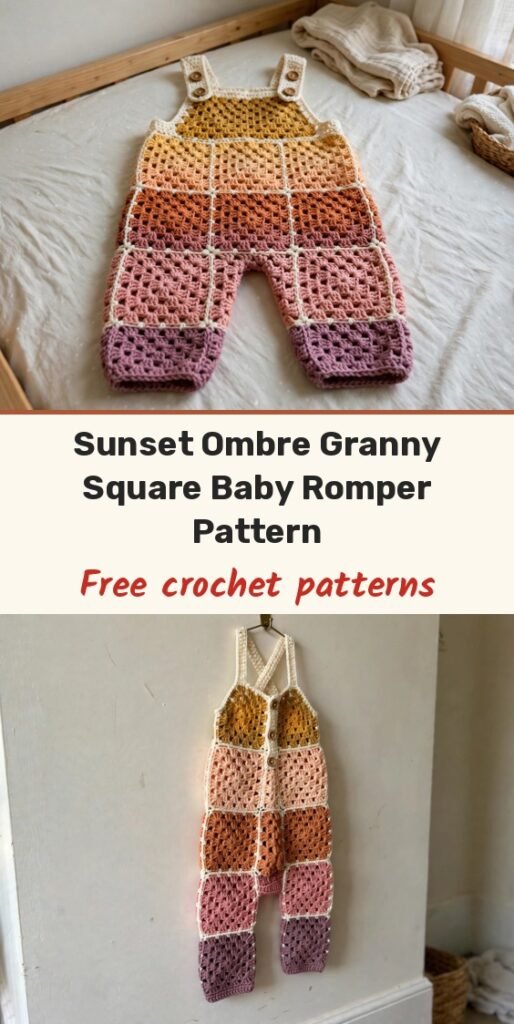
Table of Contents
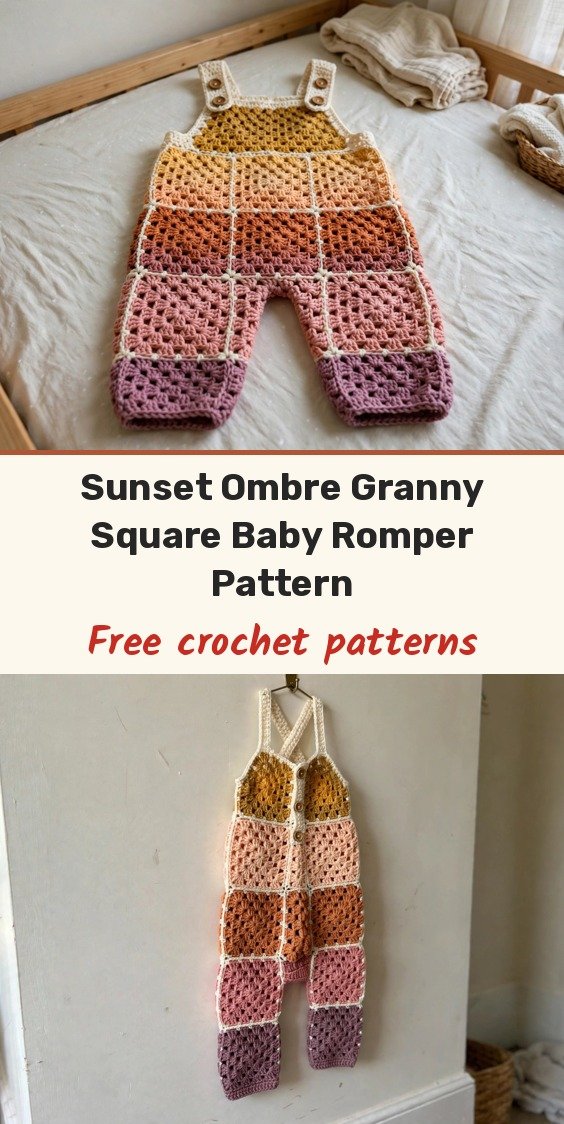
This sunset ombre romper makes me smile every time I lay the squares out! We will build it from 46 simple granny squares whose colored centers melt from mustard gold at the bib, through peach, terracotta and dusty rose, down to soft mauve at the ankles, all held together by one cream joining color that forms a pretty lattice over the whole romper.
Every single square is made exactly the same way. We just change the center color depending on where the square sits in the layout, then join the squares into a front panel, a back panel and two leg panels, and finish with buttoned shoulder straps and ribbed ankle cuffs. There is no complicated shaping at all, just satisfying assembly.
It is sized for 12 to 18 months and fits comfortably over a onesie. If you can make a basic granny square and you are comfortable with seaming, you have everything you need. I recommend making all your squares first, blocking them, and laying out the gradient before you join anything.
Materials
- Approximately 570 yards worsted weight (number 4) cotton or cotton-acrylic blend yarn in total, split as: Color A mustard gold 80 yards, Color B warm peach/orange 90 yards, Color C terracotta/coral 90 yards, Color D dusty rose/salmon 90 yards, Color E mauve/dusty purple 90 yards, Color J cream/off-white for joining 220 yards
- US G-6 (4.0 mm) crochet hook, for squares and body
- US F-5 (3.75 mm) crochet hook, for ribbing and straps
- 2 wooden buttons, approximately 3/4 inch diameter
- Yarn needle, for weaving in ends and seaming
- Locking stitch markers
- Rust-proof pins, for blocking
- Scissors
Abbreviations
- ch: chain
- sl st: slip stitch
- sc: single crochet
- dc: double crochet
- ch-sp: chain space
- BLO: back loop only
- RS: right side
- WS: wrong side
- rnd: round
- rep: repeat
- sk: skip
- st/sts: stitch / stitches
- sp: space
- t-ch: turning chain
- yo: yarn over
Special Stitches
- Granny cluster: 3 dc worked into the same stitch or space. Every square in this romper is built from these clusters.
Gauge & Size
- Gauge: one completed and blocked granny square = 3 inches by 3 inches with the G-6 hook; 16 dc and 8 rows = 4 inches in double crochet fabric. Make a test square before committing to all 46, because a square even a quarter inch off causes cumulative sizing errors
- Finished size: 12 to 18 months; chest approximately 24 inches around; total length from shoulder to ankle about 22 inches; inseam about 9 inches; ankle cuff circumference approximately 6 inches
- Construction: 46 granny squares joined into front, back and leg panels, with buttoned shoulder straps and ankle cuffs
- Skill level: Intermediate
Granny Square Pattern
Make 46 squares in total, following the layout below for center colors. Every square follows the same construction; only the center color changes, and Round 3 is always worked in Color J (cream).
Round 1 (center color): Make a magic ring, or ch 4 and join with sl st to form a ring. Ch 3 (counts as first dc), work 2 dc into ring, ch 2, (3 dc into ring, ch 2) 3 times, sl st to top of beginning ch-3 to join. Fasten off center color. (Four 3-dc clusters, four ch-2 corner spaces)
Round 2 (center color): Join center color with sl st into any corner ch-2 sp. Ch 3 (counts as first dc), 2 dc in same sp, ch 2, 3 dc in same sp (first corner made), ch 1, skip 3 dc, (3 dc, ch 2, 3 dc) in next ch-2 sp (corner), ch 1, skip 3 dc, rep 2 more times, sl st to top of beginning ch-3. Fasten off center color. (Eight 3-dc clusters, four ch-2 corner spaces, four ch-1 side spaces)
Round 3 (Color J, cream): Join Color J with sl st into any corner ch-2 sp. Ch 3 (counts as first dc), 2 dc in same sp, ch 2, 3 dc in same sp (corner), ch 1, 3 dc in next ch-1 sp, ch 1, (3 dc, ch 2, 3 dc) in corner ch-2 sp, ch 1, 3 dc in next ch-1 sp, ch 1, rep 2 more times, sl st to top of beginning ch-3. Fasten off Color J. (Twelve 3-dc clusters, four ch-2 corner spaces, eight ch-1 side spaces)
Weave in all ends. Block each square to exactly 3 inches by 3 inches.
Square Layout
Front panel (reading top to bottom): Row 1 (bib) 1 square with Color A center, centered at top; Row 2 (upper body) 4 squares across, Color A centers; Row 3 (mid upper body) 4 squares across, Color B centers; Row 4 (mid body) 4 squares across, Color C centers; Row 5 (lower body) 4 squares across, Color D centers. Total front panel: 17 squares.
Back panel (reading top to bottom): Row 1 (upper back) 4 squares across, Color B centers; Row 2 (mid back) 4 squares across, Color C centers; Row 3 (lower back) 4 squares across, Color D centers. Total back panel: 12 squares. The back panel is shorter because it has no bib; the back top edge aligns with the front body below the bib.
Each leg panel: top row 2 squares wide, Color C; middle row 2 squares wide, Color D; bottom row 2 squares wide, Color E. Each leg uses 6 squares, so two legs equal 12 squares total.
The remaining 5 squares fill in the sides and the crotch gusset area during assembly.
Joining the Squares
Use Color J (cream) and your yarn needle. Hold two squares with right sides facing outward. Whipstitch or mattress stitch through the outermost loops of corresponding stitches, aligning the ch-1 side spaces and ch-2 corner spaces carefully.
Join squares horizontally within each row first to form strips. Then join the strips vertically to complete your panels. After joining, your front body panel (not counting the bib square) should measure approximately 12 inches wide by 12 inches tall.
Bib Pattern
After the front panel is assembled and the single Color A bib square is attached at the top center, work the bib surround. With Color A and the G-6 hook, join yarn to the top right corner of the bib square with a sl st.
Bib Border Round 1: Ch 1, sc evenly around all 4 sides of the bib square, working 3 sc in each corner ch-2 sp and 1 sc in each dc across each side (approximately 11 sc per side, 3 sc in each corner). Sl st to first sc to join. (56 sc)
Bib Border Round 2: Ch 1, sc in each sc around, working 3 sc in each corner sc. Sl st to join. (64 sc)
Fasten off Color A. Weave in ends.
Button loops: With Color A, join with sl st to top right corner sc. Ch 1, sc in same sc, ch 4 (forms button loop), sc in next sc, fasten off. Repeat for top left corner.
Shoulder Strap Pattern
Make 2 straps. With Color A and the F-5 (3.75 mm) hook, ch 8.
Row 1: Dc in 4th ch from hook and in each ch across. (6 dc, counting t-ch as 1 dc)
Rows 2 to 18: Ch 3, turn, dc in each dc across. (6 dc)
At the end of Row 18, do not fasten off. Work 1 round of sc edging around all 4 sides of the strap for a clean finish: ch 1, sc evenly around the strap (approximately 3 sc per dc row end at the sides, 1 sc per dc at the short ends), sl st to first sc to join.
Fasten off. Weave in ends. Your completed strap should measure approximately 1 inch wide by 9 inches long. Adjust the length by adding or removing rows to fit your little one.
Sew a wooden button to the end of each strap. This end attaches at the back waistband. The other end feeds through the button loops at the bib corners.
Ankle Cuff Pattern
Make 2 cuffs. With Color E and the F-5 (3.75 mm) hook, ch 11.
Row 1: Sc in 2nd ch from hook and in each ch across. (10 sc)
Rows 2 to 24: Ch 1, turn, sc in BLO of each sc across. (10 sc)
Join the short ends together with sl st to form a ring. Attach this cuff ring to the ankle opening of each leg using Color E and your yarn needle. Repeat for the second leg.
Finishing & Assembly
With right sides facing out, fold the front and back panels so their side edges meet, and align the lower edges. Remember the front panel is taller due to the bib.
Seam the left side edge of front to left side edge of back, inserting the side fill-in squares as you go. Repeat for the right side. Your body now forms a tube with the lower edge open for the legs.
Fold each leg panel in half lengthwise to form a tube, and seam the long edge closed. Attach each leg tube to the lower edge of the body at the appropriate opening. Seam the crotch gusset square at the center to close the gap between the legs.
Sew the buttons onto the strap ends securely, and attach the strap ends to the back waistband edge with reinforced stitching.
Weave in all remaining ends on the wrong side. Soak the completed romper in cool water with a small amount of gentle wool wash for 15 to 20 minutes, press gently between clean towels, and lay flat on a blocking mat, pinning each square into shape and aligning the cream lattice lines. Allow to dry completely, at least 24 hours.
Tips
Make a test square first and block it to exactly 3 inches. Small errors multiply across 46 squares.
Lay the whole ombre gradient out before joining. Seeing the color flow from mustard to mauve lets you adjust placement while nothing is permanent.
To size up to 18 to 24 months, use a US H-8 (5.0 mm) hook throughout to enlarge each square to about 3.5 inches. To size down to 6 to 12 months, use a US F-5 (3.75 mm) hook to reduce squares to about 2.5 inches.
To lengthen the inseam, add one additional row of Color E squares at the bottom of each leg panel. Always check button attachments before each use, and machine wash cold on a gentle cycle and lay flat to dry.
Sunset Ombre Granny Square Baby Romper Free Crochet Pattern
Materials
Steps
- Make and block 46 granny squares with ombre center colors and cream third rounds
- Lay out the front (17), back (12) and two leg panels (6 each) plus 5 fill-in squares
- Join squares with cream yarn, rows first, then strips
- Work the bib border (56 then 64 sc) and the two ch-4 button loops
- Make 2 buttoned shoulder straps in dc
- Make 2 BLO ankle cuffs and attach them to the leg openings
- Seam sides, leg tubes and crotch gusset, block the finished romper flat
- Block every square to exactly 3 inches before joining
- Lay the full gradient out before seaming so the color flow is right
- Size up with a 5.0 mm hook or down with a 3.75 mm hook throughout
- Check the wooden buttons are sewn on securely before each wear