Sunset Gradient Baby Romper Free Crochet Pattern
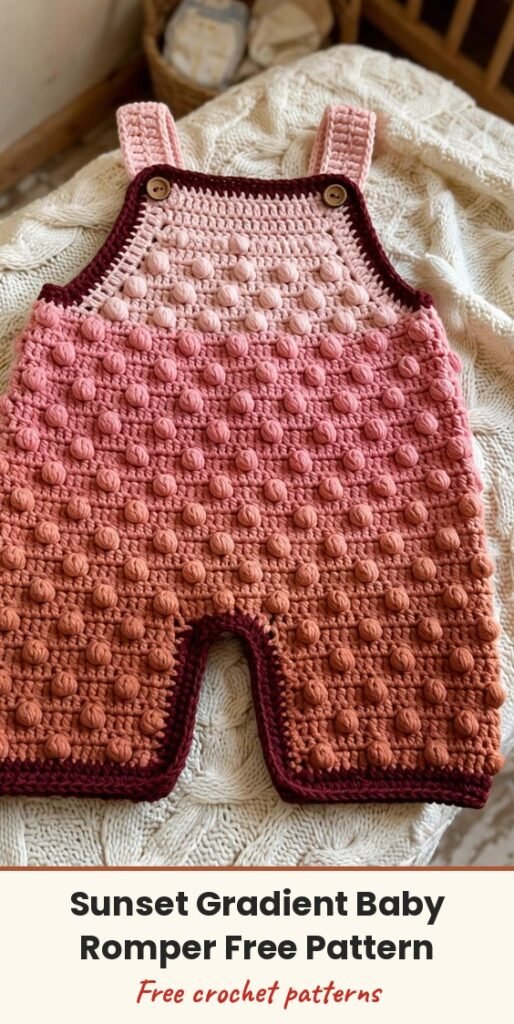
Table of Contents
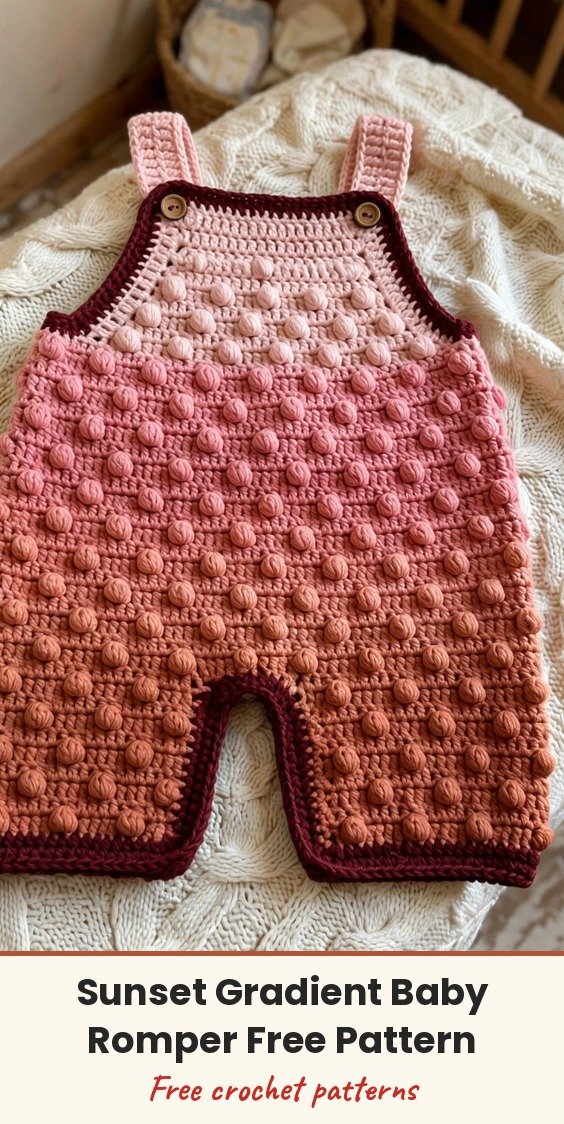
This little romper makes my heart so happy! The warm sunset gradient drifts from blush pink through rose and coral to terracotta, the bobble rows pop out with the sweetest texture, and a deep burgundy border frames everything beautifully.
We will work two identical flat panels, front and back, from the strap tops downward, then add the burgundy edging, sew on the straps and finish with snap buttons down the sides. Because the whole garment opens up flat, nappy changes are wonderfully easy.
The romper is written for size 3 to 6 months, with a chest of 19 inches and a length of about 13 inches from shoulder to leg opening.
Materials
- 45 yards DK weight yarn in blush pink (Color A)
- 55 yards DK weight yarn in rose pink (Color B)
- 60 yards DK weight yarn in dusty coral (Color C)
- 60 yards DK weight yarn in terracotta or deep coral (Color D)
- 120 yards DK weight yarn in burgundy or wine (Color E)
- US G-6 / 4.0mm crochet hook
- 12 gold snap buttons, 10 mm diameter
- Snap button pliers, or a sewing needle and thread
- Yarn needle for weaving in ends
- 4 stitch markers
- Scissors
- Blocking mat and pins
- Measuring tape
Abbreviations
- beg: beginning
- BLO: back loop only
- bo: bobble stitch (see Special Stitches)
- ch: chain
- ch-sp: chain space
- dc: double crochet
- hdc: half double crochet
- inc: increase, work 2 stitches in the same stitch
- rem: remaining
- rep: repeat
- RS: right side
- sc: single crochet
- sk: skip
- sl st: slip stitch
- st(s): stitch or stitches
- WS: wrong side
- yo: yarn over
Special Stitches
- Bobble stitch (bo): yarn over, insert hook into the indicated stitch, yarn over and pull up a loop (3 loops on hook). Yarn over, insert hook into the same stitch, yarn over and pull up a loop (5 loops on hook). Yarn over, insert hook into the same stitch again, yarn over and pull up a loop (7 loops on hook). Yarn over and draw through all 7 loops, then chain 1 to close and secure the bobble. This chain 1 does not count as a stitch. Bobbles are worked on right side rows so they pop outward on the finished garment.
- Half double crochet ribbing: work hdc into the back loop only of each stitch across for a stretchy, ridged texture at the leg openings.
Gauge & Size
- Finished size: 3 to 6 months; chest 19 inches total (each panel 9.5 inches), length from shoulder to leg opening 13 inches, strap length 7 inches each
- Gauge: 18 stitches and 20 rows = 4 inches in half double crochet; 18 stitches and 16 rows = 4 inches in the bobble pattern, both after blocking
- Construction: two identical flat panels with separate straps, burgundy edging, and snap closures at the sides and straps
- Skill level: Intermediate
Strap Pattern (Make 4)
Using Color A, ch 9.
Row 1 (RS): Hdc in 3rd ch from hook and in each ch across. Turn. (7 hdc)
Rows 2 through 20: Ch 2, hdc in each st across. Turn. (7 hdc)
After Row 20, do not turn. Fasten off. Each strap measures approximately 7 inches long and 1.5 inches wide. Make 4 straps total and set them aside.
Front Panel Pattern
The front panel is worked from the yoke downward. Change colours at the end of the row noted, completing the last yarn over of the final stitch in the old colour with the new colour, and cut the old colour leaving a 6 inch tail. Chain 2 at the beginning of hdc rows counts as the first hdc; chain 1 at the beginning of bobble rows does not count as a stitch.
Foundation: Using Color A, ch 45. (This yields 43 working stitches.)
Row 1 (RS): Hdc in 3rd ch from hook and in each ch across. Turn. (43 hdc)
Row 2 (WS): Ch 2, hdc in each st across. Turn. (43 hdc)
Row 3 (RS, bobble row): Ch 1, bo in first st, hdc in next st, (bo in next st, hdc in next st) across to last st, bo in last st. Turn. (43 sts: 22 bobbles, 21 hdc)
Row 4 (WS): Ch 2, hdc in each st across. Turn. (43 hdc)
Change to Color B at the end of Row 4.
Row 5 (RS): Ch 2, hdc in each st across. Turn. (43 hdc)
Row 6 (WS): Ch 2, hdc in each st across. Turn. (43 hdc)
Row 7 (RS, bobble row): Ch 1, bo in first st, hdc in next st, (bo in next st, hdc in next st) across to last st, bo in last st. Turn. (43 sts)
Row 8 (WS): Ch 2, hdc in each st across. Turn. (43 hdc)
Change to Color C at the end of Row 8.
Row 9 (RS): Ch 2, hdc in each st across. Turn. (43 hdc)
Row 10 (WS): Ch 2, hdc in each st across. Turn. (43 hdc)
Row 11 (RS, bobble row): Ch 1, bo in first st, hdc in next st, (bo in next st, hdc in next st) across to last st, bo in last st. Turn. (43 sts)
Row 12 (WS): Ch 2, hdc in each st across. Turn. (43 hdc)
Change to Color D at the end of Row 12.
Row 13 (RS): Ch 2, hdc in each st across. Turn. (43 hdc)
Row 14 (WS): Ch 2, hdc in each st across. Turn. (43 hdc)
Row 15 (RS, bobble row): Ch 1, bo in first st, hdc in next st, (bo in next st, hdc in next st) across to last st, bo in last st. Turn. (43 sts)
Row 16 (WS): Ch 2, hdc in each st across. Turn. (43 hdc)
Row 17 (RS): Ch 2, hdc in each st across. Turn. (43 hdc)
Row 18 (WS): Ch 2, hdc in each st across. Turn. (43 hdc)
Row 19 (RS, bobble row): Ch 1, bo in first st, hdc in next st, (bo in next st, hdc in next st) across to last st, bo in last st. Turn. (43 sts)
Row 20 (WS): Ch 2, hdc in each st across. Turn. (43 hdc)
Change to Color E at the end of Row 20. After Row 20 your bodice panel should measure approximately 4 inches tall, showing four colour bands.
Row 21 (RS): Ch 2, 2 hdc in first st (inc made), hdc in each st across to last st, 2 hdc in last st (inc made). Turn. (45 hdc)
Row 22 (WS): Ch 2, hdc in each st across. Turn. (45 hdc)
Row 23 (RS, bobble row): Ch 1, bo in first st, hdc in next st, (bo in next st, hdc in next st) across to last st, bo in last st. Turn. (45 sts: 23 bobbles, 22 hdc)
Row 24 (WS): Ch 2, hdc in each st across. Turn. (45 hdc)
Row 25 (RS): Ch 2, 2 hdc in first st (inc), hdc in each st across to last st, 2 hdc in last st (inc). Turn. (47 hdc)
Row 26 (WS): Ch 2, hdc in each st across. Turn. (47 hdc)
Row 27 (RS, bobble row): Ch 1, bo in first st, hdc in next st, (bo in next st, hdc in next st) across to last st, bo in last st. Turn. (47 sts: 24 bobbles, 23 hdc)
Row 28 (WS): Ch 2, hdc in each st across. Turn. (47 hdc)
Row 29 (RS): Ch 2, hdc in each st across. Turn. (47 hdc)
Row 30 (WS): Ch 2, hdc in each st across. Turn. (47 hdc)
Row 31 (RS): Ch 2, hdc in each st across. Turn. (47 hdc)
Row 32 (WS): Ch 2, hdc in each st across. Turn. (47 hdc)
Leg Opening Ribbing
The lower edge is divided into two leg sections with a gap in the centre for the crotch. For the right leg, with RS facing, join Color E at the bottom right corner of Row 32.
Ribbing Row 1: Ch 2, working in BLO, hdc in first 21 sts. Turn. (21 hdc)
Ribbing Rows 2 through 5: Ch 2, hdc in BLO of each st across. Turn. (21 hdc)
Fasten off after Row 5. Skip the centre 5 sts of Row 32, then join Color E in the next stitch for the left leg and work Ribbing Rows 1 through 5 the same way. (21 hdc each row)
Fasten off after Row 5. The panel should now measure approximately 10 to 10.5 inches from the top of Row 1 to the bottom of the ribbing.
Front Panel Edging
With Color E and RS facing, work a surface slip stitch border up the right side edge from bottom right to top right corner, across the top edge from right to left, and down the left side edge from top left to bottom left corner. Work approximately 1 slip stitch per row end on the side edges and 1 slip stitch per stitch (43 slip stitches) across the top edge. Do not work along the leg openings.
Then work 1 round of sc along the same edges: join Color E with a sl st at bottom right, ch 1, sc evenly along the right edge, 3 sc in the top right corner, sc across the top edge (43 sc), 3 sc in the top left corner, sc evenly along the left edge. Fasten off and weave in all ends on the front panel.
Back Panel & Assembly
Work the back panel identically to the front panel, following all instructions from the foundation through the edging. Make 1 back panel total.
Position one strap at each of the four top shoulder corners, two on the front panel and two on the back panel, aligning each strap with the outer 7 stitches of the top edge. Using Color E, whip stitch or slip stitch each strap end firmly to its corner with the right side of the strap facing out. If needed, work a single row of sc in Color E along the top edge of each strap to clean the edge.
Attach 12 snap buttons in total: 4 along the left side seam, 4 along the right side seam, 2 on the front left strap end and 2 on the front right strap end. For the side seams, place the first snap approximately 0.75 inches from the underarm corner and space the remaining snaps approximately 2 to 2.5 inches apart. On each strap end, attach one snap pair approximately 0.5 inches from the free end, with the receiving half on the front panel top edge at the matching position. Use pliers for pronged snaps, or sew sewn snaps with a bar tack stitch.
Finally, with Color E and RS facing, work 1 round of sc evenly around each leg opening, including along the ribbing edges and across the centre crotch stitches. Join with sl st to first sc and fasten off. The approximate count is 48 to 52 sc per leg opening, adjusted to keep the circle flat.
Finishing & Assembly
Weave in all yarn ends securely, burying tails at least 1.5 inches into the wrong side of the work. Wet block the finished romper by soaking it in cool water for 15 to 20 minutes, pressing out the excess water in a clean towel without wringing, then pinning it flat to the finished measurements and letting it dry completely. For acrylic yarn, use steam blocking instead, hovering the iron about 1 inch above the surface.
Tips
To size up to 6 to 12 months, increase the foundation chain to ch 51 (49 working stitches), add 2 rows in each gradient colour section, and work 4 increase rows in the lower body. For 12 to 18 months, start with ch 57 (55 working stitches) and work 6 increase rows. For 0 to 3 months, start with ch 39 (37 working stitches) and work only 1 increase row. Keep the foundation chain at an odd number of working stitches so the bobble pattern repeat stays correct.
Because each colour section is only a few rows, it is most economical to cut and rejoin colours rather than carry them along the side.
Wash the finished romper cold on a gentle cycle and lay it flat to dry. Remove the snap buttons before washing if they are not rustproof, and store the romper folded flat rather than on a hanger.
Sunset Gradient Baby Romper Free Crochet Pattern
Materials
Steps
- Make 4 identical straps in blush pink
- Work the front panel bodice in gradient bands with bobble rows to Row 20
- Work the burgundy lower body with increases to Row 32
- Add the ribbed leg openings in back loop hdc
- Work the surface slip stitch and sc edging on the front panel
- Work the back panel identically
- Sew the straps to the four shoulder corners
- Attach 12 snap buttons and finish the leg opening borders
- Keep bobble rows on right side rows so the bobbles face outward
- Cut and rejoin colours at each band instead of carrying them up the side
- Block gently so the bobble texture stands out
- Space side snaps evenly so the panels align when worn