How Does That Spiral Happen? Crochet Christmas Ornament Cover Pattern
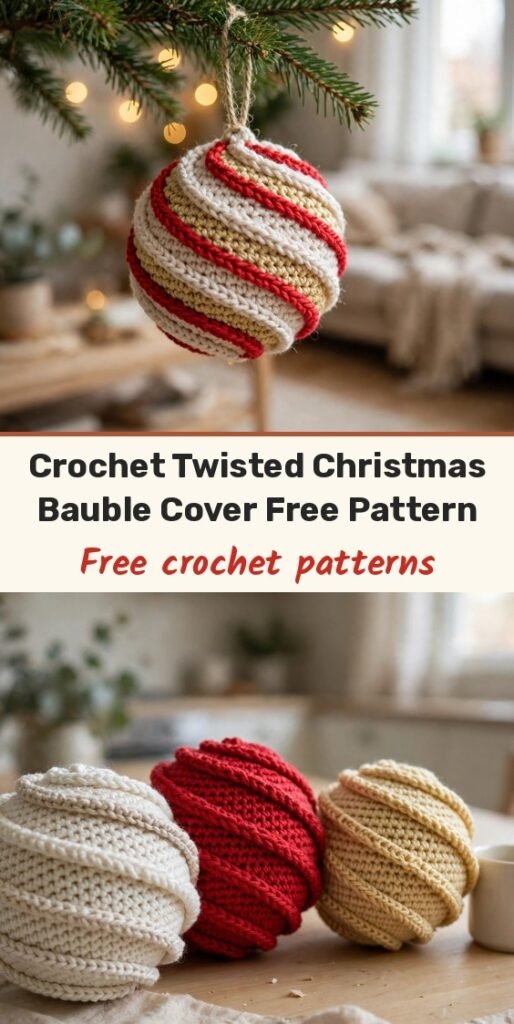
Table of Contents
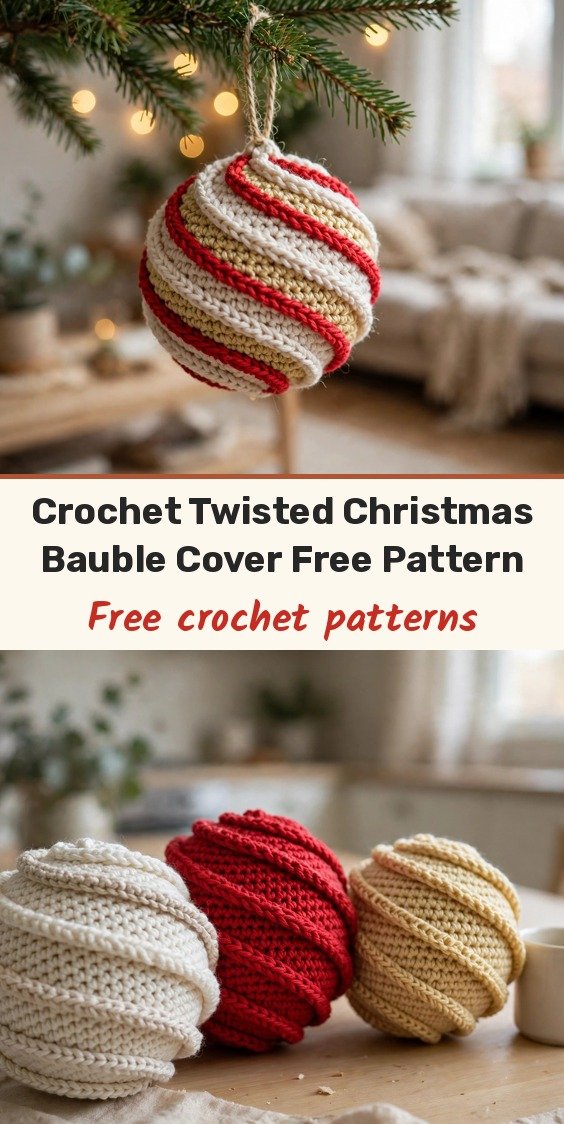
Hi, I’m Amy, and this is one of my favourite ways to dress up a plain tree! This twisted bauble cover slips over an inexpensive plastic ornament and turns it into a beautiful spiral-striped decoration that catches the light in the loveliest way.
The clever part is the construction. You crochet a flat, slanted panel with increases at one edge and decreases at the other, seam it into a tube, slip it over the bauble, and cinch both ends closed. It sounds fancy, but it is worked in simple single crochet in the back loop only.
Because it uses small amounts of fine cotton yarn, this is a wonderful stash-buster. Make a whole matching set in a weekend, or mix your colours for a tree that is completely your own.
Materials
- 15 grams super fine weight cotton yarn in Off White
- 10 grams super fine weight cotton yarn in Festive Red
- 10 grams metallic glitter cotton yarn in Pale Gold
- 2.5 mm crochet hook (US size B-1)
- 1 plain plastic Christmas ornament ball, approximately 2.5 inches in diameter
- Tapestry needle with a blunt tip
- Sharp scissors
- Locking stitch marker
Abbreviations
- ch = chain
- sl st = slip stitch
- sc = single crochet
- blo = back loop only
- inc = increase (2 single crochet in the same stitch)
- dec = decrease (single crochet 2 stitches together)
- st = stitch
- sts = stitches
Gauge & Size
- Gauge: 28 stitches and 26 rows in back loop single crochet = 4 inches x 4 inches, using a 2.5 mm hook
- Finished size: fits a standard 2.5 inch bauble
- Unseamed flat panel: approximately 3.25 inches tall by 7.5 inches long when stretched slightly
- Terminology: US terms
- The chain 1 turning chain at the beginning of each row does not count as a stitch
Twisted Bauble Cover Pattern
Start with Off White yarn. Foundation: Ch 23.
Row 1: Work 1 sc in the 2nd ch from the hook, 2 sc in the next ch, 1 sc in each of the next 18 ch, dec over the last 2 ch, ch 1, turn. (22 sts)
Row 2: Dec blo over the first 2 sts, 1 sc blo in each of the next 19 sts, 2 sc blo in the last st, ch 1, turn. (22 sts)
Row 3: Work 2 sc blo in the first st, 1 sc blo in each of the next 19 sts, dec blo over the last 2 sts, ch 1, turn. (22 sts)
Row 4: Dec blo over the first 2 sts, 1 sc blo in each of the next 19 sts, 2 sc blo in the last st. Fasten off Off White yarn and attach Pale Gold yarn on the last yarn over. Ch 1, turn. (22 sts)
Row 5: Work 2 sc blo in the first st, 1 sc blo in each of the next 19 sts, dec blo over the last 2 sts, ch 1, turn. (22 sts)
Row 6: Dec blo over the first 2 sts, 1 sc blo in each of the next 19 sts, 2 sc blo in the last st. Fasten off Pale Gold yarn and attach Festive Red yarn. Ch 1, turn. (22 sts)
Row 7: Work 2 sc blo in the first st, 1 sc blo in each of the next 19 sts, dec blo over the last 2 sts, ch 1, turn. (22 sts)
Row 8: Dec blo over the first 2 sts, 1 sc blo in each of the next 19 sts, 2 sc blo in the last st, ch 1, turn. (22 sts)
Row 9: Work 2 sc blo in the first st, 1 sc blo in each of the next 19 sts, dec blo over the last 2 sts, ch 1, turn. (22 sts)
Row 10: Dec blo over the first 2 sts, 1 sc blo in each of the next 19 sts, 2 sc blo in the last st. Fasten off Festive Red yarn and attach Pale Gold yarn. Ch 1, turn. (22 sts)
Row 11: Work 2 sc blo in the first st, 1 sc blo in each of the next 19 sts, dec blo over the last 2 sts, ch 1, turn. (22 sts)
Row 12: Dec blo over the first 2 sts, 1 sc blo in each of the next 19 sts, 2 sc blo in the last st. Fasten off Pale Gold yarn and attach Off White yarn. Ch 1, turn. (22 sts)
Rows 13 to 44: Repeat the colour sequence of Rows 1 to 12 three more times until you have a total of 44 rows.
Check the fit by wrapping the slanted strip around your plastic ornament ball. The ends should meet snugly with a slight stretch. Add or subtract 2 rows if your ornament is slightly larger or smaller. Fasten off, leaving a 12 inch tail for seaming.
Finishing & Assembly
Fold the panel in half so the foundation chain edge aligns with Row 44, with the wrong side of the fabric facing outward.
Thread the 12 inch tail onto your tapestry needle. Sew the short ends together stitch by stitch, matching each foundation chain loop to the corresponding stitch of the final row. Flip the tube right side out so the seam is hidden inside.
Thread a 10 inch piece of Off White yarn onto your tapestry needle and weave it in and out of the bottom row edges all the way around the lower opening. Pull firmly to cinch the bottom closed, tie a secure double knot, and push the tail ends inside.
Insert the plastic ornament into the open top of the tube, pushing it down until the cinched bottom sits centred against the base of the ball.
Thread another 10 inch piece of Off White yarn and weave it in and out of the top row edges around the neck of the ornament. Pull tight so the cover hugs the top curve, tie a tight knot, weave in the ends, and attach a golden ribbon loop for hanging.
Tips
Place a locking stitch marker in the first stitch of every row so you never lose track of where your increases and decreases belong.
When switching colours, finish the final yarn over of the last stitch in the previous row with the new colour to keep your stripes crisp.
Count your 22 stitches after every fourth row to ensure your diagonal edges stay straight.
Use lightweight plastic baubles rather than heavy glass spheres so your tree branches do not sag.
How Does That Spiral Happen? Crochet Christmas Ornament Cover Pattern
Materials
Steps
- Chain 23 and work the diagonal panel in back loop single crochet
- Repeat the 12-row colour sequence to 44 rows
- Check the fit around the bauble
- Seam the short ends into a tube
- Cinch the bottom closed
- Insert the bauble and cinch the top closed
- Add a ribbon loop for hanging
- Mark the first stitch of every row
- Change colour on the final yarn over for crisp stripes
- Count 22 stitches after every fourth row


