Crochet Cutest Santa Ornament
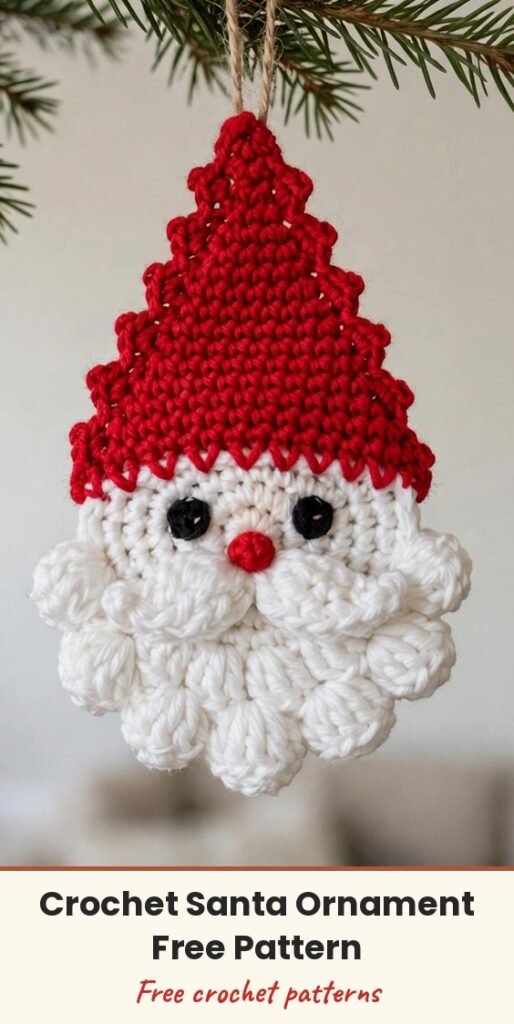
Table of Contents
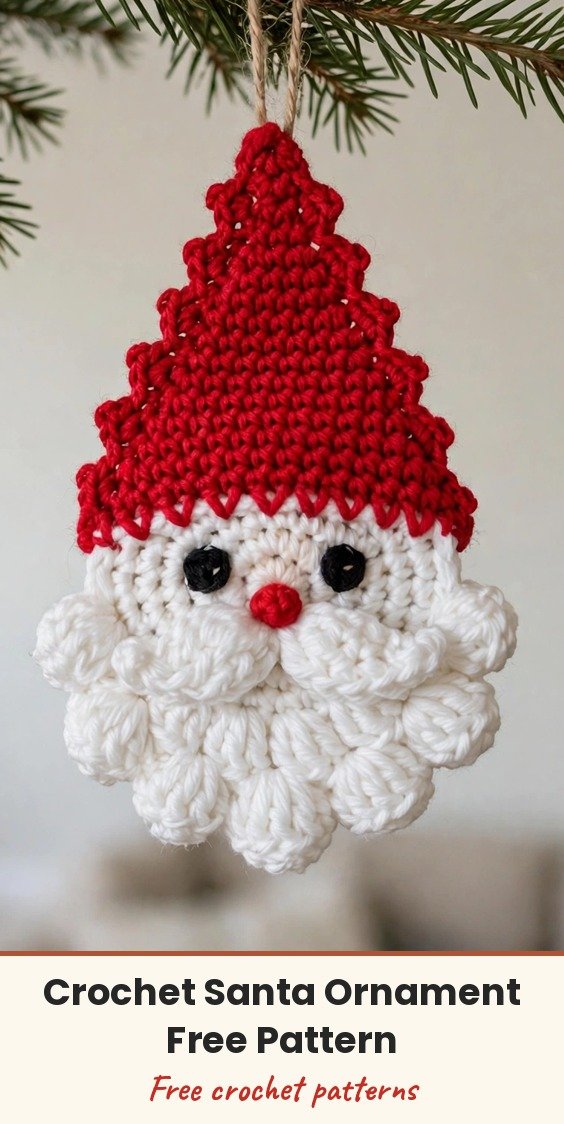
Hi, I am Amy, and this little Santa might be the cutest scrap-yarn make on my whole tree. He is worked flat, so there is no stuffing to fight with and no separate hat to sew on afterwards — the hat grows straight out of the fluffy white circle, and he still looks lovely and plump when he hangs.
I love that the picot edge does two jobs at once: it gives the hat that fun zigzag finish and, with a few extra chains at the tip, it becomes the hanging loop. Make one for your tree, then make a few more as gift tags, garland pieces or bag charms — one skein of each colour makes 3 to 4 ornaments.
Materials
- 35 yards DK weight (light worsted, #3) yarn in white, for the fur circle
- 25 yards DK weight yarn in red, for the hat
- Small scrap of red or pink yarn, for the nose
- 3.5 mm (US E/4) crochet hook
- 2 x 8 mm safety eyes, or black yarn for embroidered French knot eyes
- Optional: a pinch of polyester fiberfill, tucked behind the hat only
- Yarn or tapestry needle
- 2 stitch markers
- Scissors
- Ribbon or embroidery floss for hanging, optional if you use the built-in loop
Abbreviations
- MR: magic ring
- ch: chain
- sc: single crochet
- sl st: slip stitch
- puff st: puff stitch
- sc2tog: single crochet 2 together (decrease)
- picot: ch 2, sl st into 2nd ch from hook
- st(s): stitch(es)
Special Stitches
- Puff stitch: Yarn over, insert hook into stitch, yarn over and pull up a loop. Repeat that two more times into the same stitch (7 loops on hook), yarn over and draw through all 7 loops, then chain 1 to close and secure the top. Do not skip that chain 1 — it keeps the puff from unravelling.
- Picot edge: Chain 2, slip stitch into the second chain from hook, then slip stitch into the next base stitch before repeating. Space the picots by counting base stitches so the edge looks even.
Gauge & Size
- Finished size: roughly 3.5 to 4 inches (9 to 10 cm) wide, 5 to 6 inches (13 to 15 cm) tall including the hat point
- Construction: flat ornament, no fiberfill required
- Gauge: exact gauge is not critical — swatch a few puff stitches and check that no base fabric shows through between them
- Place a marker in the first stitch of Round 1 and move it up each round. It marks centre front, and every symmetry measurement counts outward from that point
- Read the eye placement note before Round 4 — safety eyes must go in while you can still reach the wrong side
Santa Fur Circle
Foundation: With white yarn, make a magic ring and work 6 puff sts into it. Join with a slip stitch to the top of the first puff, leaving the ring loose enough to tighten so the centre shows no hole. (6 puffs)
Work in joined rounds, chaining 1 at the start of each round. That chain does not count as a stitch.
Round 2: 2 puff sts in each stitch around. (12)
Round 3: Puff st, 2 puff sts in next st, repeat around. (18)
Round 4: Puff st in next 2 sts, 2 puff sts in next st, repeat around. (24) Pause here and insert both safety eyes before finishing the round — see Finishing & Assembly for exact placement.
Round 5: Puff st in next 3 sts, 2 puff sts in next st, repeat around. (30)
Round 6: Puff st in next 4 sts, 2 puff sts in next st, repeat around, join. Do not fasten off yet for marking. (36)
Tip: Puff stitches loosen with handling, so tug the working yarn gently right after the chain 1 closes each puff. Count before you move on — after Round 4 you should have 24 puffs with both eyes seated, and after Round 6 you should have 36 puffs and a circle that lies flat.
Santa Hat
Marking the hat zone: Count 14 consecutive stitches centred on the marked centre-front point of Round 6 — 7 stitches to each side. Place a second marker at each end of that span. Everything outside the markers stays as exposed white fur; everything inside becomes the hat foundation row.
Join red yarn in the first marked stitch.
Row 1 (RS): Ch 1, sc in same st and in each st across to the second marker, turn. (14 sc)
Row 2: Ch 1, sc2tog, sc to last 2 sts, sc2tog, turn. (12)
Row 3: Ch 1, sc evenly across, turn. (12)
Row 4: Ch 1, sc2tog, sc to last 2 sts, sc2tog, turn. (10)
Row 5: Sc evenly across, turn. (10)
Row 6: Sc2tog, sc to last 2 sts, sc2tog, turn. (8)
Row 7: Sc evenly across, turn. (8)
Row 8: Sc2tog, sc to last 2 sts, sc2tog, turn. (6)
Row 9: Sc2tog, sc to last 2 sts, sc2tog, turn. (4)
Row 10: Sc2tog twice. (2)
Fasten off Row 10 leaving a 6-inch tail. If you want a little loft, tuck a pinch of fiberfill behind the hat point before this final row closes the gap. Fold the tip flat and check it points straight up from the centre of the hat base — a leaning tip usually means an uneven decrease in Rows 2, 4 or 6.
Finishing & Assembly
Picot edge and hanging loop: Rejoin red yarn at the base corner of one diagonal hat edge. Work the picot edge evenly up the slope to the point. At the tip, chain 8 to 10, slip stitch back into the tip to form the hanging loop, then continue the picot edge back down the opposite diagonal edge to the far base corner. Fasten off and weave in all ends.
Eyes: Work symmetry from the centre-front marker, not by eye. On Round 4 (24 stitches), the marker sits at stitch 1. Count 5 stitches to either side and place the eyes there, so each eye sits exactly 5 stitches from centre and the eyes are 10 stitches apart.
Nose: With the red scrap yarn, work a single puff stitch, or three tightly stacked straight stitches, centred between the eyes, sitting just below the marked centre line, one round below the eyes. Secure on the wrong side and trim.
Weave in every tail through several stitches on the wrong side rather than knotting — knots work loose under the natural stretch of puff stitches. Steam the fur circle lightly from the back to help the puffs settle flat.
Tips
- Embroidered French knot eyes are the safer choice if small children or pets can reach the ornament.
- For a mini ornament of about 2.5 inches, use a 2.5 mm hook with fingering-weight yarn and keep the same counts. For an oversized version, use worsted weight with a 4.5 to 5 mm hook and add one extra increase round before the decreases.
- Making a set? Crochet all the white fur circles first in one sitting — your puff tension will stay much more consistent.
- Store flat in a box between seasons so the hat point does not develop a permanent bend. Hand wash only if needed, in cool water, and lay flat to dry.
Crochet Cutest Santa Ornament
Materials
Steps
- Work 6 puff stitches into a magic ring
- Increase the fur circle to 36 puffs over Rounds 2 to 6
- Insert the eyes during Round 4, 5 stitches either side of centre
- Mark 14 stitches for the hat zone
- Work hat Rows 1 to 10, decreasing to 2 stitches
- Add the picot edge and chain 8 to 10 hanging loop at the tip
- Work the nose and weave in all ends
- Tug each puff gently after its closing chain so the circle does not sag
- Place safety eyes by Round 4 while the wrong side is still reachable
- Space picots by counting base stitches, not by guessing distance
- Embroider the eyes if toddlers or pets can reach the ornament


