Christmas Poinsettia Granny Square Bag Free Crochet Pattern
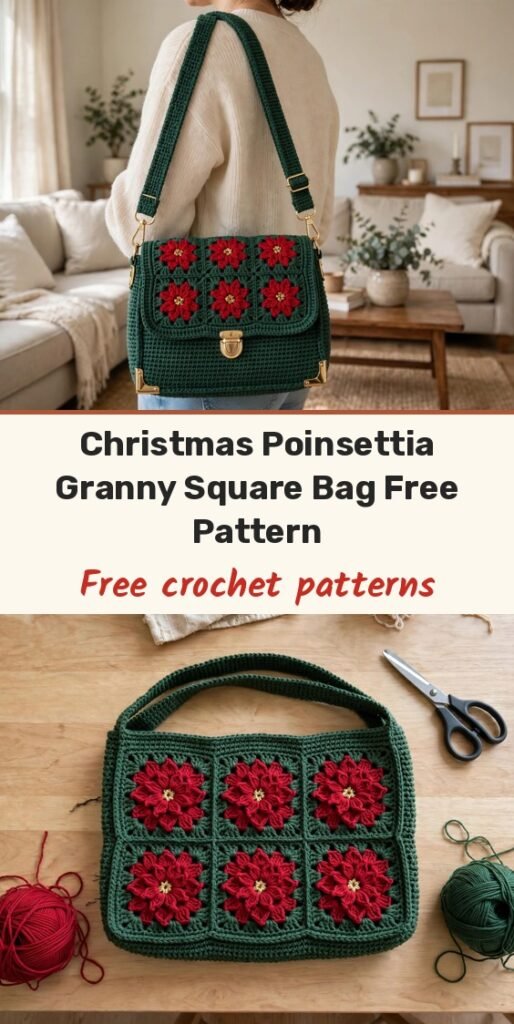
Table of Contents
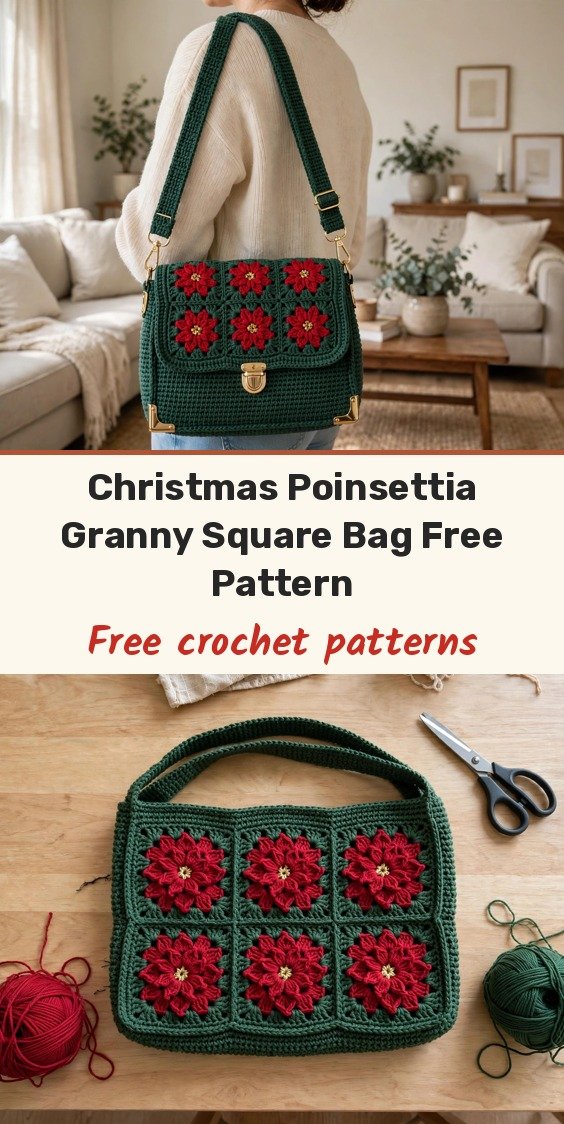
Hi, I am Amy, and I will be honest — this is a showpiece bag, the kind people stop you to ask about. Six raised poinsettia granny squares sit in a neat grid on a sturdy forest green crossbody body, with gold hardware and leather tabs finishing it like a boutique make. It looks like weeks of work, but it is really just repetition: one lovely square, made six times, plus a strong single crochet body.
Plan for 18 to 26 hours in happy sittings — each square takes about 45 to 60 minutes — and block your squares before joining. That one step makes the panel sew onto the front beautifully flat. If you have made two or three bags or motif projects before, you have everything you need for this one.
Materials
- 400 yards worsted weight yarn in forest green (Main Colour, MC)
- 100 yards worsted weight yarn in crimson red (Colour A)
- 60 yards worsted weight yarn in burgundy / deep wine (Colour B)
- 30 yards worsted weight yarn in gold / antique brass (Colour C)
- 40 yards worsted weight yarn in medium green (Colour D)
- 15 yards gold metallic thread or thin metallic yarn, for border trim
- US J-10 / 6.0 mm crochet hook, for bag body and strap
- US I-9 / 5.5 mm crochet hook, for poinsettia squares
- 2 swivel snap hooks, gold, 1 inch wide
- 2 D-rings, gold, 1 inch wide
- 2 leather strap tabs with D-ring slots, tan / cognac, approximately 1 inch wide
- Tapestry needle, stitch markers and scissors
- Optional: 0.5 yard lining fabric with sewing needle and thread, and one magnetic snap or a 9 to 10 inch zipper for closure
Abbreviations
- beg: beginning
- ch: chain
- ch-sp: chain space
- dc: double crochet
- hdc: half double crochet
- MC: main colour
- ps: puff stitch
- rep: repeat
- rnd: round
- RS: right side
- sc: single crochet
- sk: skip
- sl st: slip stitch
- sp: space
- st(s): stitch(es)
- WS: wrong side
- yo: yarn over
Special Stitches
- Puff stitch (ps): Yarn over, insert hook into indicated stitch or space. Yarn over, pull up a loop to approximately 0.5 inch height (3 loops on hook). Yarn over, insert hook into the same stitch or space. Yarn over, pull up a loop to the same height (5 loops on hook). Yarn over, insert hook into the same stitch or space. Yarn over, pull up a loop to the same height (7 loops on hook). Yarn over, draw through all 7 loops on hook. Chain 1 to close and lock the puff stitch.
- 3-double crochet cluster (3-dc cl): Yarn over, insert hook into indicated stitch or space, yarn over, pull up a loop, yarn over, draw through 2 loops (one incomplete dc made). Repeat two more times in the same stitch or space (4 loops on hook). Yarn over, draw through all 4 loops on hook.
- Granny square corner shell: Work (3 dc, ch 2, 3 dc) all into the same corner ch-2 space.
Gauge & Size
- Bag body gauge (sc, US J-10 / 6.0 mm hook): 16 sc x 18 rows = 4 inches x 4 inches (10 cm x 10 cm), blocked
- Granny square gauge (US I-9 / 5.5 mm hook): one completed 4-round poinsettia granny square = 3.5 inches x 3.5 inches (9 cm x 9 cm) after light blocking
- Bag body: approximately 11 inches wide x 12 inches tall x 2.5 inches deep (28 cm x 30.5 cm x 6.4 cm), not including strap
- Flap: approximately 11 inches wide x 3.5 inches deep (28 cm x 9 cm), folded over
- Each poinsettia square: approximately 3.5 inches x 3.5 inches before blocking. Assembled panel: approximately 10.5 inches wide x 7 inches tall
- Strap: approximately 48 inches (122 cm)
- Pattern notes: the bag body is worked flat in rows of single crochet, then seamed. The flap is a continuation of the back panel. The six squares are joined in a 3 column x 2 row grid and sewn onto the front as a panel. Turning ch 1 does NOT count as a stitch throughout. Colour sequence per square: centre Colour C (gold), first petal round Colour A (crimson), second petal layer Colour B (burgundy), then Colour D for the first background round and MC for the outer round.
Poinsettia Granny Square
Make 6 squares identically, using the US I-9 / 5.5 mm hook, RS always facing — do not turn.
Round 1 (Gold centre, Colour C): Make a magic ring. Ch 1. Work 8 sc into the magic ring. Sl st to first sc to join. Pull ring closed. (8 sc)
Round 2 (Crimson inner petals, Colour A): Join Colour A with sl st into any sc of Round 1. Work into each sc around: (ps, ch 1), then sl st into the next sc. You will make 8 puff stitches total, one in each sc, with a sl st between each. After the last sl st, sl st into the first ps of the round to close. (8 puff stitches) Your piece should look like a small sunburst with 8 raised crimson petals around the gold centre.
Round 3 (Burgundy outer petals, Colour B): Join Colour B with sl st behind Round 2, inserting the hook into the back bar of any sc from Round 1, or work into the sl sts between petals from Round 2. In each of the 8 positions: (ps, ch 1, sl st to next position) around. (8 ps, Colour B) You now have a two-layer poinsettia, approximately 2 inches in diameter.
Round 4 (Green granny corners, Colour D): Join Colour D with sl st into any ch-1 space between any two outer petals. Designate 4 petal positions as corners (every other one) and 4 as sides. Corner positions: (3 dc, ch 2, 3 dc) into the ch-sp. Side positions: (3 dc) into the ch-sp. Work as follows, starting at a corner: (3 dc, ch 2, 3 dc) into corner ch-sp, ch 1, (3 dc) into next ch-sp, ch 1, repeat 3 more times around. Sl st to top of first dc to join. (4 corner shells = 24 dc, 4 side clusters = 12 dc, total 36 dc, 4 ch-2 corner spaces, 8 ch-1 spaces)
Round 5 (Forest green outer border, MC): Join MC with sl st to any corner ch-2 sp. Ch 3 (counts as first dc). (2 dc, ch 2, 3 dc) into same corner ch-2 sp. Ch 1. (3 dc) into next ch-1 sp. Ch 1. (3 dc, ch 2, 3 dc) into next corner ch-2 sp. Ch 1. (3 dc) into next ch-1 sp. Ch 1. Repeat from the corner shell around all 4 corners. Sl st to top of beg ch-3 to join. Fasten off, leave a tail for seaming. (4 corner shells = 24 dc, 8 side clusters = 24 dc, total 48 dc, 4 ch-2 corner spaces, 8 ch-1 spaces)
Block all 6 squares lightly by pinning to 3.5 inches square and misting with water or steam. Allow to dry completely before joining.
Join Squares into Panel
Lay the squares out in a 3 wide x 2 tall grid, RS facing up, flowers all oriented the same direction. Join Square 1 to Square 2 and Square 2 to Square 3 for the top row, Square 4 to Square 5 and Square 5 to Square 6 for the bottom row, then join the two rows together across the full width.
Flat slip stitch seam: Hold two squares with WS together, RS facing out. Insert hook through both corner ch-2 sps, join MC with sl st, then sl st through both layers in each ch-sp and dc top across the edge, working (sl st, ch 1) at corner ch-2 alignments. Fasten off and weave in ends. The joined panel measures approximately 10.5 inches wide x 7 inches tall.
Gold trim border: Join gold metallic thread with sl st at any outer corner and sl st evenly around the entire outer edge of the panel, 1 sl st into each dc and (sl st, ch 1, sl st) at each outer corner. Fasten off, weave in ends, and set the panel aside.
Bag Body
Use MC and the US J-10 / 6.0 mm hook throughout. Ch 1 at the beginning of every row does NOT count as a stitch.
Front Panel: Ch 46. Row 1 (WS): Sc into second ch from hook and each ch across, turn. (45 sc) Rows 2 through 54: Ch 1, turn, sc across, turn. (45 sc each row) After Row 54, fasten off and weave in ends. The front panel measures approximately 11.25 inches wide x 12 inches tall.
Back Panel with Flap: Ch 46. Row 1 (WS): Sc into second ch from hook and each ch across, turn. (45 sc) Rows 2 through 54: Ch 1, turn, sc across, turn. (45 sc each row) Rows 55 through 69 (flap section): Ch 1, turn, sc across, turn. (45 sc each row) These 15 additional rows create the fold-over flap, approximately 3.5 inches. After Row 69, do not fasten off yet: rotate the work and sl st evenly down the right side of the flap (approximately 15 sl sts), sl st across the bottom edge of the flap (45 sl sts), sl st up the left side of the flap (15 sl sts), and sl st across the top. Fasten off and weave in ends.
Side Panels (make 2): Ch 12. Row 1 (WS): Sc into second ch from hook and each ch across, turn. (11 sc) Rows 2 through 54: Ch 1, turn, sc across, turn. (11 sc each row) Fasten off, leaving a long tail for seaming.
Base Panel: Ch 46. Row 1 (WS): Sc into second ch from hook and each ch across, turn. (45 sc) Rows 2 through 11: Ch 1, turn, sc across, turn. (45 sc each row) Fasten off, leaving a long tail for seaming.
Bag Assembly
Step 1: With RS of the front panel and RS of the base facing out, hold them WS together along the bottom edge and whipstitch through the outer loops of corresponding stitches across the 45-stitch width.
Step 2: Repeat Step 1 on the opposite long edge of the base panel, attaching the back panel bottom edge.
Step 3: Position one side panel between front and back along the right side. Whipstitch it to the front right edge, then to the back right edge. Repeat for the second side panel on the left.
Step 4: Close the four bottom corner joints where the base meets the side panels by whipstitching the seam intersections closed. The bag body is now an open-top box, approximately 11.25 inches wide x 12 inches tall x 2.5 inches deep.
Step 5: Join MC at the top edge of the front panel corner and work 1 round of sc evenly around the top opening: 45 sc across the front top, 11 sc across each side top, and along the base of the flap where it meets the bag back top. Join with sl st and fasten off.
Step 6: Position one leather tab on the right side of the bag, centred on the side panel top edge with the D-ring extending upward, and sew it to the exterior with at least 4 passes in an X pattern. Repeat on the left side.
Step 7: Centre the 6-square panel on the front face, leaving approximately 0.5 inch margin on the left and right edges and approximately 1.5 inches from the bottom edge. Whipstitch around the entire perimeter of the panel with MC or Colour D.
Step 8 (optional): Join gold metallic thread at the flap right edge and sl st evenly around the flap perimeter for a gold accent edge.
Strap and Closure
Strap (MC, US J-10 / 6.0 mm hook): Ch 9. Row 1: Sc into second ch from hook and each ch across, turn. (8 sc) Rows 2 through approximately 215: Ch 1, turn, sc across, turn. (8 sc each row) Work until the strap measures 48 inches from the foundation. Fasten off, leaving a long tail.
Strap edging: With RS facing, join MC at one corner and sl st evenly into each row end along one long edge. Fasten off. Repeat on the opposite long edge.
Strap attachment: Thread one end of the strap through one swivel snap hook, fold over 1 inch of strap end and whipstitch down tightly. Repeat at the other end with the second swivel snap hook. Clip the swivel snaps to the D-rings on the leather tabs at each side of the bag.
Closure Option A (magnetic snap, recommended): Attach one half to the underside of the flap, centred horizontally, 1 inch from the flap bottom edge. Attach the other half to the front panel, centred, approximately 1.5 inches down from the top edge. Option B: crochet a chain loop of approximately 10 ch on the underside of the flap centre and sew a large decorative button to the front panel. Option C: sew a 9 inch zipper to the inside top opening before full assembly.
Finishing & Assembly
Lining (optional but recommended): Cut two fabric rectangles 12 inches tall x 12 inches wide, two side rectangles 12 inches tall x 3.5 inches wide, and one base rectangle 12 inches wide x 3.5 inches wide. Sew the lining pieces together RS together along all seams, leaving the top edge open. Fold the top edge under 1 inch and press. Insert the lining into the bag WS to WS and hand stitch it to the inside top edge with whipstitch.
Weave in all remaining ends securely, doubling back through stitches. Block the bag body by misting lightly with water, reshape to dimensions, and allow to dry flat or stuffed with a bag shaper. Lightly re-steam the panel area if it flattened during sewing, and trim all thread ends close to the work.
Tips
- Choose a smooth, plied worsted yarn with good stitch definition — fuzzy yarns obscure the puff stitch petal detail.
- If the body fabric feels loose or floppy, go down one hook size. This bag must be dense and structured.
- To make the bag larger, add 8 sc to the width of the front and back panels to widen it by 2 inches, and add rows in increments of 4 for height. A 3 x 3 grid needs 9 squares.
- To make it smaller, reduce width and height symmetrically — a 3 x 1 grid of squares makes a lovely clutch style bag.
Christmas Poinsettia Granny Square Bag Free Crochet Pattern
Materials
Steps
- Make 6 poinsettia granny squares, Rounds 1 to 5 each
- Block squares and join into a 3 x 2 panel with gold trim
- Work front panel 45 sc x 54 rows and back panel with 15-row flap
- Work 2 side panels and the base panel in single crochet
- Seam the body into an open-top box and finish the top edge
- Sew on leather tabs and whipstitch the panel to the front
- Work the 48-inch strap, add snap hooks and clip to D-rings
- Add magnetic snap closure and optional lining
- Block all 6 squares before joining so the panel lies flat
- Use smooth plied worsted yarn so puff petals stay crisp
- Go down a hook size if the body fabric feels loose or floppy
- Each square takes about 45 to 60 minutes - pace the bag over several sittings


