Christmas Bear Ear Baby Hat Free Crochet Pattern
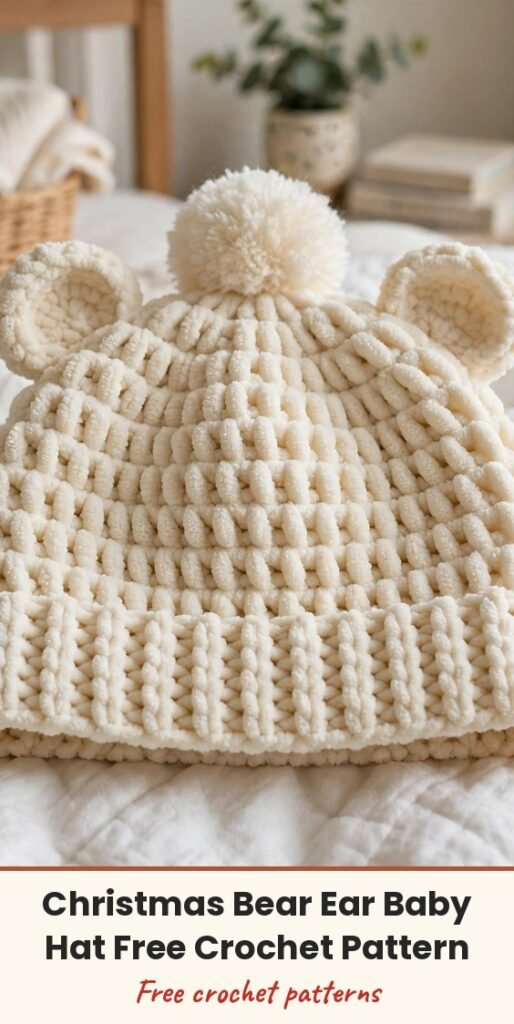
Table of Contents
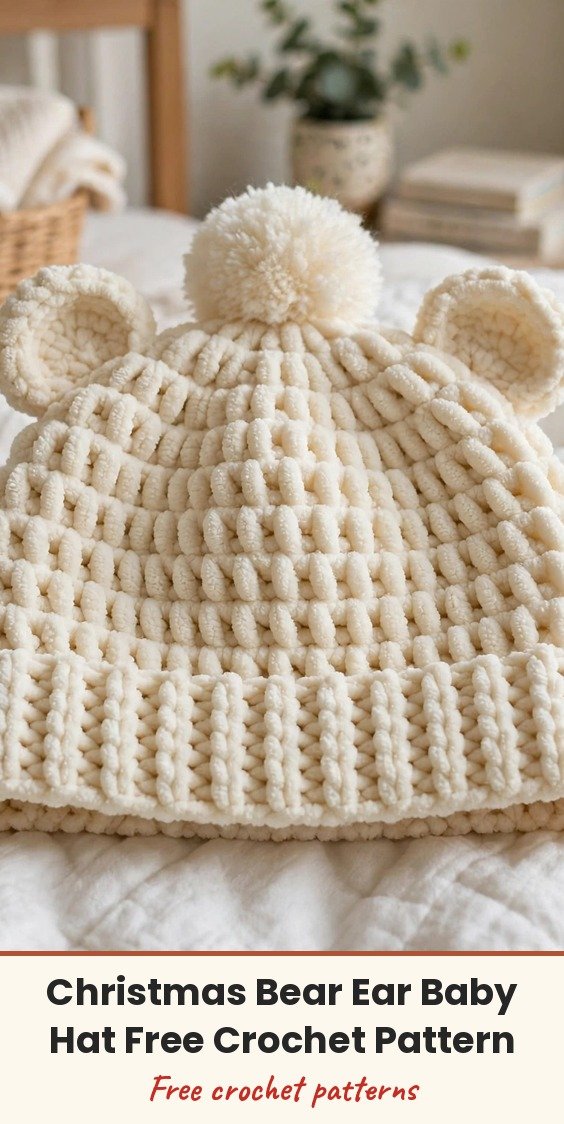
Those little bear ear baby hats look complicated, right? All that texture, the cute ears, the perfect pompom on top. I am Amy, and I promise you: if you can single crochet and double crochet, you can absolutely make this hat. The ribbed brim is just single crochet worked in the back loop only, the fancy textured body is a simple two-stitch repeat, and those adorable ears are tiny flat circles you fold in half and sew on.
This cozy beanie is quick enough to finish in an afternoon or two, impressive enough to gift with pride, and soft enough for the most sensitive baby skin. It is written for newborn to 3 months, with 3 to 6 months adjustments in parentheses throughout. Work it in cream, cranberry red, or forest green for a classic holiday colorway — or make one of each for the sweetest baby gift set.
Materials
- 80 to 100 yards bulky weight yarn (weight category 5 or 6); chenille or velvet-style yarn works best for the soft, plush texture
- US J-10 / 6.0 mm crochet hook, or whatever size you need to match gauge
- At least 2 stitch markers
- Yarn needle for weaving ends and attaching ears
- Scissors
- Pompom maker or two cardboard circles, approximately 2 inches (5 cm) diameter
- Pins for positioning ears before sewing
Abbreviations
- blo = back loop only
- BPdc = back post double crochet
- ch = chain
- dc = double crochet
- FPdc = front post double crochet
- hdc = half double crochet
- pm = place marker
- rnd = round
- sc = single crochet
- sc2tog = single crochet two together
- sk = skip
- sl st = slip stitch
- st(s) = stitch(es)
- yo = yarn over
Special Stitches
- Front post double crochet (FPdc): Yarn over. Insert your hook from the front of your work, around to the back, and back to the front around the post (the vertical bar) of the stitch in the round below. Yarn over and pull up a loop. Yarn over, pull through 2 loops. Yarn over, pull through the remaining 2 loops.
- Back post double crochet (BPdc): Yarn over. Insert your hook from the back of your work, around to the front, and back to the back around the post of the stitch below. Yarn over and pull up a loop. Yarn over, pull through 2 loops. Yarn over, pull through the remaining 2 loops.
- Single crochet two together (sc2tog): Insert hook into the next stitch, yarn over and pull up a loop. Insert hook into the following stitch, yarn over and pull up a loop. Yarn over and pull through all 3 loops on your hook.
Gauge & Size
- Gauge: 13 stitches and 10 rows = 4 inches (10 cm) in waffle stitch pattern, worked in joined rounds with a US J-10 / 6.0 mm hook, unblocked
- Newborn to 3 months: circumference approximately 13 inches (33 cm), height approximately 5.5 inches (14 cm) excluding pompom
- 3 to 6 months: circumference approximately 14.5 inches (37 cm), height approximately 6 inches (15.25 cm) excluding pompom
- Pattern notes: This hat is worked in joined rounds — slip stitch to join at the end of each round rather than working in a continuous spiral.
- For the waffle stitch body, always work your FPdc over the FPdc from the previous round and your BPdc over the BPdc from the previous round, to maintain the vertical columns.
- The turning chain at the start of each double crochet round counts as a stitch throughout the pattern.
The Brim
Foundation: Ch 43 (49 for larger size). Being careful not to twist your chain, sl st to first ch to form a ring.
Rnd 1: Ch 1, sc in same st as joining and in each ch around. Sl st to first sc to join. (42 sc) (48 sc for larger size)
Rnd 2: Ch 1, blo sc in same st and in each st around. Sl st to first blo sc to join. (42 sc) (48 sc)
Rnd 3: Rep Rnd 2. (42 sc) (48 sc)
Rnd 4: Rep Rnd 2. (42 sc) (48 sc)
Rnd 5: Rep Rnd 2. (42 sc) (48 sc)
Rnd 6: Rep Rnd 2. (42 sc) (48 sc)
Checkpoint: After Rnd 6, your brim should measure approximately 1.25 inches (3 cm) in height and stretch comfortably around a measuring tape set to 13 inches (14.5 inches for larger size).
The Hat Body
Rnd 7 (transition round): Ch 2 (counts as first dc), dc in each rem st around. Sl st to top of beginning ch-2 to join. (42 dc) (48 dc)
This round establishes the posts you will work around in the following rounds.
Rnd 8 (waffle round 1, set-up): Ch 2 (counts as first dc, treated as a BPdc column for alignment). Working in stitches of Rnd 7: FPdc in next st, BPdc in next st. Rep (FPdc in next st, BPdc in next st) around until 1 st remains before the beginning ch-2. FPdc in last st. Sl st to top of beginning ch-2. (42 sts) (48 sts)
Rnd 9 (waffle round 2): Ch 2 (BPdc column). FPdc around the post of the FPdc below. BPdc around the post of the BPdc below. Rep (FPdc, BPdc) to maintain column alignment to end of round. Sl st to top of ch-2. (42 sts) (48 sts)
Rnd 10: Rep Rnd 9. (42 sts) (48 sts)
Rnd 11: Rep Rnd 9. (42 sts) (48 sts)
Rnd 12: Rep Rnd 9. (42 sts) (48 sts)
Rnd 13: Rep Rnd 9. (42 sts) (48 sts)
Rnd 14: Rep Rnd 9. (42 sts) (48 sts)
For 3 to 6 months size only: Work one additional repeat of Rnd 9 here (Rnd 14a) to add height before crown shaping. (48 sts)
Checkpoint: After the final body round, your hat body (brim plus waffle section) should measure approximately 4 inches (10 cm) in total height (4.5 inches / 11.5 cm for 3 to 6 months). Those waffle columns should be crisp and aligned.
Crown Shaping
Rnd 15 (transition to sc): Ch 1, sc in same st and in each st around. Sl st to first sc. (42 sc) (48 sc)
Rnd 16 (decrease round 1): Ch 1, (sc in next 5 sts, sc2tog) 6 times. Sl st to first sc. (36 sc) (42 sc)
Rnd 17 (decrease round 2): Ch 1, (sc in next 4 sts, sc2tog) 6 times. Sl st to first sc. (30 sc) (36 sc)
Rnd 18 (decrease round 3): Ch 1, (sc in next 3 sts, sc2tog) 6 times. Sl st to first sc. (24 sc) (30 sc)
Rnd 19 (decrease round 4): Ch 1, (sc in next 2 sts, sc2tog) 6 times. Sl st to first sc. (18 sc) (24 sc)
For 3 to 6 months only: Work one additional decrease round here. Rnd 19a: Ch 1, (sc in next 2 sts, sc2tog) 6 times. Sl st to first sc. (18 sc)
Both sizes continue together from here:
Rnd 20 (decrease round 5): Ch 1, (sc in next st, sc2tog) 6 times. Sl st to first sc. (12 sc)
Rnd 21 (decrease round 6): Ch 1, (sc2tog) 6 times. Sl st to first sc. (6 sc)
Fasten off, leaving a long tail of approximately 8 inches (20 cm). Thread your yarn tail onto a yarn needle. Weave the needle through the front loop of each remaining 6 stitches around the crown opening. Pull tight to close completely. Knot securely and weave in the end on the wrong side.
Checkpoint: Your crown should be fully closed with no hole visible from the outside. The hat should measure approximately 5.5 inches (14 cm) tall for the smaller size, or 6 inches (15.25 cm) for the larger size.
Bear Ears
Make 2. Each ear starts as a small flat circle, then gets folded and sewn onto the hat.
Foundation ring: Ch 2.
Rnd 1: Work 6 sc in second ch from hook. Sl st to first sc to join. (6 sc)
Rnd 2: Ch 1, 2 sc in each st around. Sl st to first sc to join. (12 sc)
Rnd 3: Ch 1, (sc in next st, 2 sc in next st) 6 times. Sl st to first sc to join. (18 sc)
Fasten off, leaving a long tail of approximately 12 inches (30.5 cm) for sewing.
Ear assembly: Fold your circle in half with wrong sides together to form a half-moon shape. The curved edge will face upward once attached.
Ear placement: Position both ears on the front upper portion of the hat, approximately 0.5 to 1 inch (1.25 to 2.5 cm) down from the crown gather. Space them approximately 1 to 1.5 inches (2.5 to 4 cm) apart from each other, centered front to back. Pin in place before sewing. Using your long yarn tail, sew around the flat base edge of each ear firmly to the hat surface. Knot securely and weave in all ends on the wrong side.
Finishing & Assembly
Pompom: Cut two circles from cardboard, each approximately 2 to 2.5 inches (5 to 6.5 cm) in diameter. Cut a small hole in the center of each, approximately 0.5 inch (1.25 cm) in diameter.
Hold both circles together and wrap yarn around the ring repeatedly until the center hole is nearly full. Using sharp scissors, cut through all yarn loops along the outer edge, sliding your scissors between the two cardboard pieces.
Cut a separate 12-inch (30.5 cm) length of yarn. Slide this tie between the cardboard circles and around the center of your cut loops. Pull tightly and knot twice to secure. Remove the cardboard, fluff your pompom, and trim it into a neat round shape about 1.5 to 2 inches (4 to 5 cm) in diameter.
Thread the tie ends onto a yarn needle. Insert the needle down through the exact center of the crown from outside to inside. Pull the ties through and knot tightly several times on the inside. Weave in the ends securely.
Tips
- Check your gauge — for a fitted baby hat it really matters. Ten minutes of swatching saves a hat that slips over baby’s eyes.
- For a 6 to 12 month size, increase the foundation chain by 6 stitches (to 55 ch, giving 54 working stitches), add one additional waffle round, and work the first decrease round as (sc in next 6 sts, sc2tog) 6 times. For toddler size, increase the foundation chain by 12 stitches (to 61 ch, giving 60 working stitches) and add 2 additional waffle rounds.
- Each additional blo sc round adds approximately 0.25 inch (0.6 cm) of brim depth — work as many as you like before the body.
- Choose a soft, machine washable yarn: for acrylic and chenille, machine wash gentle in cold water and tumble dry low. Do not iron or dry clean.
- Store the finished hat folded flat or lightly stuffed with tissue to maintain the ear shape.
Christmas Bear Ear Baby Hat Free Crochet Pattern
Materials
Steps
- Work the ribbed back-loop brim in joined rounds
- Work the transition round of double crochet
- Work the waffle stitch body rounds
- Shape the crown with single crochet decreases and close the top
- Crochet two flat circle ears, fold and sew them on
- Make and attach the pompom
- Swatch first - gauge really matters for a fitted baby hat
- Work FPdc over FPdc and BPdc over BPdc to keep the waffle columns aligned
- Pin the ears in place before sewing, about 0.5 to 1 inch down from the crown gather


