Dusty Rose Romantic Bucket Bag Free Crochet Pattern
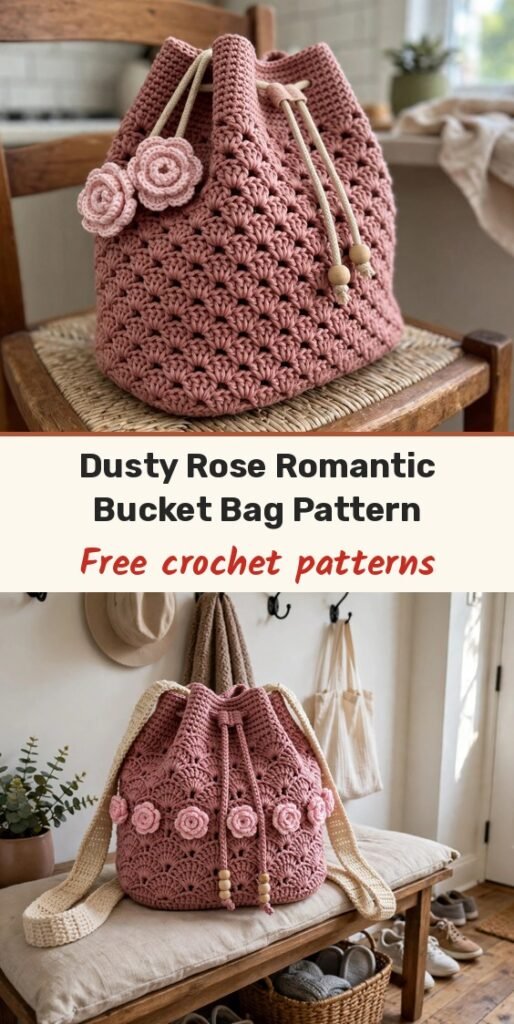
Table of Contents
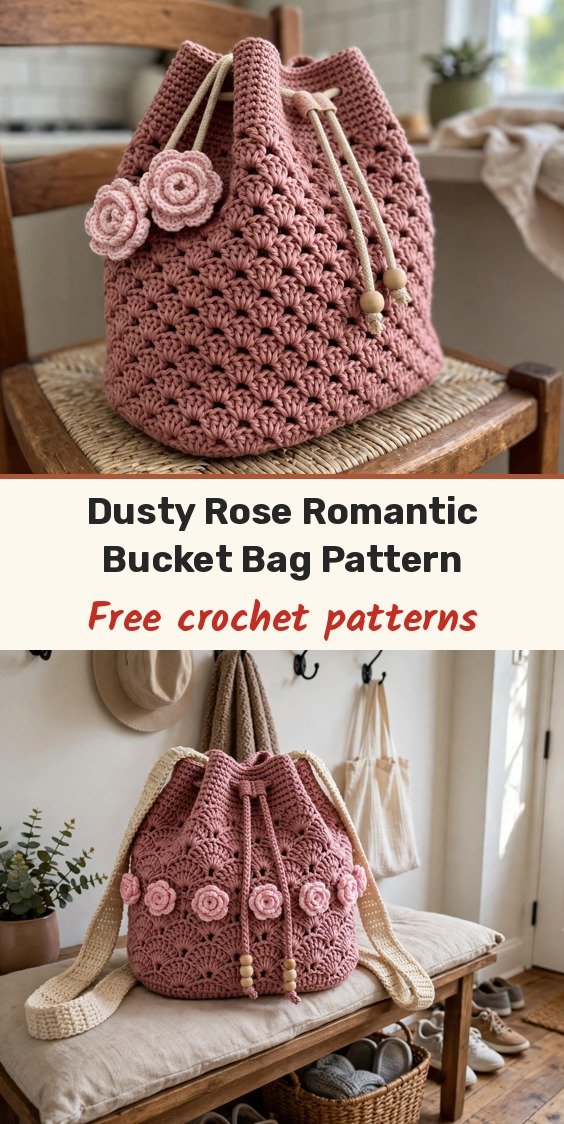
I had been looking for the perfect bucket bag for ages — something feminine but practical, structured but soft — and this dusty rose romantic bucket bag is exactly what I wanted! The shell-fan texture, the seven three-dimensional roses around the middle, and that sweet blush pink colorway make it look far more complicated than it really is.
We will work the base in continuous single crochet rounds out to 84 stitches, add a short single crochet section, then the shell-fan stitch section, an upper section with a drawstring eyelet round, and a scallop picot edging. Two D-ring tabs, a twisted drawstring with beaded rosebud ends, a fabric lining, and a cream adjustable strap finish it beautifully. The finished bag is about 8.5 inches tall, 22 inches around, and 7 inches across the base.
This one sits at intermediate to advanced, and you can plan for 20 to 30 hours for the bag body, roses, and edging, plus 2 to 4 more hours if you hand-sew your own lining.
Materials
- 400 yards worsted weight (Category 4) cotton or cotton-blend yarn in dusty rose (main color)
- 80 yards worsted weight yarn in light blush pink (contrast color, for roses and drawstring)
- 4.0mm crochet hook (US G/6) for the body and roses
- 3.5mm crochet hook (US E/4, optional) for tighter rose centers
- At least 4 stitch markers
- Tapestry needle and scissors
- 0.25 yard cotton canvas or quilting cotton, for the lining
- Sewing needle and thread
- 2 gold D-rings, 0.75 inch
- 2 gold swivel clasps, 0.75 inch
- 1 adjustable vegan leather shoulder strap in cream, 47 to 51 inches
- 6 to 8 pink seed beads or pearl beads, plus 2 small gold bead caps (optional)
- Thin cardboard or plastic canvas circle, 6.75 inches in diameter
- Fabric glue or hot glue
Abbreviations
- ch: chain
- sc: single crochet
- hdc: half double crochet
- dc: double crochet
- tr: treble crochet
- sl st: slip stitch
- MR: magic ring
- BLO: back loop only
- sk: skip
- st/sts: stitch / stitches
- rnd: round
Special Stitches
- Shell-Fan Stitch, Round A: skip 2 stitches, work 5 dc all into the next stitch (one shell), skip 2 stitches, sc in the next stitch. Each repeat uses 6 stitches.
- Shell-Fan Stitch, Round B (offset round): ch 3 (counts as first dc), work 2 dc in the same stitch (half-shell), then sc in the center (3rd) dc of the next shell below, work 5 dc in the next sc anchor, and continue around, ending with 2 dc in the same stitch as the beginning chain to complete the split shell. Join with sl st to the top of the beginning ch 3.
- 3D Crochet Rose: worked flat as a strip of increasing petals, then rolled and stitched into a dimensional bloom (full strip pattern in the Roses section below).
- Scallop Picot Edging: sl st in the next 2 stitches, ch 3, sl st back into the first chain of that ch 3 (picot made), sl st in the same stitch as the last sl st before the picot. Repeat around.
Gauge & Size
- Finished size: bag approximately 8.5 inches tall, 22 inches around, and 7 inches across the base
- Gauge: 18 sc and 20 rows = 4 inches in single crochet worked in the round with the 4.0mm hook, after blocking
- Shell-fan gauge: 1 complete repeat (6 stitches wide) = approximately 1.33 inches; 3 rows = approximately 1 inch
- Construction: base and body in continuous rounds, shell-fan stitch section, eyelet round with a twisted drawstring, sewn-on roses, optional fabric lining
- Skill level: Intermediate to Advanced
Base Pattern
Work in continuous rounds with the main color. Place a stitch marker at the beginning of each round and move it up as you work. Do not join unless instructed.
Round 1: MR, work 6 sc into the ring, pull the ring closed. (6 sc)
Round 2: 2 sc in each st around. (12 sc)
Round 3: (2 sc in next st, sc in next st) repeat around. (18 sc)
Round 4: (2 sc in next st, sc in next 2 sts) repeat around. (24 sc)
Round 5: (2 sc in next st, sc in next 3 sts) repeat around. (30 sc)
Round 6: (2 sc in next st, sc in next 4 sts) repeat around. (36 sc)
Round 7: (2 sc in next st, sc in next 5 sts) repeat around. (42 sc)
Round 8: (2 sc in next st, sc in next 6 sts) repeat around. (48 sc)
Round 9: (2 sc in next st, sc in next 7 sts) repeat around. (54 sc)
Round 10: (2 sc in next st, sc in next 8 sts) repeat around. (60 sc)
Round 11: (2 sc in next st, sc in next 9 sts) repeat around. (66 sc)
Round 12: (2 sc in next st, sc in next 10 sts) repeat around. (72 sc)
Round 13: (2 sc in next st, sc in next 11 sts) repeat around. (78 sc)
Round 14: (2 sc in next st, sc in next 12 sts) repeat around. (84 sc)
Your base should now measure approximately 6.75 to 7 inches in diameter and lie perfectly flat. That count of 84 matters: it is divisible by 6, which the shell-fan stitch needs.
Body Pattern
Round 15: Working in BLO only, sc in each st around. (84 sc)
Rounds 16 to 18: Working in both loops, sc in each st around. (84 sc each round)
Round 19 (setup): Sc in each st around. (84 sc)
Round 20 (Shell-Fan A): (Sk 2 sts, 5 dc in next st, sk 2 sts, sc in next st) repeat 13 more times. Join with sl st to first sc. (14 shells, 14 sc anchors)
Round 21 (Shell-Fan B): Ch 3, 2 dc in same st as join, (sc in 3rd dc of next shell, 5 dc in next sc anchor) repeat 12 more times, sc in 3rd dc of last shell, 2 dc in same st as beginning ch-3. Join with sl st to top of beginning ch-3.
Rounds 22 to 29: Continue alternating Shell-Fan A and B rounds as established. After Round 29 the shell-fan section should measure approximately 4 inches tall.
Round 30: Working into the shell structure, (sc in sc anchor, sc in first dc of shell, sc in center (3rd) dc of shell, sc in 5th dc of shell) repeat 13 more times. (56 sc)
Round 31: (Sc in next 6 sts, 2 sc in next st) repeat 7 more times. (64 sc)
Rounds 32 and 33: Sc in each st around. (64 sc each round)
Round 34 (eyelet round): (Sc in next 2 sts, ch 2, sk 2 sts) repeat 15 more times. Join with sl st to first sc. (16 sc, 16 ch-2 spaces)
Round 35: (Sc in next 2 sts, 2 sc in ch-2 sp) repeat 15 more times. (64 sc)
Rounds 36 to 38: Sc in each st around. (64 sc each round)
Round 39 (scallop picot edging): (Sl st in next 2 sts, ch 3, sl st back into the first ch of the ch-3 just made to complete the picot, sl st in the same st as the last sl st before the picot) repeat around. Join with sl st. Fasten off and weave in ends. (32 picot points)
Total height from the base fold line should measure 7.5 to 8 inches before the edging.
D-Ring Tabs Pattern
Make 2 tabs using the main color. Chain 10.
Row 1: Sc in 2nd ch from hook and in each ch across. Turn. (9 sc)
Rows 2 to 4: Ch 1, sc in each st across. Turn. (9 sc each row)
Fasten off, leaving a 10-inch tail. Fold each tab in half through a D-ring and sew it securely to the inside top edge of the bag at each side.
Roses Pattern
Make 7 full roses and 2 small rosebuds in the contrast color.
Full Rose foundation: chain 26.
Row 1: Starting in the 2nd chain from hook, work (sc, hdc) in first chain, (hdc, dc, hdc) in next chain, (hdc, dc, dc, hdc) in each of the next 5 chains, (hdc, dc, hdc) in next chain, (hdc, sc) in next chain. Continue with the larger petals: (dc, tr, tr, dc) in each of the next 4 chains, (dc, tr, dc) in next chain, sc in the last chain. Fasten off, leaving a 12-inch tail.
To assemble a rose, start at the small-petal end and roll the strip tightly to form the center, then continue rolling more loosely as the petals get larger. Use the tail to stitch through the base several times to secure the spiral. Each finished rose measures about 1.75 to 2 inches in diameter.
Small Rosebud: chain 14. Work Row 1 as: (sc, hdc, dc) in first chain, (dc, hdc, sc) in next chain, (hdc, dc, dc, hdc) in each of the next 3 chains, (dc, hdc) in next chain, sc in last chain. Roll tightly and stitch to secure. Each rosebud measures about 0.75 inch.
For placement, arrange 3 roses in a horizontal line centered on the front, spaced approximately 2.5 inches apart with the bottom of each rose about 2 inches above the base fold line. Mirror the front arrangement with 3 roses on the back, and place 1 rose centered on the right side at the same height. Sew each rose through its rolled base with the contrast tail, making several secure anchor stitches.
Finishing & Assembly
For the drawstring, use 2 strands of contrast yarn held together and chain 120. Slip stitch in the 2nd chain from the hook and in each chain back to form a twisted cord. Thread it through the eyelet round (Round 34) with both ends emerging at the front center, add 3 to 4 beads to each end, tie an overhand knot below the beads, and attach one small rosebud to each cord end, securing it with a small drop of fabric glue.
For the lining, cut a fabric circle 7.5 inches in diameter and a rectangle 23 inches by 9.5 inches. Sew the rectangle into a tube, attach the circle base, and fold the top edge down 0.5 inch. Insert the lining into the bag and slip stitch it to the inside along the top edge. Insert the cardboard or plastic canvas circle into the bottom for structure, and attach your adjustable strap by clipping the swivel clasps onto the D-rings.
Wet blocking gives the best finish: soak the bag body (before lining and hardware) in cool water for 10 to 15 minutes, shape it to measurements, and let it dry completely over 24 to 48 hours. Hand wash the finished bag in cool water with gentle soap, reshape and air dry, spot clean the strap with a damp cloth, and store the bag stuffed with tissue to keep its cylindrical shape.
Tips
Count carefully before you leave the base: 84 stitches divides by 6 for the shell-fan stitch, and a flat base at Round 12 (72 sc, about 5 inches across) is your best checkpoint.
Stick with smooth, tightly spun cotton. Fuzzy yarns like mohair blends will hide that gorgeous shell texture.
Sew each rose through its rolled base with several anchor stitches — these dimensional flowers get handled a lot on a daily bag.
Dusty Rose Romantic Bucket Bag Free Crochet Pattern
Materials
Steps
- Work the base in continuous sc rounds out to 84 sc at Round 14
- Work Round 15 in BLO and Rounds 16 to 19 in sc (84 sc)
- Work the shell-fan section in Rounds 20 to 29, alternating Round A and Round B
- Work the upper section in Rounds 30 to 38 with the eyelet Round 34
- Finish the opening with the scallop picot Round 39 (32 picots)
- Make 2 D-ring tabs and sew them inside the top edge
- Crochet 7 full roses and 2 rosebuds, sew the roses around the bag, and thread the beaded drawstring through the eyelets
- Sew and insert the fabric lining, add the base circle, and clip on the strap
- Check the base count at Round 14: 84 stitches must divide by 6 for the shell-fan section
- Use smooth, tightly spun cotton so the shell texture stays crisp
- Block the bag body before adding the lining and hardware