How to Crochet Slouchy Santa Hat Grinch Yoda Plushie for Gifting
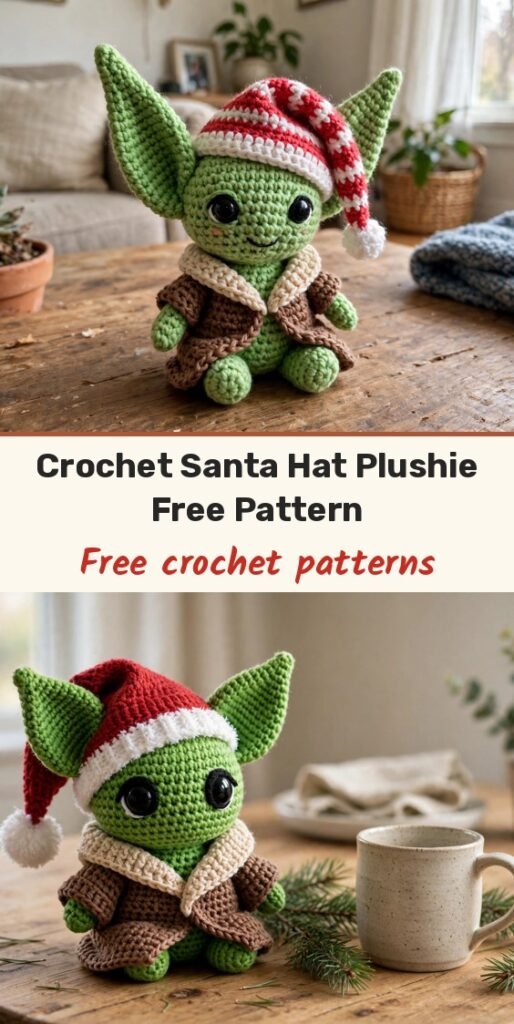
Table of Contents
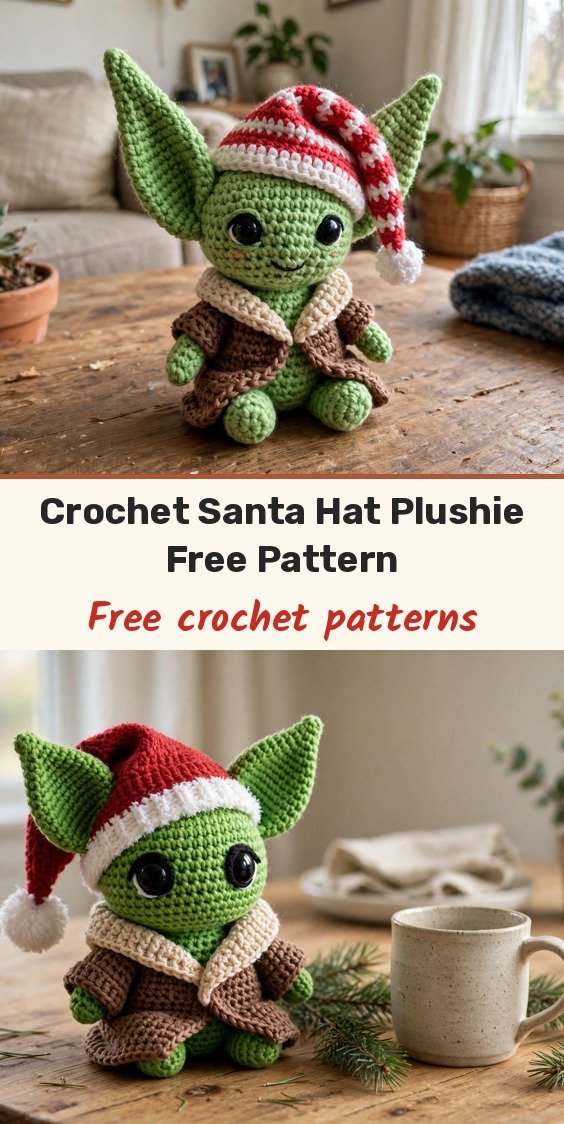
Hi, I am Amy, and oh, this little fellow melts my heart! This pocket-sized green plushie in his brown robe and slouchy Santa hat is worked almost entirely in one piece, feet and arms included, so there is hardly any sewing at all.
He stands about 8 cm (3.2 inches) tall and works up fast in soft plush yarn. The feet pop out as bobbles right in the body rounds, the arms are tiny chain arms worked straight in, and the fluffy collar is crocheted into the front loops you cleverly leave at the neck. Only those big pointy ears are sewn on separately.
Follow the colour changes exactly as written, keep a stitch marker moving, and do not skip the face sculpting at the end: those little draped eyelids are what give him all his character!
Materials
- Plush / chenille super bulky yarn in olive / lime green, for head, hands, feet and ears
- Plush / chenille super bulky yarn in brown / caramel, for coat / robe
- Plush / chenille super bulky yarn in beige / cream, for robe collar
- Bulky (weight 6) plush yarn in white, for hat pom-pom tip and brim
- Red plush yarn, for hat body
- 4.0 mm crochet hook
- 10 mm black safety eyes
- Polyester fiberfill stuffing
- Tapestry needle
- Stitch marker
- Sharp scissors
- Lighter, to melt eye posts or seal plush ends, optional
- Fabric glue or hot glue, to secure eyelids
Abbreviations
- MR: magic ring
- CH: chain
- SC: single crochet
- INC: single crochet increase, 2 SC in the same stitch
- DEC: single crochet decrease, SC 2 stitches together
- SL ST: slip stitch
- ST(S): stitch(es)
- BLO: back loop only
- FLO: front loop only
- RND(S): round(s)
Special Stitches
- Foot Bobble (5-DC cluster): Yarn over, insert hook into stitch, yarn over, pull up a loop, yarn over, draw through 2 loops, 5 times in the same stitch, leaving 6 loops on hook. Yarn over with the new colour and pull through all 6 loops on your hook.
- Colour Change: When switching colours on a single crochet or cluster, work the stitch until the final pull-through, then yarn over with the new colour and pull through all loops to complete the stitch.
Gauge & Size
- Finished size: approximately 8 cm (3.2 inches) tall
- Worked in continuous spiral rounds; use a stitch marker
- Skill level: Beginner, with careful colour changes
Ears Pattern
Make 2. Use the 4.0 mm hook and green plush yarn, worked in flat rows.
Row 1: CH 2, work 1 SC in the 2nd CH from hook. [1]
Row 2: CH 1, turn. 1 INC. [2]
Row 3: CH 1, turn. 2 INC. [4]
Row 4: CH 1, turn. 1 SC in each of the 4 STS. [4]
Row 5: CH 1, turn. 1 INC, 2 SC, 1 INC. [6]
Ear border: Do not turn. CH 1 and work SC evenly around the two slanted side edges: work 3 SC evenly down the first side edge, work 3 SC in the corner tip (the initial starting chain), then work 3 SC evenly up the second side edge. Join with a SL ST into the first stitch along the top straight edge.
Fasten off, leaving a 20 cm (8 in) tail for shaping and sewing. Make a second identical ear and set both aside.
Body and Head Pattern
Start with brown plush yarn and the 4.0 mm hook, in continuous spiral rounds from the base up.
Round 1: CH 2, work 6 SC into the 2nd chain from hook. [6]
Round 2: 6 INC. [12]
Round 3: Work 1 SC in brown, 1 INC in brown. In the next ST, work 1 SC in brown and change to green on the final pull-through of the 2nd SC of this increase. In the next ST, work 1 Foot Bobble in green, changing back to brown on the final pull-through. Work 1 INC in brown, then 1 SC in brown, 1 INC in brown, 1 SC in brown. In the next ST, work 1 SC in brown and change to green on the final pull-through of the 2nd SC of this increase. In the next ST, work 1 Foot Bobble in green, changing back to brown on the final pull-through. Work 1 INC in brown, 1 SC in brown, and 1 INC in the last ST. [18] Push both green foot bobbles outward.
Round 4: Work 6 SC in brown up to the first foot. Work 1 SC into the top loop of the foot. Work 5 SC in brown between the feet. Work 1 SC into the top loop of the second foot. Work 5 SC in brown to the end. [18]
Round 5: 1 SC in each of the 18 STS around in brown. [18]
Round 6: Work 5 SC in brown; on the 6th SC, change to green on the final pull-through. First arm: with green, CH 4. Starting in the 2nd CH from hook, work 1 SC in each of the 3 chain stitches back toward the body. Work a SL ST back into the base stitch on the body, changing back to brown on the pull-through. Work 8 SC in brown across the front; on the 9th SC, change to green on the final pull-through. Second arm: with green, CH 4. Starting in the 2nd CH from hook, work 1 SC in each of the 3 chain stitches back toward the body. Work a SL ST back into the base stitch on the body, changing back to brown on the pull-through. Work 3 SC in brown to the end of the round. [18 STS around body]
Round 7: In brown, repeat (1 SC, DEC) 6 times around. [12] Fasten off brown and cut. Hold the arms forward so they stay outside the body.
Round 8: Attach green yarn into the last loop of Round 7. In BLO, repeat (1 SC, INC) 6 times. [18] Keep the front loops exposed for the collar.
Round 9: In both loops, repeat (2 SC, INC) 6 times. [24]
Round 10: 1 SC in each of the 24 STS around. [24]
Round 11: 1 SC in each of the 24 STS around. [24]
Round 12: 1 SC in each of the 24 STS around. [24]
Round 13: Repeat (2 SC, DEC) 6 times. [18]
Eyes: Flatten the head slightly and align it with the arms. Insert the 10 mm black safety eyes between Rounds 11 and 12, spaced about 4 to 5 visible stitches apart, centred above the arms and feet. Secure the backing washers firmly inside.
Collar, Closing and Face
Collar: Hold the plushie upside down. Attach beige / cream plush yarn to the first exposed front loop of Round 7 at the centre back of the neck. CH 1, then repeat (1 SC, INC) 6 times around the 12 front loops. [18 SC] Join with a SL ST to the first SC. Fasten off and weave both tails inside the body.
Stuff the lower body and the bottom half of the head firmly with fiberfill before closing.
Round 14: Repeat (1 SC, DEC) 6 times. [12]
Round 15: 6 DEC consecutively around. [6]
Finish stuffing the head firmly. Fasten off green, leaving a long tail of approximately 35 cm (14 in). Thread the tail onto a tapestry needle, weave through the front loops only of all 6 remaining stitches, pull tightly to cinch the hole shut, and secure with a small knot.
Nose: Insert the needle into the closed top of the head and bring it out centred between the eyes along Round 11, leaving 1 ST space from each eye. Make 3 to 4 horizontal stitches across 1 to 2 centre stitches to build a plump nose ridge.
Eyelids: Bring the needle out at the outer corner of the left eye. Drape the yarn across the top curve of the eye and insert the needle into the inner corner, pulling until the yarn forms a hooded upper eyelid. Bring the needle out at the inner bottom corner, drape the yarn across the lower curve, and insert at the outer corner for the lower eyelid. Repeat on the right eye. Secure the eyelids with a tiny drop of fabric glue or hot glue underneath the yarn strands. Bring the needle out at the back of the head, knot securely, and hide the tail inside.
Santa Hat Pattern
Use the 4.0 mm hook throughout. Start with white super bulky plush yarn for the pom-pom tip.
Rnd 1: 4 SC in a magic ring. (4)
Rnd 2: Repeat (SC, INC) 2 times. (6)
Rnd 3: SC in each ST around. (6)
Rnd 4: Repeat (SC, DEC) 2 times. (4) Stuff this section with fiberfill before moving on.
Rnd 5: Switch to red plush yarn. SC in each ST around. (4)
Rnd 6: SC in each ST around. (4)
Rnd 7: SC in each ST around. (4)
Rnd 8: 3 SC, INC. (5)
Rnd 9: 4 SC, INC. (6)
Rnd 10: 5 SC, INC. (7)
Rnd 11: 6 SC, INC. (8)
Rnd 12: 7 SC, INC. (9)
Rnd 13: 8 SC, INC. (10)
Rnd 14: 9 SC, INC. (11)
Rnd 15: 10 SC, INC. (12)
Rnd 16: Repeat (5 SC, INC) 2 times. (14)
Rnd 17: Repeat (6 SC, INC) 2 times. (16)
Rnd 18: Repeat (7 SC, INC) 2 times. (18)
Rnd 19: Repeat (8 SC, INC) 2 times. (20)
Rnd 20: Repeat (9 SC, INC) 2 times. (22)
Rnd 21: Switch to white yarn for the brim. SC in each ST around. (22)
Rnd 22: SC in each ST around. (22) Fasten off invisibly, cut yarn, and weave in all loose ends.
Finishing & Assembly
Take one ear and fold it in half lengthwise at the base, pinching the edges together and leaving about 1 stitch open at the top edge. Take 2 to 3 needle stitches through the base to hold the cupped fold.
Position the ear on the side of the head level with Rounds 11 to 12, approximately 1 stitch behind the outer corner of the eye, with the folded hollow facing downward and slightly forward. Sew the base securely to the head.
Repeat on the opposite side so the ears sit symmetrically and stick straight out. Knot all tails, bury them inside the head, and trim any excess.
Place the finished slouchy Santa hat on the head to complete the plushie.
Tips
Change colour on the final pull-through of a stitch so the new colour starts cleanly.
Do not cut the green yarn at the arms; carry it inside or leave it attached.
Stuff the hat tip before you work into the red hat body, and stuff the head firmly before the final cinch.
A lighter can melt a protruding safety eye post flat inside the head; take care and press with a metal tool.
How to Crochet Slouchy Santa Hat Grinch Yoda Plushie for Gifting
Materials
Steps
- Crochet 2 ears in flat rows to 6 sts with border
- Work body Rounds 1 to 3 to 18 sts with green foot bobbles
- Work Rounds 4 to 7, adding chain arms in Round 6, to 12 sts
- Work head Rounds 8 to 13 to 18 sts and insert eyes between Rounds 11 and 12
- Work the collar into the front loops of Round 7 to 18 SC
- Close the head in Rounds 14 to 15, sculpt nose and eyelids
- Sew on the cupped ears at eye level
- Crochet the slouchy Santa hat Rounds 1 to 22 and place on head
- Change colour on the final pull-through for clean joins
- Keep the front loops of Round 7 free for the collar
- Stuff head and hat tip firmly before closing
- Secure sculpted eyelids with a tiny drop of glue


