Free Crochet Christmas Coaster Pattern
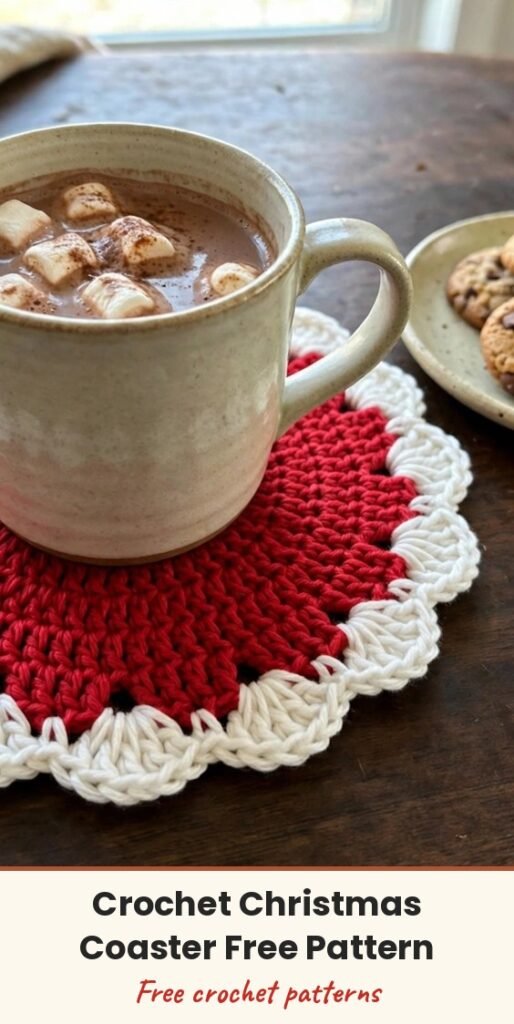
Table of Contents
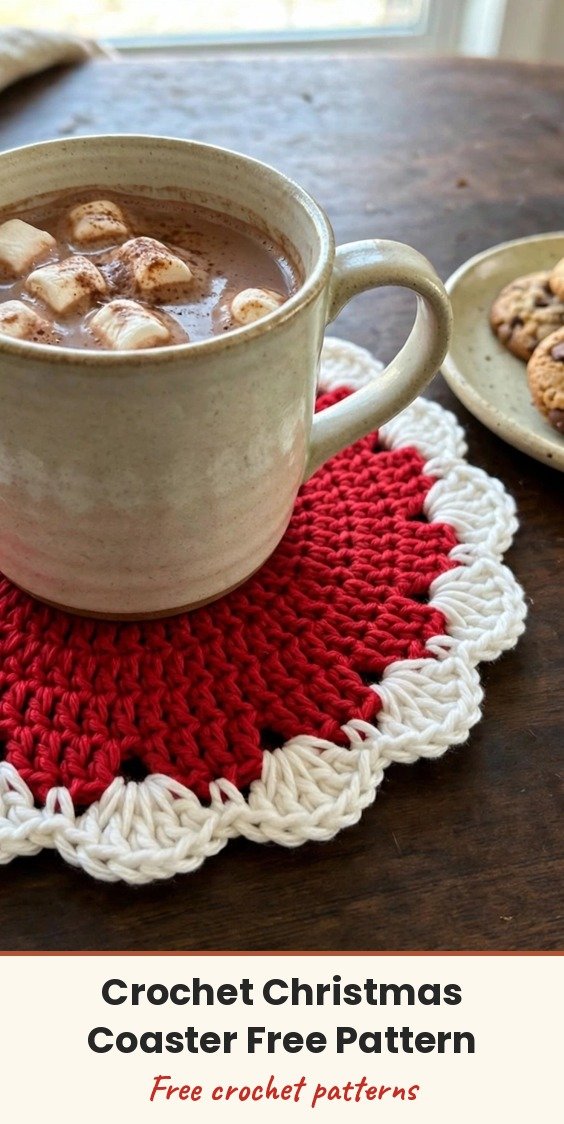
Every holiday table deserves a little handmade something under the mugs, and these cheerful coasters are exactly that. A simple red circle grows round by round, then a snowy white scalloped edge turns it into the sweetest festive coaster, ready for cocoa, coffee, and cookie plates.
I make these in little stacks while I watch a Christmas film, because each one finishes so quickly. Tie a bundle of four together with ribbon and you have a thoughtful gift that actually gets used all season long. If you can work a double crochet, you can absolutely make these.
Materials
- Four-ply yarn in red
- Four-ply yarn in white
- 4 mm crochet hook
- Scissors
- Yarn needle, for weaving in ends
Abbreviations
- ch: chain
- sc: single crochet
- dc: double crochet
- sl st: slip stitch
Gauge & Size
- Gauge: not critical for a coaster; keep your tension even so the circle lies flat
- The first 2 chains at the start of each round count as 1 dc
- Count your stitches at the end of every round to keep the circle growing evenly
- Finished coaster has 12 scallop clusters around the edge
Christmas Coaster Pattern
Coaster Base (Red)
Round 1: Start with a magic circle. Ch 2, then add 11 dc into the circle, for a total of 12 dc including the first chains. Pull the tail to close the circle tightly, ensuring no gaps remain. Sl st into the first dc.
Round 2: Ch 2. In the same space, work 1 dc (counting the chain as one dc) for a total of 2 dc. Then continue to work 2 dc in each stitch around. Sl st at the top of the first dc to close the round. (24 dc)
Round 3: Ch 2, then work 2 dc in the same space. In the next stitch, work 1 dc, followed by 2 dc in the next stitch. Alternate the pattern of 2, 1 until the end of the round. Sl st on the first dc to join. (36 dc)
Round 4: Ch 2 and crochet as before, increasing the pattern. This round alternates between 2 dc, then 1, 1, followed by 2 dc, 1, 1. Sl st to close the round. (48 dc)
Round 5: Continue the pattern by repeating 2 dc, 1, 1, 2, followed by 1, 1, 2, 1, 1 until the end of the round. Sl st on the first dc to close the round. (63 dc)
Scalloped Edging (White)
Switch to white yarn. Make a slip knot and attach it to the base with a sl st at any point.
Ch 3. In the same stitch, work 6 more dc, for a total of 7 dc in one stitch.
Skip 2 stitches, then insert your hook into the third stitch and work 1 sc.
Repeat the pattern of 7 dc in one stitch, skip 2 stitches, and 1 sc in the third stitch all the way around. (12 clusters of 7 dc)
On your last stitch, work 1 sc and finish the edge with a ch 1, then cut off the yarn.
Finishing & Assembly
Weave in all loose ends neatly with your yarn needle, taking care where the colours change so no ends peek through on the finished coaster.
Give the coaster a gentle flatten with your hands so the scallops sit evenly, and it is ready for the table.
Tips
- Always count your stitches at the end of every round to ensure the structure is correct and the circle stays flat.
- If you are new to the magic circle, take your time practising until the base feels secure and looks neat.
- Make a matching set in one sitting; these work up quickly and bundle beautifully as gifts.
- Weave in ends carefully on colour changes so the coaster looks seamless from both sides.
Free Crochet Christmas Coaster Pattern
Materials
Steps
- Work Round 1 in red with 12 dc in a magic circle
- Increase through Rounds 2 to 5 up to 63 dc
- Switch to white yarn for the edging
- Work 12 scallop clusters of 7 dc around the edge
- Fasten off and weave in all ends
- Count stitches at the end of every round to keep the circle flat
- Treat the starting ch 2 as 1 dc in every round
- Weave in colour-change ends carefully so nothing shows


