Sage Green Tiered Wall Planter Free Crochet Pattern
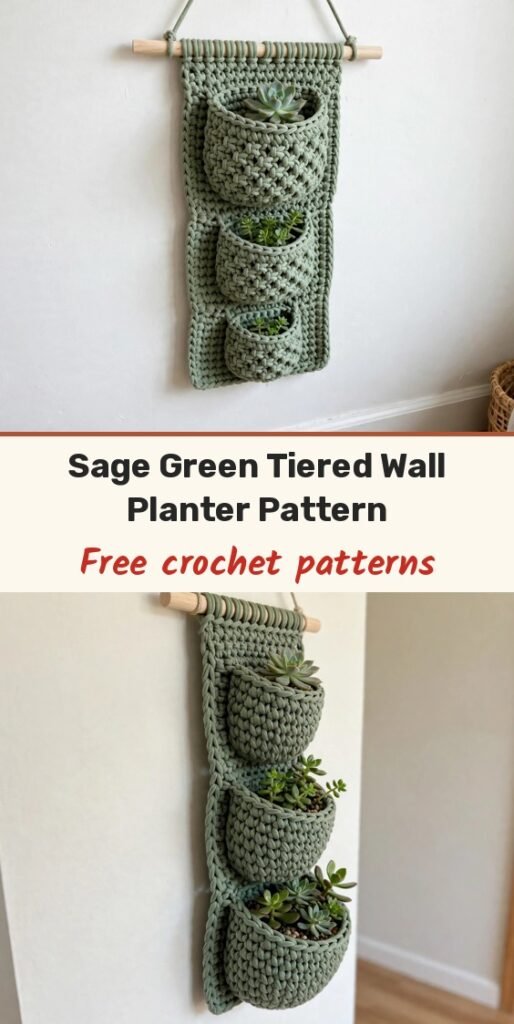
Table of Contents
Grab that chunky cotton yarn you have been saving, because this is the project that deserves it! This sage green tiered wall planter uses simple single crochet, but the clever three-pocket design gives you real visual impact without any complicated techniques. Each pocket is a half-cylinder attached to a flat backing panel, the pockets graduate from largest at the top to smallest at the bottom, and the whole piece hangs from a wooden dowel threaded through two crocheted loops.
I love this planter for small succulents and air plants, and it works just as happily holding craft supplies in your studio or little essentials in the bathroom. The thick yarn makes your stitches easy to see and count, and the structure practically builds itself once you understand the pocket shaping.
We will work the backing panel first, add the hanging loops, then build each pocket from the bottom up and attach it to the panel as we go, so there is no fussy seaming at the end.
Materials
- About 250 yards super bulky weight (6) cotton cord or t-shirt yarn in sage green
- US L-11 (8.0mm) crochet hook (size down to 7.0mm if your stitches look loose)
- 1 wooden dowel, 12 inches long and about 0.5 inches in diameter
- Tapestry needle for weaving in ends
- Stitch marker
- Scissors
- About 24 inches of jute twine or macrame cord for hanging
Abbreviations
- ch: chain
- sc: single crochet
- sl st: slip stitch
- inc: increase, 2 sc in the same stitch
- dec: decrease, single crochet two together
- st/sts: stitch / stitches
- sk: skip
- rep: repeat
- BLO: back loop only
Gauge & Size
- Finished size: backing panel about 5 inches wide by 22 inches long, with three graduated pockets
- Gauge: 10 sc and 11 rows equal 4 inches in single crochet
- Construction: flat backing panel with two dowel loops, plus three round pockets attached to the panel as they are worked
- Skill level: Easy to Intermediate
Backing Panel Pattern
Ch 13.
Row 1: Sc in the 2nd ch from the hook and in each ch across. (12 sc)
Rows 2 to 60: Ch 1, turn. Sc in each st across. (12 sc)
Your backing panel should measure about 5 inches wide by 22 inches long. Do not fasten off, because we will make the hanging loops next.
Hanging Loops
First loop Row 1: Ch 1, turn. Sc in the first 3 sts only. (3 sc)
First loop Rows 2 to 8: Ch 1, turn. Sc in each st across. (3 sc)
Fold the strip over your dowel to check the fit; it should wrap around comfortably with a little ease, so adjust the rows if you need to. Slip stitch the end of the strip to the top corner of the backing panel to form the loop, and fasten off.
Second loop: Rejoin the yarn in the 10th st of the top edge of the backing panel, counting from where you started the first loop.
Second loop Row 1: Sc in this st and the next 2 sts. (3 sc)
Second loop Rows 2 to 8: Ch 1, turn. Sc in each st across. (3 sc)
Slip stitch to attach and form the second loop. Fasten off and weave in the ends.
Bottom Pocket Pattern
This is the smallest pocket. Count 4 rows up from the bottom edge of the backing panel to mark the attachment position. Ch 16 and sl st to form a ring, being careful not to twist.
Round 1: Ch 1, sc in each ch around, and place a marker in the first st. (16 sc)
Round 2: Sc in each st around. (16 sc)
Round 3: (Sc in the next 3 sts, inc in the next st) 4 times. (20 sc)
Rounds 4 to 5: Sc in each st around. (20 sc)
Round 6: (Sc in the next 4 sts, inc in the next st) 4 times. (24 sc)
Rounds 7 to 10: Sc in each st around. (24 sc)
Round 11 (attachment round): Sc in the first 12 sts of the pocket. Now hold the pocket against the backing panel at the marked position and sl st through both the next pocket st and the corresponding st on the backing panel. Continue sl st through both layers for 12 sts in total.
Rounds 12 to 14: Continue working around the open front portion only, working sc across the front 12 sts, then sl st across the 12 sts attached to the backing.
Fasten off and weave in the ends.
Middle Pocket Pattern
This is the medium pocket. Count 20 rows up from the bottom edge of the backing panel to mark the position. Ch 20 and sl st to form a ring.
Round 1: Ch 1, sc in each ch around, and place a marker. (20 sc)
Round 2: Sc in each st around. (20 sc)
Round 3: (Sc in the next 4 sts, inc in the next st) 4 times. (24 sc)
Rounds 4 to 5: Sc in each st around. (24 sc)
Round 6: (Sc in the next 5 sts, inc in the next st) 4 times. (28 sc)
Rounds 7 to 12: Sc in each st around. (28 sc)
Rounds 13 to 16 (attachment rounds): Sc in the first 14 sts, then sl st through both the pocket and the backing panel for the remaining 14 sts.
Fasten off and weave in the ends.
Top Pocket Pattern
This is the largest pocket. Count 38 rows up from the bottom edge of the backing panel to mark the position. Ch 24 and sl st to form a ring.
Round 1: Ch 1, sc in each ch around, and place a marker. (24 sc)
Round 2: Sc in each st around. (24 sc)
Round 3: (Sc in the next 5 sts, inc in the next st) 4 times. (28 sc)
Rounds 4 to 5: Sc in each st around. (28 sc)
Round 6: (Sc in the next 6 sts, inc in the next st) 4 times. (32 sc)
Rounds 7 to 14: Sc in each st around. (32 sc)
Rounds 15 to 18 (attachment rounds): Sc in the first 16 sts, then sl st through both the pocket and the backing panel for the remaining 16 sts.
Fasten off and weave in the ends.
Finishing & Assembly
Weave in all remaining ends securely. For a project that will hold weight, weave through at least 2 inches of stitches and double back on yourself.
Slide the wooden dowel through both hanging loops and centre it so equal amounts extend on each side. Cut a 24 inch length of jute twine and tie each end securely to the dowel, about 1 inch from each end, to make the hanging loop. A light spray of fabric stiffener is optional and helps the pockets hold their shape, especially with a stretchier yarn.
Tips
Work with a slightly smaller hook than the yarn suggests. That firm single crochet fabric is what gives this planter its structure and stops the pockets sagging over time.
If you are hanging live plants, pop a plastic pot liner inside each pocket to protect the cotton from moisture, and spot wash gently with mild soap when it needs freshening up.
Want to make it your own? Extend the backing panel and repeat the pocket construction to add more pockets, work each pocket in a different shade for an ombre effect, or use back loop only single crochet on the pocket fronts for a pretty ridged texture.
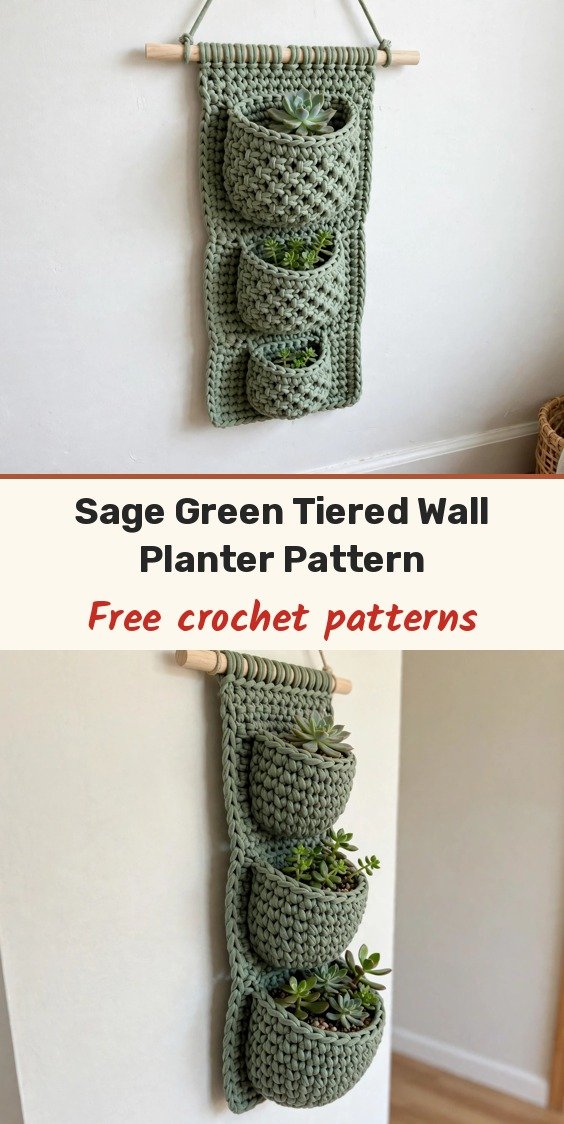
Sage Green Tiered Wall Planter Free Crochet Pattern
Materials
Steps
- Work the flat backing panel in sc rows to about 22 inches
- Make 2 hanging loops at the top of the panel
- Crochet the small bottom pocket and attach it to the panel in Round 11
- Crochet the medium middle pocket and attach it as you work
- Crochet the large top pocket and attach it as you work
- Weave in ends, slide the dowel through the loops and tie on the twine hanger
- Use a slightly smaller hook for firm, structured fabric
- Weave ends through at least 2 inches and double back, the planter holds weight
- Use plastic pot liners for live plants to protect the cotton
- Add more pockets by extending the backing panel