Layered Crochet Zinnia Flower with Realistic Petal Design
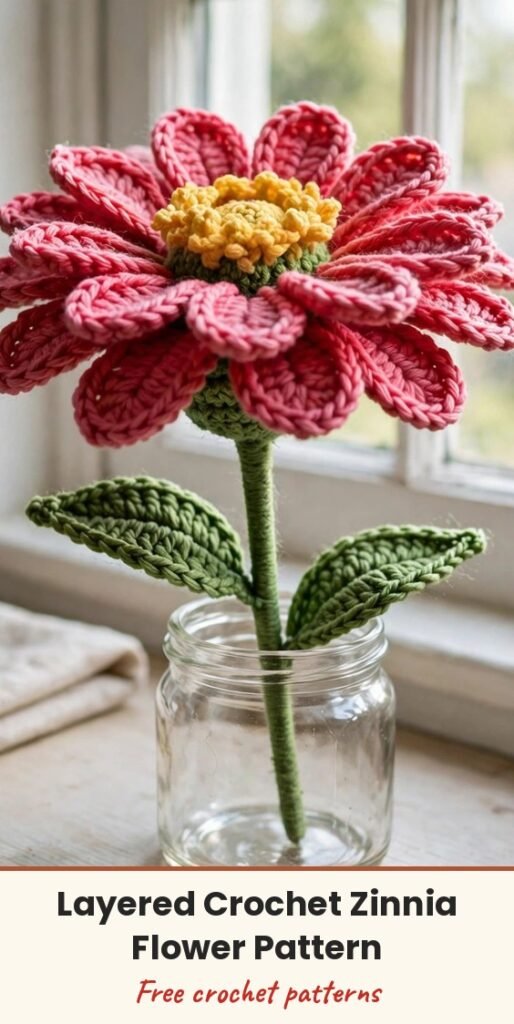
Table of Contents
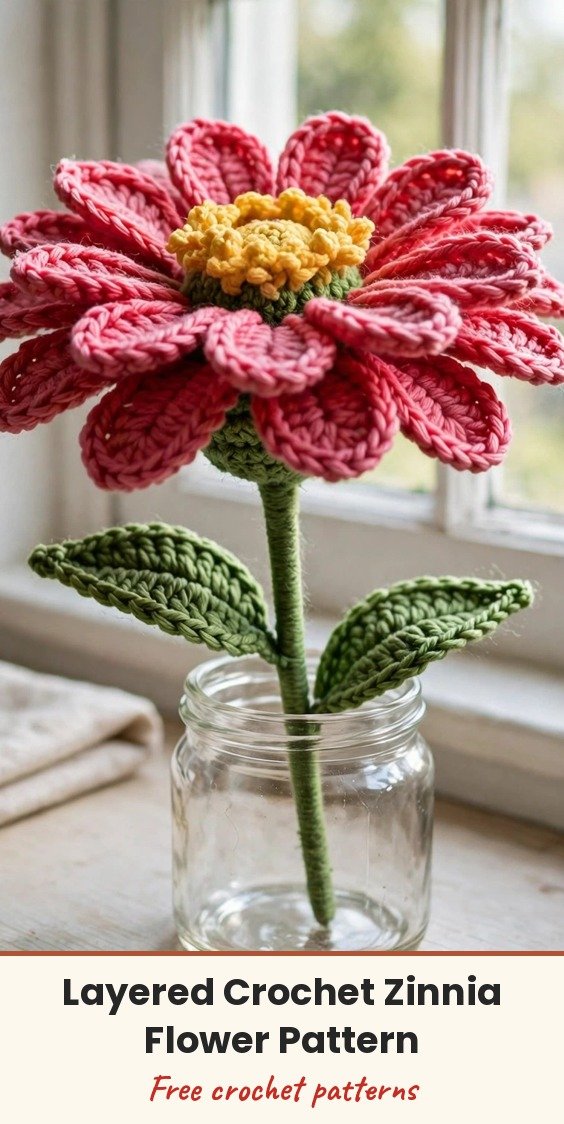
I love how real this zinnia looks when it is finished! We build it in layers: nine smaller wired petals, nine larger wired petals behind them, a textured raised centre, and a green base, then we mount everything on a wire stem with two leaves. Those wired petal edges are the secret, because they let the petals hold their pretty curved shape.
It is a beginner-friendly flower, and it is perfect for bouquets, home decor, bag embellishments, and handmade gifts. Once you make one, you will want a whole little garden of them in different petal colours!
We will work each part separately and assemble at the end, so let me walk you through it piece by piece.
Materials
- 4-ply milk cotton yarn in your petal colour
- 4-ply milk cotton yarn in yellow or green for the centre
- 4-ply milk cotton yarn in green for the base, stem, and leaves
- 2.5 mm crochet hook (2.0 mm to 3.0 mm also work)
- 2 mm floral stem wire (14 gauge) for the main stem
- 0.5 mm craft wire for shaping petals and leaves
- Scissors
- Hot melt glue
- Tapestry needle
Abbreviations
- ch: chain
- sc: single crochet
- hdc: half double crochet
- dc: double crochet
- inc: increase (2 stitches in the same stitch)
- sl st: slip stitch
- FLO/BLO: front loop only / back loop only
Gauge & Size
- Finished size: one layered zinnia flower head with a wired stem and 2 leaves; exact size varies with yarn and hook
- Construction: two petal layers of 9 petals each, a 5-round textured centre, a 4-round base, and 2 leaves, assembled on a 2 mm stem wire with glue
- Skill level: Beginner friendly
First Petal Layer Pattern
Make 9 petals. This layer is worked from a shared centre ring, first in the front loops and then wired around each petal edge.
Round 1: Create a magic ring and work 9 sc into the ring. Slip stitch to join. (9 sc)
Round 2 (working in FLO): (Chain 9, work 8 sc starting from the 2nd chain from your hook, slip stitch into the next FLO stitch). Repeat this 9 times around.
Round 3 (adding wire): Lay thin craft wire along the petal edge. Work around the petal: 1 sl st, 3 sc, 1 hdc, 1 dc, 1 dc inc, (1 dc, 1 hdc, ch 1). At the tip, do (1 sl st, ch 1). Move down the other side: (1 hdc, 1 dc), 1 dc inc, 1 dc, 1 hdc, 3 sc, 1 sl st. Repeat for all 9 petals.
Second Petal Layer Pattern
Make 9 larger petals, worked into the back loops left behind from Round 1 of the first layer.
Round 1 (working in BLO from Round 1’s leftover stitches): (Chain 11, work 10 sc starting from the 2nd chain from your hook, slip stitch into the next BLO stitch). Repeat 9 times.
Round 2 (adding wire): Lay craft wire along the petal edge. Work around the larger petals: 1 sl st, 3 sc, 1 hdc, 3 dc, 1 dc inc, (1 dc, 1 hdc, ch 1). At the tip, do (1 sl st, ch 1). Move down the other side: (1 hdc, 1 dc), 1 dc inc, 3 dc, 1 hdc, 3 sc, 1 sl st. Repeat for all 9 petals.
Flower Centre Pattern
Round 1: Work 6 sc into a magic ring, sl st to join, ch 1. (6 sc)
Round 2: Work 6 sc increases around, sl st, ch 1. (12 sc)
Round 3: Work 12 sc around, sl st, ch 1, turn your work. (12 sc)
Round 4 (working in FLO): Work 12 sc around, sl st. (12 sc)
Round 5 (change colour to accent/yellow for texture, working in FLO): (1 sc, ch 3, 1 sl st into the same stitch). Repeat 12 times to create a textured centre.
Flower Base Pattern
Round 1: Create a magic ring, work 8 sc into the ring, sl st, ch 1. (8 sc)
Round 2: Work 8 sc around, sl st, ch 1. (8 sc)
Round 3: Work 8 sc increases, sl st. (16 sc)
Round 4 (work in FLO): Work 16 sc around, sl st. (16 sc)
Leaf Pattern
Make 2 leaves in green.
Round 1: Chain 20. Starting from the 2nd chain, crochet: 1 sc, 1 hdc, 1 dc inc, 8 dc, 4 hdc, 3 sc. At the tip: (1 sc, ch 1, 1 sc). Move down the opposite side, repeating: 3 sc, 4 hdc, 8 dc, 1 dc inc, 1 hdc, 1 sc, sl st.
Round 2 (adding wire): Lay craft wire along the edge. Work across: 1 sc, 1 hdc, 1 hdc inc, 1 hdc, 1 hdc inc, 1 hdc, 14 sc. At the tip: (1 sc, ch 2, 1 sc). Continue: 14 sc, 1 hdc, 1 hdc inc, 1 hdc, 1 hdc inc, 1 hdc, sl st.
Finishing & Assembly
Prepare the stem: Take the 2 mm stem wire and bend the tip slightly with pliers, which prevents the flower from sliding.
Attach the centre: Push the wire through the middle of the flower centre and secure it using hot melt glue.
Layer the flowers: Slide the petal layers up the stem below the centre and secure them by tightly wrapping threads around the wire stem.
Add the base: Slide the green base up to cover the base threads and secure with glue.
Attach the leaves: Position the leaves slightly down the stem. Wrap green yarn tightly to cover the stem wire completely and secure with glue. Wrap any remaining yarn around the wire stem as you finish the leaf round, as the pattern directs.
Tips
Keep the craft wire lying right along the petal edge as you crochet Round 3 of each petal layer. That neat wired edge is what gives the petals their realistic, holdable curve.
Work the second petal layer into the back loops left from the very first round. Checking that you are in the BLO stitches keeps the two layers separate and full.
Shape each petal gently with your fingers after wiring, cupping the smaller layer forward and letting the larger layer open behind it for that full zinnia look.
Make a whole bouquet by repeating the flower in different petal colours and grouping the finished stems together in a vase.
Layered Crochet Zinnia Flower with Realistic Petal Design
Materials
Steps
- Crochet the first layer of 9 wired petals
- Crochet the second layer of 9 larger wired petals in the back loops
- Make the 5-round textured flower centre
- Make the 4-round green base
- Make 2 wired leaves
- Assemble centre, petal layers, base and leaves on the stem wire with glue
- Lay the craft wire right along the petal edge as you work
- Work the second layer into the back loops of Round 1
- Shape the wired petals with your fingers after assembly