Dusty Rose Pineapple Lace Halter Free Crochet Pattern
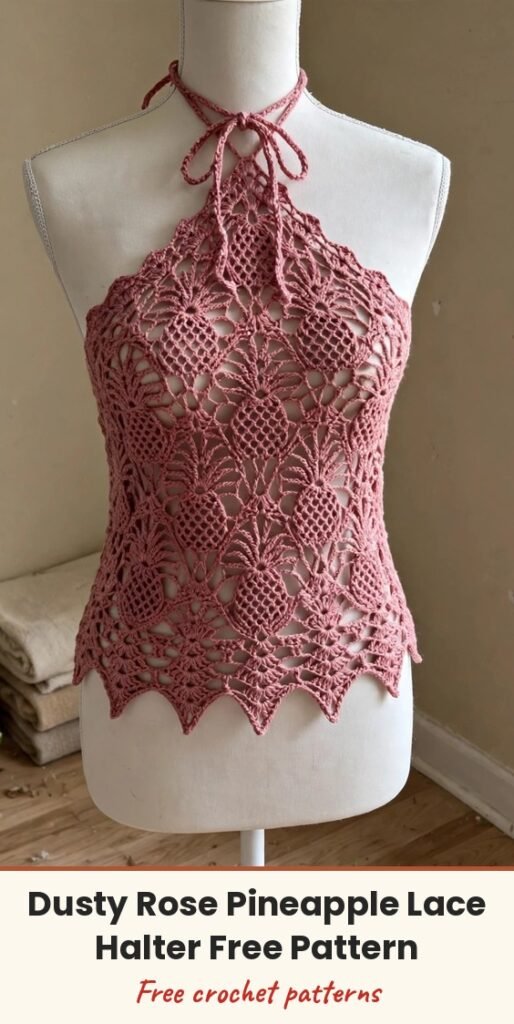
Table of Contents
This dusty rose halter is the one I reach for when someone tells me pineapple lace looks too hard to try. I love how the motifs stack in staggered tiers so the whole front becomes a diamond arrangement of little pineapples, each one narrowing down to a pretty pointed tip at the hem.
We will work the front panel flat from the neckline down in one continuous piece, then make a simpler mesh back panel, seam the sides, and finish with twisted cord ties that meet in a bow at the nape of the neck. It is written for sizes Small, Medium and Large, with the Medium and Large figures in parentheses, like this: S (M, L).
I will be honest with you: this is an advanced pattern, and blocking is not optional. But if you have worked shells or fans before and you are comfortable following lace, you can absolutely do this. Practice one pineapple motif as a swatch first and the rhythm will click.
Materials
- 600 (700, 800) yards of light weight (weight 3) cotton or cotton blend yarn in dusty rose
- 3.5mm (US E-4) crochet hook
- Yarn needle for weaving in ends and seaming
- Blocking mats and rust-proof T-pins
- Measuring tape
- 4 to 6 locking stitch markers
Abbreviations
- ch: chain
- ch-sp: chain space
- sc: single crochet
- hdc: half double crochet
- dc: double crochet
- tr: treble crochet
- sl st: slip stitch
- sk: skip
- st/sts: stitch / stitches
- RS: right side
- WS: wrong side
Special Stitches
- Pineapple Shell (P-shell): work (dc, ch 1, dc, ch 1, dc, ch 1, dc, ch 1, dc) all into the same stitch or chain space. This 5-dc fan forms the crown of each pineapple.
- Pineapple Body Row: sc in the first ch-1 sp of the shell below, then (ch 3, sc) in each remaining ch-1 sp across that shell. Each body row reduces the arches by one until a single sc forms the tip.
- Mesh Row: work (dc, ch 2, sk 2 sts or ch-sps, dc) to make the diamond mesh lattice between pineapple columns.
- Fan Border: work (sc, hdc, 3 dc, hdc, sc) all in the same ch-sp.
- Twisted Cord Tie: cut 6 strands of yarn each 60 inches long, fold in half and anchor the folded end, twist firmly until the cord kinks back on itself, fold in half again and let the halves twist together, then knot both ends. Each finished tie measures about 14 inches.
Gauge & Size
- Finished bust: 32 (36, 40) inches / 81 (91, 102) cm
- Top length from neckline to longest hem point: 17 (18, 19) inches / 43 (46, 48) cm
- Gauge: one complete pineapple motif measures 3.5 inches / 9 cm wide after blocking; 4 rows of dc mesh = 1 inch / 2.5 cm
- Construction: front panel worked flat top-down, back panel worked flat, side seams, twisted cord neck ties
- Skill level: Advanced
Front Panel
Foundation chain: Ch 59 (67, 75). This gives 4 (5, 6) pineapple motif units; each unit takes 14 chains plus 1 chain for each mesh column between units.
Row 1 (RS, setup): Ch 3 (counts as dc), dc in 4th ch from hook and in each ch across. (59 (67, 75) dc)
Row 2 (neckline edging, RS): Ch 1, turn. Sc in first st. (Sk 2 sts, Fan Border in next st, sk 2 sts, sc in next st) across, ending with sc in last st. (9 (11, 13) fans plus 2 edge sc)
Row 3 (pineapple setup, RS): With RS facing, rejoin yarn to the first st of Row 1 with a sl st. Ch 4 (counts as dc plus ch 1). (Sk 1 st, P-shell in next st, sk 1 st, ch 1, dc in next st, ch 1) rep across, ending dc in last st. (4 (5, 6) P-shells separated by ch-1, dc, ch-1 columns)
For size S, the Row 3 placement is: sts 1 to 14 = first pineapple base (P-shell in st 7), st 15 = mesh dc, sts 16 to 29 = second base (P-shell in st 22), st 30 = mesh dc, sts 31 to 44 = third base, st 45 = mesh dc, sts 46 to 59 = fourth base.
First Pineapple Tier
Work the Pineapple Body Rows across all 4 (5, 6) pineapples at once. Between pineapples, work the mesh: dc in mesh dc below, ch 2, dc.
Row 4: Ch 4, turn. For each pineapple: dc in first ch-1 sp of P-shell, ch 2, sc in same ch-1 sp, ch 3, sc in next ch-1 sp, ch 3, sc in next ch-1 sp, ch 3, sc in last ch-1 sp of shell. Between pineapples work: ch 2, dc in mesh dc, ch 2. (4 pineapple body units with 3 ch-3 arches each, plus 3 mesh columns)
Row 5: Ch 1, turn. Sc in first ch-3 sp, (ch 3, sc in next ch-3 sp) twice, rep across. Mesh: ch 3, dc in mesh dc, ch 3. (4 pineapple units with 2 ch-3 arches each, plus 3 mesh columns)
Row 6: Ch 1, turn. Sc in first ch-3 sp, ch 3, sc in next ch-3 sp. Mesh: ch 3, dc in mesh dc, ch 3. (4 pineapple units with 1 ch-3 arch each, plus 3 mesh columns)
Row 7 (tip row): Ch 1, turn. Sc in the single ch-3 arch of each pineapple. Mesh: ch 3, dc in mesh dc, ch 3. (4 pineapple tip sc, plus 3 mesh columns)
Checkpoint: after Row 7 the panel should measure about 3.5 inches / 9 cm from the foundation, and the four pineapple points should taper clearly downward.
Second Pineapple Tier
Row 8 (offset mesh setup): Ch 5, turn. (Dc in pineapple tip sc, ch 2, dc in same tip sc, ch 2) across, ending with mesh dc in turning chain. (5 mesh arches for S)
Row 9 (P-shell setup): Ch 4, turn. (P-shell in center of mesh arch, ch 1, dc in next dc, ch 1) rep across. (3 full P-shells plus 2 half P-shells at the edges)
A half P-shell is (dc, ch 1, dc, ch 1, dc) worked into the edge mesh position; it becomes a partial lace point at each side hem.
Row 10: Work body row 1 across the tier. (3 full pineapple units with 3 arches each, plus 2 half units with 2 arches each, plus mesh columns)
Row 11: Work body row 2 across the tier. (3 units with 2 arches each, plus 2 units with 1 arch each, plus mesh columns)
Row 12: Work body row 3 across the tier. (3 units with 1 arch each, plus 2 tips, plus mesh columns)
Row 13 (tip row): Work the tip row across. (3 full tips plus 2 edge tips, plus mesh columns)
Checkpoint: after Row 13 the panel should measure about 7 inches / 18 cm from the foundation, with the staggered diamond arrangement visible.
Third Pineapple Tier
Row 14 (offset mesh): Ch 5, turn. Bridge all second tier tips and mesh columns as in Row 8. (6 mesh arches for S)
Row 15 (P-shell setup): Ch 4, turn. (P-shell in mesh arch center, ch 1, dc, ch 1) rep across. (4 P-shells for S)
Row 16: Work body row 1 across the tier, mesh as set. (4 pineapple units, 3 arches each)
Row 17: Work body row 2 across the tier, mesh as set. (4 units, 2 arches each)
Row 18: Work body row 3 across the tier, mesh as set. (4 units, 1 arch each)
Row 19 (tip row): Work the tip row across, mesh as set. (4 tips)
Checkpoint: after Row 19 the panel should measure about 12 inches / 30.5 cm from the foundation, with three complete staggered tiers.
Fourth Tier & Hem
Row 20 (offset mesh): Ch 5, turn. Bridge all third tier tips. (5 arches for S)
Row 21 (P-shell setup): Ch 4, turn. (P-shell in arch, ch 1, dc, ch 1) across. (3 full P-shells plus 2 half P-shells at edges)
Row 22: Work body row 1 across the tier. (3 units with 3 arches, plus 2 units with 2 arches)
Row 23: Work body row 2 across the tier. (3 units with 2 arches, plus 2 units with 1 arch)
Row 24: Work body row 3 across the tier. (3 units with 1 arch, plus 2 tips)
Row 25 (hem tip row): Sc in each remaining arch and tip across. (Approximately 8 to 10 sc depending on size)
Row 26 (hem edging): Ch 1, turn. Sc evenly around the entire lower edge, working sc into each stitch and ch-3 sp of the bottom tier tips. Work a Fan Border into each pineapple tip sc to accentuate the points, and 3 sc into each mesh corner. Fasten off and weave in ends.
Side edges: with RS facing, work a sl st edging along both vertical side edges to stabilise them for seaming, or work 1 row of sc up each side, working 1 sc per dc row end and 1 sc per 2 ch rows.
Back Panel
Foundation chain: Ch 61 (69, 77).
Row 1 (RS): Ch 3 (counts as dc), dc in 4th ch from hook and in each ch across. (61 (69, 77) dc)
Row 2 (neck opening setup): Ch 4, turn. (Sk 2 sts, dc in next st, ch 2) rep across, ending dc in last st. (20 (23, 26) mesh sp)
Rows 3 to 26 (mesh body): Ch 4, turn. (Dc in next dc, ch 2) rep across, ending dc in t-ch. Work even in mesh until the back panel measures 13 (14, 15) inches / 33 (36, 38) cm from the foundation.
Back opening shaping: beginning when the panel measures 4 inches / 10 cm from the top (around Row 10), divide the work into left and right back panels of about one third of the width each, leaving the centre third unworked for the open back. Work the mesh over the left 7 (8, 9) mesh columns only, then rejoin yarn and work the right 7 (8, 9) mesh columns to match.
Row 27 (lower back join): With RS facing, rejoin yarn at the right edge base of the right back panel. Ch 1. Sc across the lower edge of the right back panel (about 18 sc for S), sc across the centre foundation chains, then sc across the left back panel base. (54 (62, 70) sc)
Row 28: Ch 1, turn. Sc in each sc across. (54 (62, 70) sc)
Row 29: Ch 1, turn. Sc in each sc across. (54 (62, 70) sc)
Row 30: Ch 1, turn. Sc in each sc across. (54 (62, 70) sc)
Fasten off and weave in ends. At the centre top of the back panel, work 3 sc across the centre 3 sts of Row 1, then make two Twisted Cord Ties and attach one to each end of this centre sc group.
Finishing & Assembly
Block both panels first: soak in cool water with a drop of gentle wash for at least 15 minutes, roll in a towel to remove water, then pin out on blocking mats, pulling each pineapple open to 3.5 inches / 9 cm and pinning every tip firmly. Let dry completely, 24 to 48 hours for cotton.
Place the front and back panels with right sides together and align the side edges. Align the top edge of the lower back border with the front panel row at waist height, about 3 to 4 inches / 7.5 to 10 cm up from the lowest pineapple hem point.
Seam the sides with mattress stitch or a sl st seam from waist level up to the underarm, about 8 to 9 inches / 20 to 23 cm up from the lower back border. Leave the upper portion open as the armhole gap.
Attach two Twisted Cord Ties to the front neckline corners, at each end of the Row 2 fan edging. All four ties meet at the nape of the neck and tie in a bow or knot. Weave in any remaining ends on the wrong side.
Tips
To make an XS, remove one complete pineapple unit: subtract 14 chains from both panels for a bust of about 28 inches / 71 cm. To go larger than L, add one unit (14 chains) to both panels; each unit adds about 3.5 inches / 9 cm of bust and needs about 100 extra yards of yarn.
To lengthen the top, add a complete fourth pineapple tier for about 4 inches / 10 cm more length. To shorten it into a cropped version, end after the third tier tip row and work the hem edging straight away.
Choose a smooth, plied cotton or cotton blend. Fuzzy, textured or very stretchy yarns blur the stitch definition that pineapple lace depends on.
Care: machine wash cold on a gentle cycle in a mesh laundry bag, or hand wash in cool water. Roll in a towel, lay flat to dry away from direct sunlight, and store folded flat rather than on a hanger.
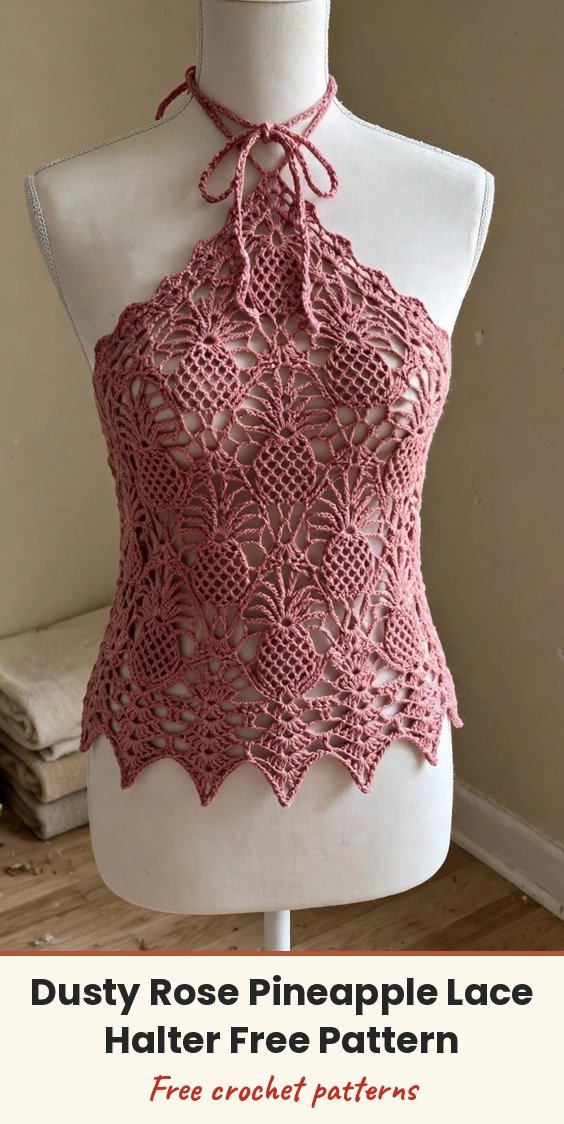
Dusty Rose Pineapple Lace Halter Free Crochet Pattern
Materials
Steps
- Work the front panel foundation and neckline fan edging
- Set up the first tier of pineapple shells and work the body rows to the tips
- Repeat the offset tiers through the fourth tier
- Work the hem edging and side edge stabilising rows
- Work the back panel in mesh with an open back split and solid lower border
- Make four twisted cord ties
- Block both panels hard, seam the sides and attach the ties
- Practice one pineapple motif as a swatch before starting the top
- Block vigorously - pineapple lace only opens fully when pinned out wet
- Each added or removed pineapple unit changes the bust by about 3.5 inches
- Use smooth plied cotton so the lace definition stays crisp


