How To Make Easy Crochet Beanie Hat Pattern – Yarn Items
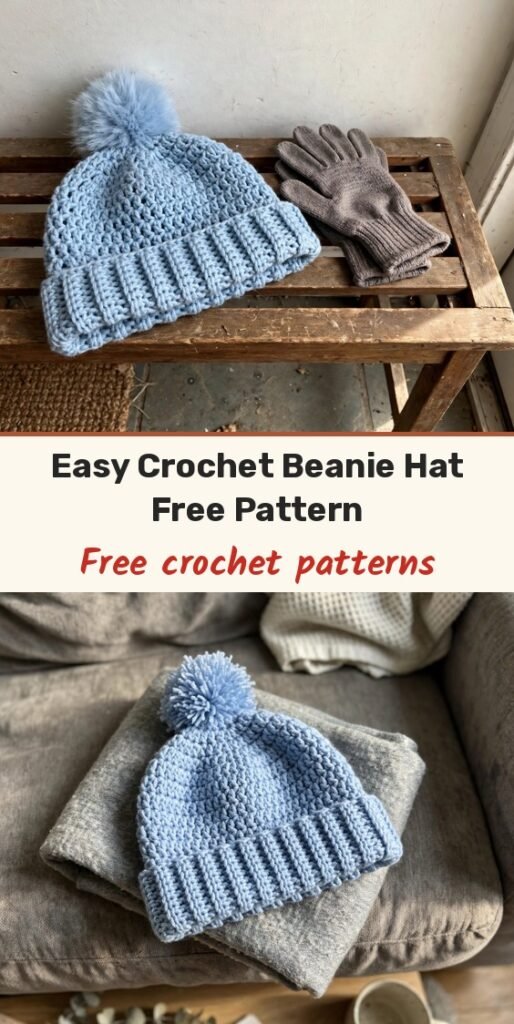
Table of Contents
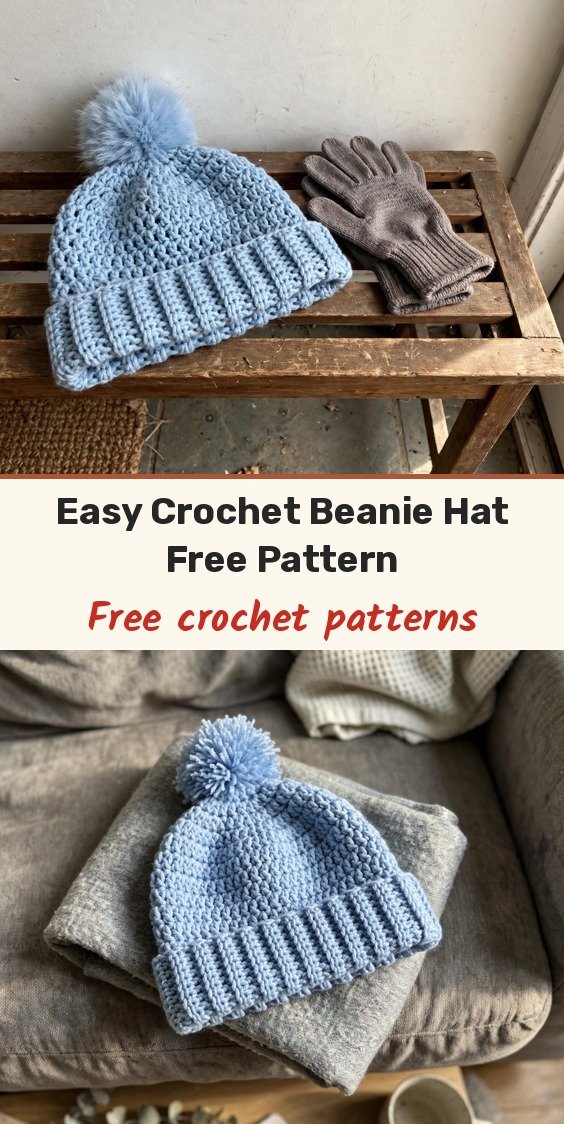
I love a beanie that looks simple but has just enough texture to feel special, and this blue beanie is exactly that! We will start with a stretchy ribbed brim worked in rows, join it into a band, then build the hat body with groups of double crochet and raised front post stitches, and shape a softly rounded crown with gentle decreases.
The pattern demonstrates a child-size beanie, and it is wonderfully adjustable. We can repeat the brim rows until the band fits the head we are making it for, and repeat the body round until the hat is as tall as we like. A fluffy pom-pom on top is optional, but I think it brings such a playful finish to the soft blue stitches.
Because the brim uses a smaller hook than the body, the band stays snug while the textured body keeps its shape. Let me walk you through it step by step.
Materials
- Worsted-weight yarn in your preferred color (the example is a soft blue)
- 4.5 mm crochet hook, for the ribbed brim
- 5 mm crochet hook, for the hat body
- Yarn needle, for closing the crown and weaving in loose ends
- Scissors
- Optional pom-pom, for decorating the top of the finished hat
Abbreviations
- ch: chain
- st/sts: stitch / stitches
- sl st: slip stitch
- sc: single crochet
- hdc: half double crochet
- dc: double crochet
- fpdc: front post double crochet
- BLO: back loop only
- inv dec sc: invisible decrease single crochet
- rep: repeat
Special Stitches
- Invisible decrease single crochet: insert the hook into the front loop of the next stitch, then into the front loop of the following stitch. Yarn over and pull through both front loops, yarn over again, and pull through the remaining two loops
- Front post double crochet (fpdc): work a double crochet around the post of the stitch below, inserting the hook from front to back, so the stitch stands raised on the front of the fabric
Gauge & Size
- Finished size: child-size beanie as written, with a 40-row brim; adjust the brim circumference and body height for other sizes as described in the pattern
- Construction: ribbed brim worked in rows and seamed into a band, body worked in joined rounds around the brim edge, crown shaped with invisible decreases and gathered closed
- Skill level: Easy
Brim Pattern
Use the 4.5 mm crochet hook to create the brim. Its alternating stitch placement gives the band a ribbed texture.
Foundation: Make a slip knot and chain 10.
Row 1: Skip the first chain from the hook. Work 1 hdc into each of the remaining 9 chains. Chain 1 and turn. (9 hdc)
Row 2: Work 1 hdc under both loops of the first stitch. Work 1 hdc in the back loop only (BLO) of each of the next 7 stitches. Work 1 hdc under both loops of the final stitch. Chain 1 and turn. (9 sts)
Rows 3 to 40, or until the brim fits: Repeat Row 2, maintaining 9 stitches in every row. The first and last stitches are worked through both loops, while the 7 middle stitches are worked through the back loop only.
For the child-size example, work 40 rows. If you need a different circumference, adjust the row count while keeping the total number of rows a multiple of 2.
Joining the Brim
Once the brim reaches the desired length, join its two short ends to form a loop. Fold the band in half, bringing the last row alongside the foundation-chain edge.
Chain 1. Insert the hook through both loops of a stitch on the last row and the corresponding remaining loop of the foundation chain. Work a slip stitch to join the two edges.
Continue slip stitching through each matching pair of stitches until the seam is complete. Turn the band inside out so the neat joining seam sits on the inside of the hat, and check that the band is not twisted before moving on to the body.
Hat Body Pattern
First round around the brim: Switch to the 5 mm crochet hook. Chain 1. Work 3 single crochets evenly across every 2 brim rows along the long edge. Continue around the entire band. Join with a slip stitch to the first sc. With 40 brim rows, this produces 60 sc stitches around the opening. Distribute the stitches as evenly as possible so the top edge lies smoothly.
Round 2: Chain 3; this counts as the first dc. Work 2 more dc into the same stitch, making the first group of 3 dc. Skip the next 2 stitches. Work 3 dc into the next stitch. Repeat the sequence of skipping 2 stitches and working 3 dc into the next stitch around the hat. Skip the final 2 stitches and join with a slip stitch to the third chain of the starting ch-3. Slip stitch into the space between the starting chain-3 and the next dc to position the hook for the following round.
Round 3: Chain 3; this counts as the first dc. Work 1 front post double crochet (fpdc) around the second dc of the underlying group. Work 1 dc into the space between the second and third dc of that same group. At the next group, work 1 dc in the space before its first stitch, 1 fpdc around its second stitch, and 1 dc in the space after its second stitch. Repeat this sequence around the hat. Join with a slip stitch to the third chain, then slip stitch into the first space.
Round 4: Chain 3; this counts as the first dc. Work 1 fpdc around the fpdc post from the previous round. Work 1 dc into the space immediately after that fpdc. Repeat the sequence of 1 dc, 1 fpdc, and 1 dc around the hat, following the established groups. Join with a slip stitch to the third chain.
Rounds 5 to 15: Repeat Round 4 for 11 additional rounds, or continue until the body reaches your preferred length measured from the brim. Join each round with a slip stitch.
Crown Pattern
Crown Round 1: Chain 1. Work 1 sc into the same stitch. Work 1 invisible decrease single crochet over the next 2 stitches. Repeat the sequence of 1 sc followed by 1 invisible decrease around. Join with a slip stitch to the first sc.
Crown Round 2: Chain 1. Work an invisible decrease single crochet over each pair of stitches around the crown. Join with a slip stitch.
Crown Round 3 (optional for adult size): If a smaller top opening is needed, chain 1 and repeat the decrease round once more, decreasing every pair of stitches together. Join with a slip stitch. Check the remaining opening as you work rather than adding this round automatically.
Finishing & Assembly
Fasten off, leaving a yarn tail approximately 8 to 10 inches long. Thread the tail through a yarn needle and weave the needle in and out through the remaining top loops around the crown opening. Pull the yarn tail firmly to gather the opening closed. Secure the yarn on the inside and weave in the remaining loose ends. Check the crown from both sides to ensure the opening is closed securely and the gathered stitches are sitting neatly.
For the optional pom-pom, position it at the center of the closed crown and use its attachment loop or a suitable length of yarn to secure it firmly to the hat, fastening the attachment on the inside so it does not come loose during wear. Check that the pom-pom sits upright and is securely attached before using the hat. A pom-pom in the same blue shade gives a coordinated look, while a contrasting color creates a more noticeable accent.
Tips
Check the brim before seaming: the ribbed band determines the hat’s circumference, so estimate the fit before joining the short ends, and keep the total brim row count a multiple of 2.
Distribute the first body round evenly, working 3 sc for every 2 brim rows, so the hat body sits evenly on the band.
Follow the stitch placement carefully in the body pattern, keeping track of where each raised post belongs so the texture remains consistent.
Decide the height before decreasing: repeat Round 4 as needed for a longer hat, then begin shaping the crown.
How To Make Easy Crochet Beanie Hat Pattern – Yarn Items
Materials
Steps
- Work the ribbed brim in hdc rows of 9 sts to 40 rows
- Slip stitch the brim ends together into a band
- Work 60 sc evenly around the brim edge with the 5 mm hook
- Work the textured body in 3-dc groups and fpdc rounds to Round 15
- Shape the crown with invisible decrease rounds
- Gather the top closed with the yarn tail
- Attach an optional pom-pom at the crown center
- Keep the brim row count a multiple of 2
- Work 3 sc for every 2 brim rows to get an even 60-st body base
- Repeat Round 4 for extra height before starting the crown
- Check the brim fit before seaming the band closed