Free Crochet Cat and Fish Water Bottle Holder Pattern
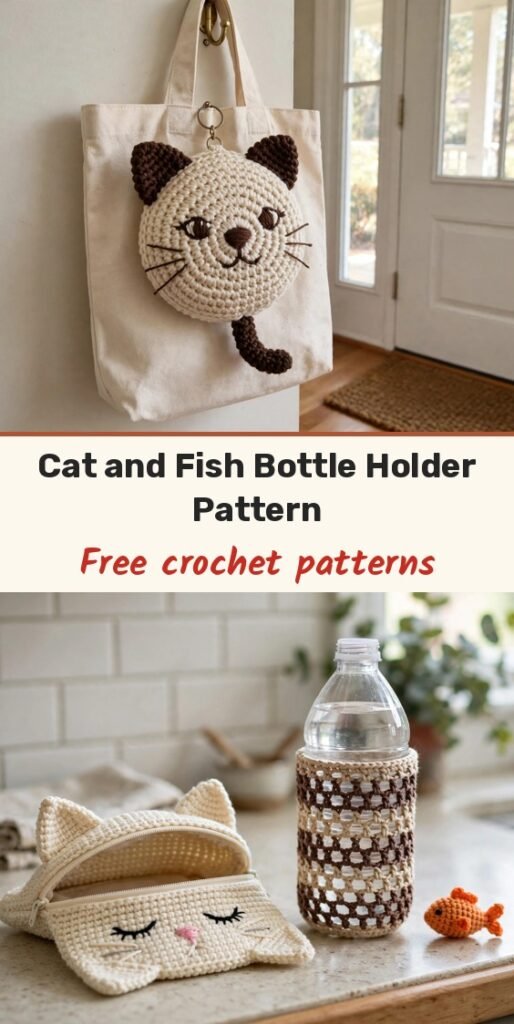
Table of Contents
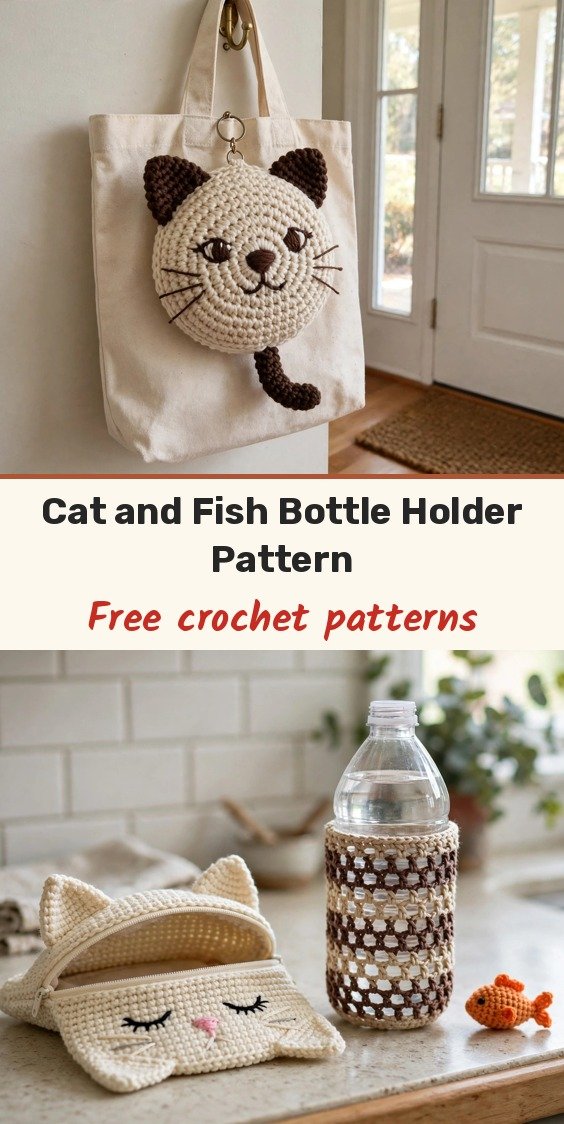
This clever little make always makes me smile: a cute Siamese cat pouch that hides a whole mesh water bottle holder inside! You use it as a bag charm, then pull the tucked mesh pouch out, slip it around your bottle, and clip the little fish onto your bag. It is a true 2-in-1.
We will crochet two thick cat face circles holding double strands of yarn, add ears and an embroidered face, join them into a pouch with a tiny tail, then work the transformable mesh bag inside in a cream-to-brown gradient with two handles. A small orange fish keychain finishes the set.
The holder fits an ordinary plastic bottle, a cup, or a coffee-shop tumbler, and the diamond mesh keeps everything secure while you are on the move.
Materials
- 4-ply cotton yarn in cream/beige, for the main body
- 4-ply cotton yarn in dark brown, for the ears and embroidery
- 4-ply cotton yarn in light brown and dark brown, for the gradient mesh bag
- 4-ply cotton yarn in yellow or orange, for the little fish
- 3.0mm crochet hook
- Tapestry needle and scissors
- Craft glue (slow-drying recommended)
- 2 small black beads or safety eyes, for the fish
- 2 jump rings and 1 lobster clasp
Abbreviations
- MR: magic ring
- sc: single crochet
- hdc: half double crochet
- dc: double crochet
- tr: treble crochet
- inc: increase, 2 sc in one stitch
- dec: decrease, single crochet two together
- sl st: slip stitch
- ch: chain
- BLO: back loop only
- st/sts: stitch / stitches
Gauge & Size
- Finished size: cat pouch worked to 48 stitches around (two circles), with a mesh holder of 10 chain loops that stretches around an ordinary plastic bottle or cup; fish worked to 15 stitches around
- Construction: two double-strand circles joined into a pouch, mesh bag worked inside the back piece in a spiral, fish worked separately in joined rounds
- Skill level: Intermediate
Cat Pouch Pattern
Make 2 identical circles, one front and one back, holding double strands of cream yarn to make the pouch thick and sturdy. Work in joined rounds: sl st to the first stitch and ch 1 at the beginning of each round, and the ch 1 does not count as a stitch.
Round 1: MR, ch 1, 6 sc in the ring. Join. (6 sts)
Round 2: Ch 1, 2 sc in each st around (inc x 6). Join. (12 sts)
Round 3: Ch 1, (1 sc, inc) 6 times. Join. (18 sts)
Round 4: Ch 1, (1 sc, inc, 1 sc) 6 times. Join. (24 sts)
Round 5: Ch 1, (3 sc, inc) 6 times. Join. (30 sts)
Round 6: Ch 1, (2 sc, inc, 2 sc) 6 times. Join. (36 sts)
Round 7: Ch 1, (5 sc, inc) 6 times. Join. (42 sts)
Round 8: Ch 1, (3 sc, inc, 3 sc) 6 times. Join. (48 sts)
Right after Round 8, add the loops. On Piece 1 (the back piece, long strap): chain 35 and sl st back into the base of the chain to form a long loop, then fasten off. On Piece 2 (the front piece, button loop): chain 15 (or a smaller amount) and sl st back into the base of the chain to form a small button loop, then fasten off.
Cat Ears Pattern
Switch to a single strand of dark brown yarn. Lay your circles flat with the strap loop at the top center, and work the ears directly onto the edge of Round 8 on both pieces.
Left Ear, stitch 1: Count 8 stitches to the left of the top strap and attach the dark brown yarn in the 8th stitch. Ch 1, 1 sc in the 1st st.
Left Ear, stitch 2: Work 1 hdc and 1 dc in the 2nd st.
Left Ear, stitch 3: Work 2 tr in the 3rd st.
Left Ear, stitch 4: Work 1 dc and 1 hdc in the 4th st.
Left Ear, stitch 5: Work 1 sc in the 5th st. Fasten off. There should be exactly 3 empty stitches between the ear and the top strap.
Right Ear: Count 4 stitches to the right of the top strap, attach the yarn, and repeat the exact same 5-stitch sequence. Fasten off. Repeat the ear process for both the front and back pieces.
Mesh Bag Pattern
First, assemble the pouch. On the front piece, use a single strand of dark brown yarn to embroider a small triangular nose in the center and three straight whiskers on each cheek. Place the front and back pieces right sides together (wrong sides facing out), find the middle stitch of the left ear, and attach cream yarn through the inner loops only of both pieces. Single crochet the two pieces together around the bottom curve.
When you reach the exact bottom center, directly opposite the top straps, stop joining and make the tail: chain 11, hdc in the 3rd ch from the hook, work 1 hdc in each of the remaining 8 chains, then sl st back into the body to anchor the tail. Continue single crocheting the two pieces together until you reach the middle stitch of the right ear, then fasten off and turn the pouch right side out. The top half between the ears stays open.
Now work the mesh bag with a single strand of yarn, changing colors every 3 rounds in the gradient cream, then light brown, then dark brown. Work around the inner unjoined loops of the back piece, the side with the long 35-chain strap.
Round 1: Attach yarn to the first stitch below the ear seam. Ch 1, 1 sc in the same st. (Chain 10, skip 4 sts, 1 sc in next st) repeat 8 times. (Chain 10, skip 3 sts, 1 sc in next st) repeat 2 times. You should have exactly 10 chain loops around the opening.
Rounds 2 to 9: Sc directly into the first ch-10 space. (Chain 10, sc into the next ch-10 space) repeat continuously in a spiral for 9 rounds, or until your desired bottle height is reached.
Handle 1: In your current mesh loop, work 2 sc. Chain 70. Skip 1 mesh loop. In the next mesh loop, work 2 sc. Ch 1, turn, and sc in BLO of all 70 chains. Sl st into the mesh loop to secure and fasten off.
Handle 2: Skip 2 mesh loops. Attach yarn to the next mesh loop, work 2 sc, chain 70, skip 1 mesh loop, work 2 sc in the next mesh loop, ch 1, turn, sc in BLO of all 70 chains, sl st into the mesh loop to secure, and fasten off.
Fish Keychain Pattern
Use a single strand of orange or yellow yarn.
Round 1: MR, ch 1, 6 sc. Join. (6 sts)
Round 2: Ch 1, (1 sc, inc) 3 times. Join. (9 sts)
Round 3: Ch 1, (1 sc, inc, 1 sc) 3 times. Join. (12 sts)
Round 4: Ch 1, (3 sc, inc) 3 times. Join. (15 sts)
Rounds 5 to 8: Ch 1, 1 sc in each st around. Join. (15 sts each round)
Round 9: Ch 1, (3 sc, dec) 3 times. Join. (12 sts)
Round 10: Ch 1, 6 dec. Join. (6 sts)
Fish tail: pinch the remaining 6 stitches flat to close the opening and work through both layers. In stitch 1: sl st, ch 1, 3 hdc in the same st. In stitch 2: sl st. In stitch 3: 3 hdc, ch 1, sl st in the same st. Fasten off and weave in ends.
Thread dark brown yarn and embroider tiny V-shaped scales around Round 5. Glue the two tiny black eyes near the front. Attach a jump ring to the fish’s mouth, connect it to a lobster clasp, and clip it onto the cat’s top loop.
Finishing & Assembly
To use your holder, stuff the long mesh bag inside the cat’s head, fold the top of the cat head closed, and pass the short button loop through the long strap. Hang it on your bag as a charm, and unfold the mesh whenever you buy a drink: remove the fish, pull the pouch out around your bottle, and attach the fish to the bag again.
Tips
Keep the double strands tidy on the cat circles — that thickness is what makes the pouch hold its round face shape.
Count your mesh loops after Round 1: exactly 10 loops means your handles will land evenly spaced.
Change mesh colors every 3 rounds for the soft gradient, carrying the look from cream at the top to dark brown at the base.
Free Crochet Cat and Fish Water Bottle Holder Pattern
Materials
Steps
- Crochet 2 cat circles with double strands to 48 sts and add the strap loops
- Work the dark brown ears onto both circles and embroider the face
- Join the circles into a pouch, adding the tail at the bottom center
- Work the mesh bag inside the back piece in Rounds 1 to 9 with 10 chain loops
- Add 2 mesh handles of ch 70 worked back in BLO sc
- Crochet the fish in Rounds 1 to 10 with its flat tail and embroidered scales
- Clip the fish to the cat's top loop with a jump ring and lobster clasp
- Keep the double strands tidy so the pouch holds its round face shape
- Count exactly 10 mesh loops after Round 1 so the handles space evenly
- Change mesh colors every 3 rounds for the cream-to-brown gradient