Cute Crochet Chicken Mug Coaster (Mug Hugger Pattern + Easy Gift Idea
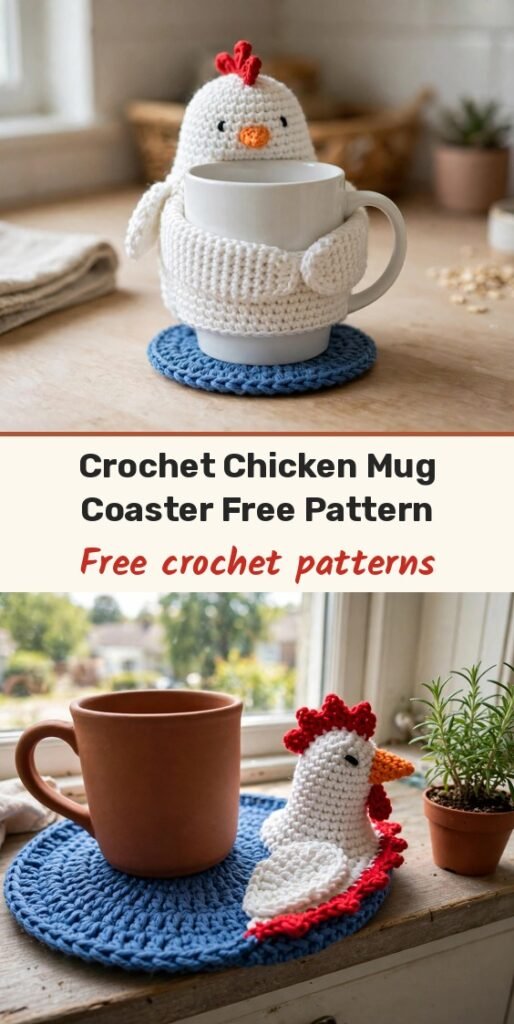
Table of Contents
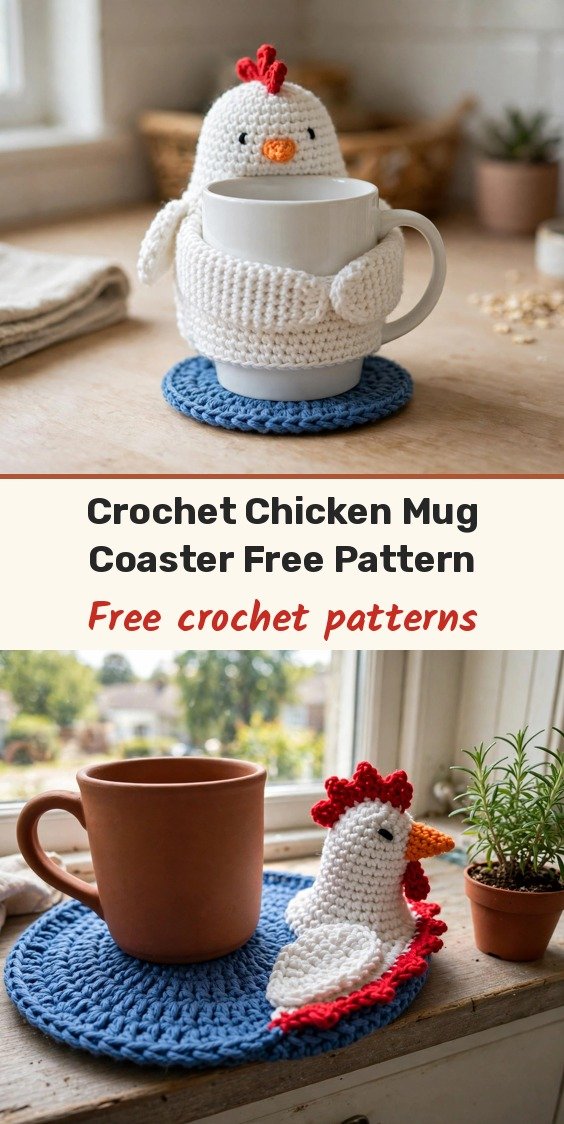
This little chicken mug coaster makes me smile every single time I use it! It is a round coaster with a raised white chicken body along one edge, so when you set your mug down it looks like a tiny chicken is giving your cup a hug. Sweet and practical at the same time, my favourite combination.
We will crochet a flat blue coaster base first, then add the raised chicken body panel, two little wings, a tiny orange beak and a red comb. It is a brilliant scrap-yarn project and a fast, memorable gift for coffee lovers, teachers and coworkers.
Beyond the cuteness, your coaster protects tables, desks and nightstands from heat, drips and condensation, and the whole thing works up in an evening.
Materials
- Worsted (medium) weight yarn in blue for the coaster base
- Worsted weight yarn in white for the chicken body and wings
- Small amount of orange yarn for the beak
- Small amount of red yarn for the comb
- 4.0 mm to 5.0 mm crochet hook (4.0 to 4.5 mm gives a tighter, sturdier coaster)
- 2 safety eyes, 6 to 8 mm, or black yarn for embroidered eyes
- Yarn needle
- Scissors
- Stitch markers
- Optional: a pinch of fiberfill for slightly puffy wings
Abbreviations
- MR: magic ring
- ch: chain
- sc: single crochet
- hdc: half double crochet
- sl st: slip stitch
- inc: increase, 2 stitches in the same stitch
- dec: decrease, single crochet 2 together
- st/sts: stitch / stitches
Gauge & Size
- Finished size: coaster base about 4.5 to 5.5 inches (11.5 to 14 cm) in diameter; raised chicken edge about 1 to 1.5 inches (2.5 to 4 cm) tall
- Construction: flat coaster worked in joined rounds, raised body panel worked in rows, small parts made separately and sewn on
- Skill level: Easy
Coaster Base
Use blue yarn. I like joined rounds for a neat, flat circle.
Round 1: MR, ch 1, 6 sc in MR, join with sl st to first sc. (6 sts)
Round 2: Ch 1, inc in each st around, join. (12 sts)
Round 3: Ch 1, (sc, inc) around, join. (18 sts)
Round 4: Ch 1, (2 sc, inc) around, join. (24 sts)
Round 5: Ch 1, (3 sc, inc) around, join. (30 sts)
Round 6: Ch 1, (4 sc, inc) around, join. (36 sts)
Round 7: Ch 1, (5 sc, inc) around, join. (42 sts)
Round 8: Ch 1, (6 sc, inc) around, join. (48 sts)
Size check: pop your mug on the circle. You want the coaster slightly wider than the mug base. For a smaller mug, stop at Round 7 (42 sts). For a larger mug, add Round 9: (7 sc, inc) around. (54 sts)
Fasten off the blue yarn and weave in the end.
Chicken Body Panel
Use white yarn. This panel forms the raised chicken chest that curves up around the front of your mug. Attach the white yarn anywhere on the outer edge of the coaster and decide where the chicken will sit, front and center.
Row 1: Ch 1, sc in next 18 to 24 sts (depending on your coaster size). Turn.
Row 2: Ch 1, sc across. Turn.
Row 3: Ch 1, sc across. Turn.
Row 4: Ch 1, dec, sc across until 2 sts left, dec. Turn.
Row 5: Ch 1, sc across. Turn.
Repeat Rows 4 and 5 as needed until the panel looks like a rounded chicken chest, not too tall. Fasten off, leaving a long tail for shaping or sewing if needed.
If you want the body to hug the mug more, sew the side edges of the panel down slightly so it curves upward like a little apron.
Wings
Make 2 in white yarn.
Round 1: MR, 6 sc in MR. (6 sts)
Round 2: (Sc, inc) around. (9 sts)
Round 3: Sc around. (9 sts)
Flatten the piece and sc through both layers across the top (about 4 to 5 sc) to close. Fasten off, leaving a tail for sewing. Add a tiny pinch of stuffing before closing if you would like a puffy wing.
Beak
Use orange yarn.
Row 1: Ch 3.
Row 2: Sc in 2nd ch from hook, sc in next ch. (2 sts)
Row 3: Ch 1, dec over the 2 sts. (1 st)
Fasten off, leaving a tail for sewing.
Comb
Use red yarn. This makes a simple 3-bump comb.
Chain 7. In 2nd ch from hook: sl st. Next ch: sc. Next ch: hdc. Next ch: sc. Next ch: hdc. Last ch: sc.
Fasten off, leaving a tail for sewing.
Finishing & Assembly
Position the chicken body panel on the coaster edge, with the white section where the front of the mug will be. Sew the body panel edges to the coaster base with a whip stitch or mattress stitch so it curves slightly upward.
Attach one wing on each side of the body panel, angled slightly forward so they look like they are holding the mug.
Add the eyes: push safety eyes into the body panel about 2 to 3 stitches apart, centered near the top, or embroider two small eyes with black yarn for a kid-friendly finish.
Sew the beak on centered beneath the eyes, then sew the comb to the top of the body panel, centered above the eyes.
Weave in all ends securely. Final fit check: set your mug on the coaster. If the chicken does not hug enough, sew the wings a little further forward or add a small tack stitch at the sides of the body panel to bring it closer around the mug.
Tips
Keep your tension tight and even. Coasters lie flatter and feel sturdier, and counting each round keeps your circle from ruffling.
Worsted cotton is my favourite choice for coasters because it is heat-resistant and washable. Acrylic works too, just a little softer and less structured.
If your coaster curls, lightly steam it (for acrylic) or wet-block it (for cotton) and let it dry flat.
Once you have the chicken down, the same base becomes a whole farmyard: swap the details for a cat, frog, bear or duck face and gift the whole set!
Cute Crochet Chicken Mug Coaster (Mug Hugger Pattern + Easy Gift Idea
Materials
Steps
- Crochet the blue coaster base in joined rounds to 48 sts
- Work the white chicken body panel in rows along the coaster edge
- Make two small white wings and close them flat
- Crochet the tiny orange beak and the red 3-bump comb
- Sew the panel, wings, beak and comb onto the coaster
- Add safety eyes or embroidered eyes and weave in all ends
- Choose worsted cotton for a heat-resistant, washable coaster
- Place your mug on the base circle as you go and stop at Round 7 for small mugs or add Round 9 for wide mugs
- Sew the wings angled forward so the chicken looks like it is hugging the mug