Coral Blossom Halter Dress Crochet Pattern
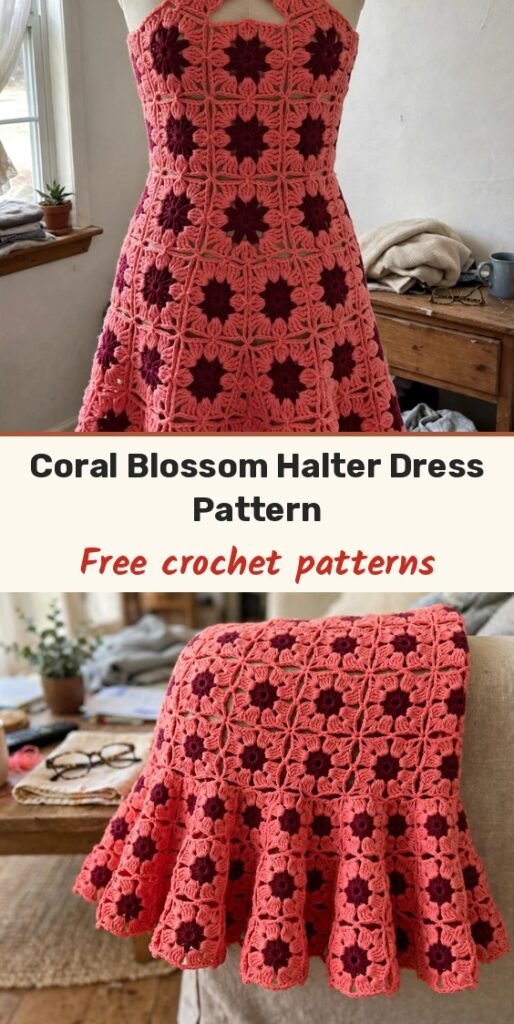
Table of Contents
You know that moment when a project stops you mid-scroll? The kind that makes you immediately think “I need to make that”? Yeah. This is that dress!
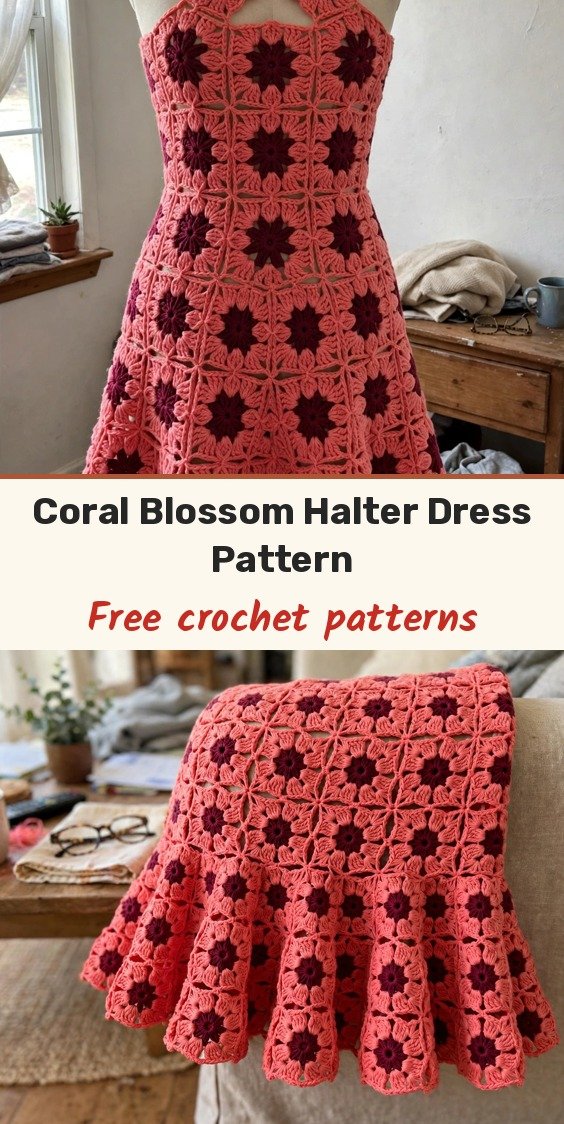
The Coral Blossom Halter Dress is a showstopper built entirely from individual eight-petal flowers joined into shaped horizontal bands. Those coral pink petals with deep burgundy centers create a flower-lattice effect that looks incredibly intricate but follows a logical, repeatable construction method. The fitted bodice tapers at the waist before flaring into a graceful A-line skirt, and the halter neckline adds an elegant finishing touch.
This is an advanced project that rewards patience and careful gauge work. We will create 242 individual flower motifs, join them into 14 horizontal bands with progressively longer chain bridges to create the flare, then connect everything with vertical joins and diagonal mesh stabilization. Let’s build it together!
Materials
- 600 g / 1800 m sport cotton yarn in coral pink (Yarn A)
- 150 g / 450 m sport cotton yarn in burgundy (Yarn B)
- Smooth sport cotton yarn, approximately 150 m per 50 g
- 3.0 mm crochet hook (adjust for gauge)
- Tapestry needle
- 32 stitch markers
- Measuring tape
- Blocking pins
- Matching opaque slip with 40 cm side zipper (support garment, essential)
- Matching thread, hand sewing needle, 6 mm stay tape
Abbreviations
- ch: chain
- sl st: slip stitch
- sc: single crochet
- hdc: half double crochet
- dc: double crochet
- tr: treble crochet
- st(s): stitch(es)
- sp: space
- RS/WS: right side / wrong side
- rep: repeat
Special Stitches
- Petal: in one ch-3 loop, work (sc, hdc, 3 dc, hdc, sc), then slip stitch into the next anchoring single crochet. The middle of the three double crochets is the petal tip. Each flower has eight petals, and each petal contains seven stitches.
- Bridge (Joining Method): join yarn A with a slip stitch to one petal tip. Chain the specified number, then slip stitch to the opposite tip on the adjacent flower. Fasten off. For a zero-chain bridge (used in Band 3), whipstitch the tips together instead. Use north/south and east/west tips for main joins; diagonal tips (NE, SE, SW, NW) carry stabilizing mesh.
Gauge & Size
- Finished size: approximately 118 cm from shoulder to hem, finished bust 96 cm, waist 80 cm; one reference size intended for a 90 to 92 cm bust
- Gauge: one finished flower measures 5 cm across the outer petal tips using a 3.0 mm hook; a chain 4 (ch-4) horizontal connector adds approximately 1 cm; a chain 8 (ch-8) vertical connector adds approximately 2 cm; four flowers in one bust band, including four connector allowances, span 24 cm
- Construction: 242 flower motifs joined into 14 horizontal bands plus an upper finish; silhouette created by progressively longer chain bridges; left side opening through the first six bands for a 40 cm zipper
- Skill level: Advanced
Pattern Notes
This pattern uses US crochet terminology. Stitch counts exclude joining slip stitches unless specifically stated. Brackets enclose repeats; work the bracketed section the stated number of times. Join each round to its first counted stitch. Keep the right side facing for all motifs. Change colors on the final yarn over of the last stitch and fasten off unused colors. All measurements refer to washed, dry, blocked fabric.
Orientation system: before joining, mark one petal as north. Number the eight petals clockwise: N, NE, E, SE, S, SW, W, NW. This compass system keeps joins consistent throughout.
Start Band 1 at the upper chest and work toward the hem. Leave the left side open through the first six bands for the zipper. All body bands contain 16 flowers. The skirt flare comes from progressively longer horizontal bridges.
Important: this design requires an independently fitted opaque slip worn underneath. The crochet layer is openwork and provides the decorative lattice effect, while the slip handles coverage and helps support the garment’s weight.
Band Reference Chart
Band 1: horizontal chain 4, approximate circumference 96 cm.
Band 2: horizontal chain 2, approximate circumference 88 cm.
Band 3: horizontal chain 0, approximate circumference 80 cm.
Band 4: horizontal chain 4, approximate circumference 96 cm.
Band 5: horizontal chain 6, approximate circumference 104 cm.
Band 6: horizontal chain 8, approximate circumference 112 cm.
Band 7: horizontal chain 10, approximate circumference 120 cm.
Bands 8 to 14: horizontal chain 12, approximate circumference 128 cm each.
Flower totals: body requires 224 flowers. Upper finish requires 18 additional flowers. Total: 242 flowers. Vertical joins between body bands: 208.
Flower Motif
Make 242 flowers.
Round 1 (B, burgundy): Make an adjustable ring. Ch 1, work 8 sc into the ring. Tighten the ring and sl st to the first sc. (8 sc)
Round 2 (B, burgundy): Ch 1, 2 sc in each st around. Sl st to the first sc, fasten off. (16 sc)
Round 3 (A, coral pink): Join in any st. (Sc in the next st, ch 3, skip the next st) 8 times. Sl st to the first sc. (8 sc, 8 ch-3 loops)
Round 4 (A, coral pink): Work one petal in each ch-3 loop as defined in the special stitches section. Fasten off after the eighth petal. (8 petals; 56 petal stitches)
Checkpoint: all 242 flowers have eight petals and measure 5 cm across. Set aside 18 flowers for the upper finish.
Build Horizontal Bands
Work each band by arranging 16 flowers with centers in a straight line, then bridging E (east) tips to W (west) tips of neighboring flowers using the chain count specified below. Make 15 bridges per band now; reserve the 16th closing bridge until fitting.
Band 1: Bridge with ch 4. (16 flowers, 15 bridges; target closed circumference 96 cm)
Band 2: Bridge with ch 2. (16 flowers, 15 bridges; target closed circumference 88 cm)
Band 3: Bridge with ch 0 (whipstitch tips together). (16 flowers, 15 bridges; target closed circumference 80 cm)
Band 4: Bridge with ch 4. (16 flowers, 15 bridges; target closed circumference 96 cm)
Band 5: Bridge with ch 6. (16 flowers, 15 bridges; target closed circumference 104 cm)
Band 6: Bridge with ch 8. (16 flowers, 15 bridges; target closed circumference 112 cm)
Band 7: Bridge with ch 10. (16 flowers, 15 bridges; target closed circumference 120 cm)
Bands 8 through 14: Bridge with ch 12 for each band. (16 flowers, 15 bridges per band; target closed circumference 128 cm each)
Join Bands from Chest to Hem
Place each subsequent band below the previous one, aligning all 16 columns. Connect every S (south) tip on the upper band to the corresponding N (north) tip on the lower band with ch 8.
Join Row 1: Connect Band 1 to Band 2. (16 vertical bridges)
Join Row 2: Connect Band 2 to Band 3. (16 vertical bridges)
Continue this process through Join Row 13, connecting Band 13 to Band 14. You will have 13 join rows total, creating 208 vertical bridges.
Mesh Stabilization
At each space between four flowers, add diagonal stabilization: bridge the SE tip of the upper-left flower to the NW tip of the lower-right flower with ch 10. Bridge the SW tip of the upper-right flower to the NE tip of the lower-left flower with ch 5, sl st into the fifth chain of the first bridge, ch 5, and join. (2 diagonal bridges per complete four-flower cell)
If an intersection pulls or puckers, increase both halves of the diagonal bridge equally until the fabric lies flat.
Upper Finish
Yoke Row 1: Join 5 flowers side by side with ch 2 bridges. Attach this strip to the center five flowers of the front upper band (Band 1) with ch 4. (5 flowers)
Yoke Row 2: Center 4 flowers above Yoke Row 1. Connect adjacent tips with ch 2 and join diagonally to Row 1 with ch 4. (4 flowers)
Yoke Row 3: Center 3 flowers above Yoke Row 2 and join in the same way. (3 flowers)
Neckband Row 1: Join 6 flowers into an open strip with ch 4 bridges. Sew the central two flowers of this strip to the upper yoke. Leave the ends open at the back neck. (6 flowers; 18 added flowers total for upper finish)
Neckband Row 2: With yarn A, ch 41. Sc in the second ch from hook and across. (40 sc)
Make two of these tie straps and sew one to each neckband end.
Fit tip: the neckband should fit with room for two fingers underneath. Transfer garment weight to the slip and underarm stay tape, not solely to the neck ties. Try the pinned garment over the slip before final assembly. The neckline should sit flat and the shoulders should bear weight without stretching. Use the side opening for dressing; do not force the openwork over the hips.
Finishing & Assembly
Body Seam and Closure, Join Round 1: Close each body band from Band 7 through Band 14 using that band’s scheduled bridge count (ch 10 for Band 7, ch 12 for Bands 8 to 14). (8 closing bridges) Bands 1 through 6 remain open for the zipper.
Join Row 2: Connect the seam-adjacent diagonal mesh below the zipper opening using the same crossed-bridge method described in mesh stabilization. (One mesh cell per joined band interval)
Sewing Pass 3: Hand sew stay tape along both edges of the upper side opening. Sew the zipper to the tape without catching the teeth. (2 supported zipper edges)
Checkpoint: closed bust measures approximately 96 cm. Total shoulder-to-hem length measures approximately 118 cm. The zipper opens smoothly and no joins twist.
Slip and Shoulder Support, Sewing Pass 1: Attach stay tape underneath the straps or halter edges using small catch stitches. (2 supported shoulder paths)
Sewing Pass 2: Tack the crochet layer to the slip at shoulders and both underarms, leaving the skirt layers independent. (4 anchor points)
Checkpoint: the slip allows comfortable movement and covers all openwork areas intended to be opaque.
Neckline and Armholes, Round 1: With yarn A and 3.0 mm hook, sc once in each exposed petal stitch. Work one sc into each chain of each exposed bridge. Do not work across the zipper opening. Record the resulting stitch count (E) separately for each opening. (E sc)
Round 2: Sl st loosely in every sc. Fasten off. (E sl st)
Checkpoint: both armholes lie flat. Corresponding edges have matching stitch counts.
Hem, Finishing Pass 1: Secure every bottom-band bridge end with a tapestry needle. Keep the lower petals unattached so they form natural scallops. (16 hem flowers)
Checkpoint: the flower scallops hang evenly without curling.
Ends and Blocking, Finishing Pass 1: Weave every yarn end through at least 3 cm of dense stitching in two directions. (0 unsecured ends)
Blocking Pass 2: Dampen the entire garment and lay it flat according to the band measurements. Support the full garment weight; do not stretch. Dry completely before lifting. (16 flowers per band)
Final Checkpoint: length measures approximately 118 cm. Chest measures approximately 96 cm. Each flower measures approximately 5 cm. Hang only briefly for the final fit check.
Tips
Batch your flowers. Making all 242 motifs before assembly helps maintain consistent tension and allows you to catch gauge drift early. Consider making flowers in groups of 20, checking measurements periodically.
Use stitch markers liberally. Mark the north petal of every flower before joining. This prevents orientation mistakes that become obvious only after several flowers are connected.
Pin before bridging. When joining bands vertically, pin everything in place first. Step back and check alignment before committing to any chain bridges.
Trust the process with the waist shaping. Band 3 will look very gathered compared to Bands 1 and 2. This is intentional: the zero-chain joins create the fitted waist, and subsequent bands release that tension gradually.
Fit as you go. This pattern wisely instructs you to reserve closing bridges until fitting. Take advantage of this by trying the dress over your slip at multiple stages.
Care: hand wash in cool water with mild detergent. Support the wet dress with both hands when lifting. Roll in towels to remove excess water and dry flat. Do not wring, tumble dry, or suspend while wet. Store folded, not on a hanger.
Coral Blossom Halter Dress Crochet Pattern
Materials
Steps
- Make and block all 242 flower motifs (16 sc rounds with 8 petals each)
- Bridge the flowers into 14 horizontal bands of 16 flowers
- Connect the bands with 208 vertical ch-8 bridges
- Add diagonal mesh stabilization in every four-flower cell
- Build the yoke and neckband from the 18 reserved flowers and make 2 tie straps
- Close Bands 7 to 14, install stay tape and zipper in the side opening
- Tack the crochet layer to the slip, edge neckline, armholes and hem, and block
- Buy all yarn from one dye lot to prevent color shifts between flowers
- Mark the north petal of every flower before joining so orientation stays consistent
- Pin bands in place and check alignment before committing to chain bridges
- Try the dress over its slip at several stages before closing the reserved bridges


