Blush Pink Rose Vine Bracelet Free Crochet Pattern
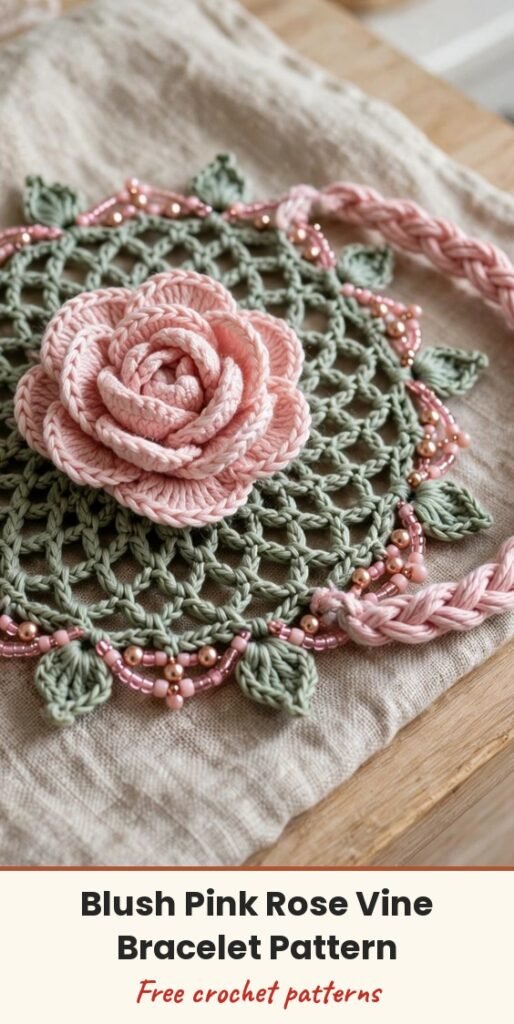
Table of Contents
This blush pink rose vine bracelet looks so much more complicated than it really is, and that is my favourite kind of pattern! If you can single crochet and roll a strip of crochet into a spiral, you can absolutely make this beautiful wrist cuff, beads and all.
We will work the bracelet in separate pieces, then assemble them. First comes a sage green lace diamond base panel, then a dimensional dusty rose made from two rolled petal strips, then eight little leaves, beaded edging, and a braided band with a sliding knot closure.
The finished centrepiece measures approximately 2.75 inches square, the band adjusts to fit wrists from 5.5 inches all the way up to 8 inches, and the whole piece takes about 4 to 6 hours spread across a few happy sessions. What a perfect handmade gift!
Materials
- Size 10 crochet cotton thread in dusty rose or blush pink, approximately 80 yards
- Size 10 crochet cotton thread in sage green, approximately 50 yards
- Steel crochet hook size 7 US steel (1.65 mm)
- Optional steel crochet hook size 6 US steel (1.8 mm), for the braided band if your tension feels tight
- Approximately 40 to 50 rose gold metallic seed beads, size 8/0
- Approximately 30 to 40 faceted bicone or rondelle crystal beads, pale pink, 4 mm
- Beading needle or twisted wire needle, for pre-stringing beads
- Tapestry needle for weaving ends
- Scissors
- 2 large-hole stoppers or bead caps for the sliding closure ends (optional)
- Fabric stiffener or light-hold spray starch (optional, for blocking)
- Blocking board and pins
Abbreviations
- ch: chain
- ch-sp: chain space
- dc: double crochet
- hdc: half double crochet
- sc: single crochet
- sk: skip
- sl st: slip stitch
- tr: treble crochet
- st/sts: stitch / stitches
- RS: right side
Special Stitches
Beaded Single Crochet (bsc): Pre-string your beads onto the working thread with a beading needle before you begin. Insert your hook into the indicated stitch or space, yarn over and pull up a loop (2 loops on hook), slide one bead snugly up the working thread so it sits against the back of the fabric, yarn over and draw through both loops. The bead is now locked into the stitch, and when the beaded edge is folded into position the beads face the right side.
Petal Spiral Strip: Work a foundation chain of the stated length, then crochet increasing heights of stitches (sc, hdc, dc, tr) evenly along the strip to create a tapered ruffle. Roll the strip from the narrow end outward to form the rose, securing the base as you go.
Gauge & Size
- Finished size: centrepiece approximately 2.75 inches x 2.75 inches; band adjusts to fit wrists from 5.5 to 8 inches
- Gauge: with a size 7 steel hook and size 10 thread, 16 chain-5 lace loops = 4 inches across and 18 rows of single crochet = 4 inches
- Construction: lace base panel worked flat, beaded edging, rolled-strip rose, individual leaves, braided adjustable band with sliding knots
- Skill level: Intermediate
Lace Vine Base Panel
The base panel is a flat diamond-shaped lace grid worked in sage green thread. All turning chains count as the first stitch of their row unless noted.
Foundation: With sage green thread and the size 7 steel hook, ch 6, sl st in first ch to form a ring.
Row 1 (RS): Ch 1, work 8 sc into ring, sl st to first sc to join. (8 sc)
Row 2: Ch 5 (counts as first dc plus ch 2), skip 1 sc, dc in next sc, (ch 2, skip 1 sc, dc in next sc) 2 times, ch 2, sl st in 3rd ch of beg ch-5 to join. (4 dc, 4 ch-2 spaces)
Row 3: Sl st into first ch-2 sp, ch 1, (sc, ch 3, sc) in each ch-2 sp around, sl st to first sc. (8 sc, 4 ch-3 loops)
Row 4: Sl st into first ch-3 loop, ch 1, (sc, ch 5, sc) in each ch-3 loop around, sl st to first sc. (8 sc, 4 ch-5 loops)
Row 5: Sl st into first ch-5 loop, ch 1, (sc, hdc, dc, hdc, sc) in each ch-5 loop around, sl st to first sc. (20 sts total, 5 sts per loop, 4 loops)
Row 6: Ch 1, sc in first sc, (ch 5, skip 3 sts, sc in next sc, ch 5, sc in next sc) 3 times, ch 5, skip 3 sts, sc in next sc, ch 5, sl st to first sc. (8 sc, 8 ch-5 loops)
Row 7: Sl st into first ch-5 loop, ch 1, (sc, hdc, 3 dc, hdc, sc) in each ch-5 loop around, sl st to first sc. (56 sts total, 7 sts per loop, 8 loops)
Row 8: Ch 1, sc in first sc, (ch 6, skip 5 sts, sc in next sc) 7 times, ch 6, sl st to first sc. (8 sc, 8 ch-6 loops)
After Row 8 your lace base should be roughly circular with 8 scallop loops radiating outward, measuring approximately 1.75 inches across.
Row 9: Sl st into first ch-6 loop, ch 1, (sc, hdc, dc, ch 2, dc, hdc, sc) in each ch-6 loop around, sl st to first sc. (48 sts, 8 ch-2 corner picots)
Row 10 shapes the piece from circular to diamond, with longer chains at the four corners and shorter chains at the four sides. Sl st into the first ch-2 sp and ch 1 to begin.
Row 10, Corner 1: (Sc, ch 7, sc) in ch-2 sp, sc in each of next 6 sts.
Row 10, Side 1: (Sc, ch 4, sc) in next ch-2 sp, sc in each of next 6 sts.
Row 10, Corners & Sides 2 to 4: Repeat the corner and side sequence 3 more times, alternating a ch-7 corner loop with a ch-4 side loop, then sl st to first sc. (56 sc, 4 ch-7 loops, 4 ch-4 loops)
Row 11: Work (sc, hdc, 5 dc, hdc, sc) in each ch-7 corner loop. Work (sc, hdc, dc, hdc, sc) in each ch-4 side loop. Work sl st across the 6 sc between loops. (36 sts in corner shells, 20 sts in side shells, 24 sl sts; 80 working sts and sl sts)
Row 12: Ch 1, sc in first sc of a corner shell, then work the following sequence around, repeating it 4 times in total, and sl st to first sc at the end.
Row 12, Corner: Sc, (ch 5, skip 3, sc) twice, for 2 ch-5 loops per corner, then ch 3 to connect to the side.
Row 12, Side: Sc, ch 5, skip 3, sc, for 1 ch-5 loop per side, then ch 3 to connect to the next corner. (12 ch-5 loops total, plus 8 ch-3 connector arches)
Row 13: (Sc, hdc, dc, hdc, sc) in each ch-5 loop. (Sc, ch 2, sc) in each ch-3 connector arch. (60 sts in shells, 16 sc plus 8 ch-2 picots in arches)
Fasten off the sage green and weave in the ends. Your finished base panel should be a clear diamond measuring approximately 2.5 to 2.75 inches across the widest points, with a centre hole of approximately 0.75 inch.
Beaded Edging: Pre-string 30 seed beads and 20 crystal beads, alternating seed and crystal, onto a new length of dusty rose thread. Join the dusty rose thread at any outer shell tip. Ch 1, work a beaded single crochet in the first st, then sc around the entire outer edge, working into the tip of each shell and each connector arch and placing one bead every 3rd stitch until the beads are used or the round is complete. Sl st to first sc to join. With approximately 80 outer stitches you will use approximately 26 to 28 beads. Fasten off and weave in the end.
Dimensional Rose
The rose is made from two petal spiral strips in dusty rose thread, one small inner strip and one larger outer strip. Pre-string your remaining beads onto the dusty rose thread before you begin the beaded sections of the bracelet, and keep the thread on a bobbin or small card to avoid tangles.
Inner Strip Foundation: With dusty rose thread and the size 7 steel hook, ch 32.
Inner Strip Row 1: Starting in 2nd ch from hook, sc in first 5 ch (5 sc), hdc in next 4 ch (4 hdc), dc in next 8 ch (8 dc), hdc in next 4 ch (4 hdc), sc in next 4 ch (4 sc). (29 sts total)
Inner Strip Row 2: Ch 1, turn. Work 2 sc in each sc, 2 hdc in each hdc, and 2 dc in each dc across. Do not work into the turning chain. (42 sts: 10 sc, 16 hdc, 16 dc)
Do not fasten off. Roll the strip from the narrow sc end with the right side facing outward. After approximately 2 full rotations, secure the base with 3 to 4 whipstitches through the lower edge, then keep rolling and securing every half rotation until the full strip is used. Fasten off and weave the end into the base of the rose.
Outer Strip Foundation: With dusty rose thread, ch 48.
Outer Strip Row 1: Starting in 2nd ch from hook, sc in first 5 ch (5 sc), hdc in next 4 ch (4 hdc), dc in next 10 ch (10 dc), tr in next 8 ch (8 tr), dc in next 8 ch (8 dc), hdc in next 4 ch (4 hdc), sc in next 8 ch (8 sc). (47 sts total)
Outer Strip Row 2: Ch 1, turn. Work 2 sc in each sc, 2 hdc in each hdc, 2 dc in each dc, and 2 tr in each tr across. (94 sts)
Roll the outer strip around the base of the completed inner rose with the right side facing outward, securing with whipstitches every half rotation through the combined lower edge. Fasten off and weave in all ends through the base. Your finished rose should measure approximately 1 to 1.25 inches in diameter and stand approximately 0.5 inch tall. Do not press the rose flat, as its rolled shape is what makes it dimensional.
Leaves
Make 8 leaves in total in sage green thread: 4 long leaves and 4 short leaves, each with a 6-inch tail left for sewing.
Long Leaf (make 4): Ch 12. Starting in 2nd ch from hook, sc in first st, hdc in next 2 sts, dc in next 3 sts, hdc in next 2 sts, sc in next 2 sts, 3 sc in last ch for the tip. Do not turn. Work back along the opposite side of the foundation chain: sc in next 2 sts, hdc in next 2 sts, dc in next 3 sts, hdc in next 2 sts, sc in next st, sl st to first sc to join the leaf base. (25 sts around leaf plus sl st join)
Fasten off, leaving a 6-inch tail for sewing.
Short Leaf (make 4): Ch 9. Starting in 2nd ch from hook, sc in first st, hdc in next 2 sts, dc in next 2 sts, hdc in next st, sc in next st, 3 sc in last ch for the tip. Do not turn. Work back along the opposite side: sc in next st, hdc in next st, dc in next 2 sts, hdc in next 2 sts, sc in next st, sl st to first sc to join. (19 sts around leaf plus sl st join)
Fasten off, leaving a 6-inch tail for sewing.
Braided Band & Closure
Cut 6 strands of dusty rose thread, each 40 inches long. Group them into 2 sets of 3 strands and braid each set for approximately 5 inches. The two braided sections form the two sides of the wristband.
Thread one braided cord through the upper left side of the base panel, passing under the lace on the back, and bring both ends out to the right side. Thread the second braided cord through the lower right side of the base panel in the same way, so the two cords cross behind the panel.
For each sliding knot, cut a separate 6-inch length of thread. Fold it into a small loop around both strands of the band, wrap its tail around both band strands 4 times, pass the tail through the loop end, and pull to tighten. Repeat on the other side with a second cut piece so both ends slide independently. Thread one seed bead and one crystal bead onto each cord tail and knot to secure the decorative ends.
With the closure slid fully open, the bracelet should fit a wrist up to 8 inches. Slid closed, it sits snugly on a wrist as small as 5.5 inches.
Finishing & Assembly
Block the base panel before assembly. Mist it lightly with water or spray starch, pin it face-up on a foam blocking board while gently stretching it to reveal the diamond shape, and allow it to dry completely, 1 to 4 hours. Do not block the rose.
Place the completed rose at the centre of the blocked panel and sew its base to the lace panel with a tapestry needle and a doubled length of dusty rose thread, taking 6 to 8 secure stitches that catch both the rose base and the lace grid threads beneath.
Arrange the 4 long leaves evenly around the rose at the top, bottom, left, and right, tucking their bases slightly under the rose, and pin them in place. Arrange the 4 short leaves at the diagonals and pin those too. Sew each leaf to the panel with its 6-inch tail, catching 2 to 3 stitches of the leaf base and 2 to 3 threads of the lace beneath, letting the leaf tips angle upward slightly for a layered look.
Thread the braided band through the panel and finish the sliding knots and bead ends as described above. Weave in all remaining ends, and add a tiny amount of fabric stiffener to the base panel and leaf tips only if you would like extra firmness.
Tips
Fine thread means smaller stitches, not harder stitches. Work in good lighting, take your time, and weave ends in extra securely, as thread ends in lace work can work loose with wear.
To make the centrepiece slightly larger, add one more lace round after Row 13 by working (sc, ch 5, sc) into each corner shell tip and connecting with ch 3 between. This adds approximately 0.25 inch in each direction.
To make the rose smaller or larger, adjust the foundation chain of each petal strip by 6 to 8 chains. A shorter strip gives a tighter bud, and a longer strip gives a larger, more open rose.
Hand wash only in cool water with a little mild soap, roll in a towel to remove moisture without wringing, reshape, and air dry flat away from direct sunlight. Store flat or coiled loosely in a small pouch.
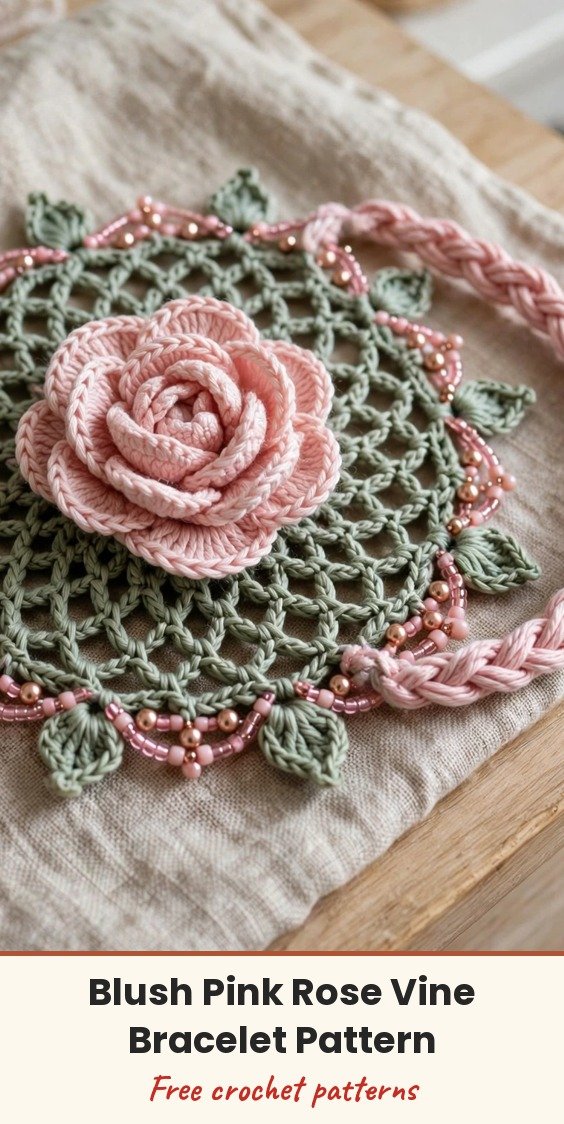
Blush Pink Rose Vine Bracelet Free Crochet Pattern
Materials
Steps
- Work the sage lace diamond base panel through Row 13
- Work the beaded edging around the base panel
- Work the inner petal strip, roll and secure it into a rose centre
- Work the outer petal strip and roll it around the inner rose
- Make 4 long leaves and 4 short leaves
- Braid the two band cords and add sliding knot closures with bead ends
- Block the panel, sew the rose at the centre and the leaves around it
- Thread the band through the panel
- Pre-string beads onto the dusty rose thread before beaded sections
- Do not block the rose, its rolled shape gives the dimension
- Work in good light and weave thread ends extra securely for lace