Sunset Ombre Gradient Granny Backpack Crochet Pattern
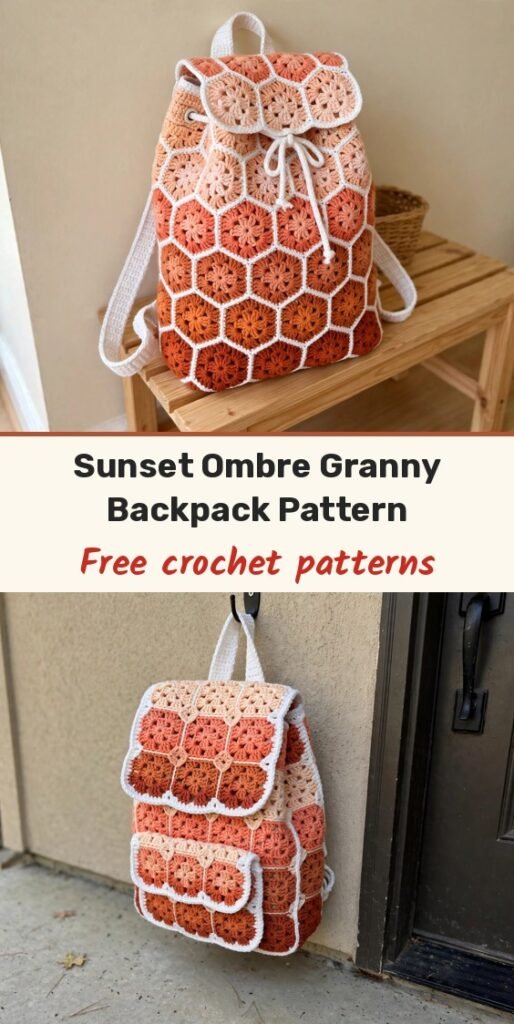
Table of Contents
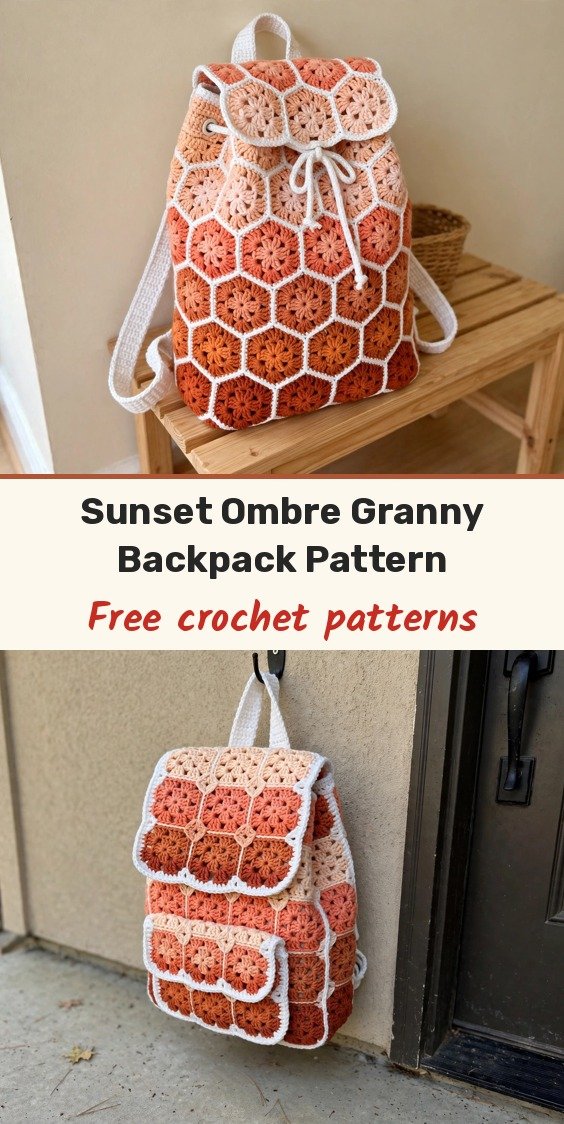
I have been looking for the perfect backpack pattern for ages, and this one finally checked every box on my list! We will make 28 African flower hexagon motifs in a sunset gradient, soft peach at the top flowing down through coral and terracotta to deep burnt orange at the bottom, then join them into a roomy backpack with a flap, a front pocket, a drawstring top and sturdy white straps.
I love how the colour placement does all the work here. Each hexagon is the same simple motif worked in a different shade, with a clean white final round that makes those sunset colours really pop. The finished backpack measures about 12 inches wide by 14 inches tall, not counting the flap, so it happily holds a wallet, phone, water bottle and even a small crochet project.
The motif itself uses familiar stitches, working in the round. The real care points are keeping track of your colour placement and taking your time with the assembly, and I will walk you through both, step by step.
Materials
- 150 yards worsted weight (category 4) yarn in light peach (Colour A)
- 150 yards worsted weight yarn in medium coral (Colour B)
- 150 yards worsted weight yarn in terracotta (Colour C)
- 150 yards worsted weight yarn in burnt orange (Colour D)
- 200 yards worsted weight yarn in white (Colour E) for edging, straps and details
- US H-8 (5.0mm) crochet hook
- Yarn needle for weaving ends and seaming
- Stitch markers
- Scissors
- Optional: about half a yard of fabric for a lining, and a magnetic snap closure
Abbreviations
- ch: chain
- sl st: slip stitch
- sc: single crochet
- hdc: half double crochet
- dc: double crochet
- sk: skip
- sp: space
- st/sts: stitch / stitches
Special Stitches
- Puff stitch: yarn over, insert hook, yarn over and pull up a loop five times in the same stitch (11 loops on hook), yarn over and pull through all 11 loops at once. Pull up tall loops so you have enough slack to pull through at the end.
Gauge & Size
- Finished size: about 12 inches wide by 14 inches tall, not including the flap
- Gauge: one completed hexagon motif measures about 4 inches from flat edge to flat edge
- Construction: 28 hexagon motifs joined with whip stitch into body, bottom, flap and pocket, with a drawstring channel and sewn straps
- Skill level: Intermediate
African Flower Hexagon Motif
You will need 28 hexagon motifs in total: 4 in Colour A for the top of the bag and flap, 8 in Colour B for the upper body, 8 in Colour C for the lower body, and 8 in Colour D for the bottom. Each motif uses its main colour for Rounds 1 to 3, then switches to white (Colour E) for the final round.
Round 1 (Flower Centre): With your main colour, make a magic ring. Ch 1 (does not count as a stitch throughout), work 6 sc into the ring, sl st to the first sc to join, and pull the ring closed. (6 sc)
Round 2 (Petal Round): Ch 1, work (sc, ch 1, puff stitch, ch 1, sc) all in the first stitch. Work (sc, ch 1, puff stitch, ch 1, sc) in each of the remaining 5 stitches around, sl st to the first sc to join. (6 petals, 6 puff stitches)
Round 3 (Filling Between Petals): Sl st into the ch-1 space before the first puff stitch. Ch 2 (counts as the first hdc here). Work (2 hdc, ch 2, 2 hdc) into the top of the puff stitch for the first corner. Hdc into the next ch-1 space, hdc into the space between the two sc stitches where the petals meet, and hdc into the next ch-1 space. Repeat the corner sequence, (2 hdc, ch 2, 2 hdc) into the top of the puff stitch, and continue around, working 3 hdc between each puff stitch and a corner into each puff stitch. End with hdc in the last ch-1 space, sl st to the top of the beginning ch-2 to join. (6 corners, 30 hdc total plus 6 ch-2 corner spaces)
Fasten off your main colour and weave in the end.
Round 4 (Border Round in White): Join Colour E in any ch-2 corner space with a sl st. Ch 3 (counts as dc), work (dc, ch 1, 2 dc) in the same corner space. Dc in each hdc across the side (5 dc between corners). Work (2 dc, ch 1, 2 dc) in the next corner space. Continue around, working 5 dc along each flat edge and the corner cluster in each ch-2 space. End by working the final dc of the last side, sl st to the top of the beginning ch-3 to join. (6 corners, 9 dc per side)
Fasten off and weave in ends. Repeat for all 28 hexagons.
Assembling The Backpack Body
Lay your hexagons out in the gradient, lightest at the top and darkest at the bottom. The bag body uses 20 hexagons in 4 horizontal rows of 5 motifs each.
Row 1 (top): 4 Colour A motifs plus 1 Colour B motif.
Row 2: 4 Colour B motifs plus 1 Colour C motif.
Row 3: 4 Colour C motifs plus 1 Colour D motif.
Row 4 (bottom): 4 Colour D motifs.
Join with a whip stitch join in white yarn, which creates a visible seam that becomes part of the design. Hold two hexagons with right sides facing and, working through the back loops only of both pieces, whip stitch across one flat edge through corresponding stitches, keeping your tension even but not too tight. First join the hexagons into horizontal rows, then join the rows together, offsetting them slightly so the hexagons nestle into each other, and finally join the side edges to form a tube.
Bottom, Flap & Pocket
Bottom panel: Join 3 hexagons in Colour D in a triangular arrangement and attach the panel to the bottom edge of the bag tube, easing it to fit. You may need to add a few single crochet stitches around the edge to help everything connect smoothly.
Flap: The flap uses 4 hexagons in Colour A. Join 3 hexagons in a row, then attach the fourth to create a rounded flap shape.
Flap edging Round 1: Join white yarn at one corner of the flap. Sc evenly around the curved edge, working approximately 2 sc per dc and 3 sc in each corner, sl st to join.
Flap edging Round 2: Ch 1, work (sc, ch 2, sc) in the first stitch, skip 1 stitch. Repeat (sc, ch 2, sc, skip 1) around for a scalloped edge, sl st to join. Fasten off.
Attach the straight edge of the flap to the back top edge of the backpack body using whip stitch.
Front pocket: Join 2 hexagons in coordinating colours side by side, add the white scalloped edging around three sides, leaving the top open, and sew the pocket to the front of the backpack at a pleasing height.
Drawstring Channel
Join white yarn at the top edge of the backpack.
Round 1: Work sc evenly around the top opening, sl st to join. (Approximately 60 sc, adjust to your actual stitch count)
Rounds 2 to 4: Ch 1, sc in each st around, sl st to join. (60 sc per round)
Round 5 (eyelet round): Ch 1, sc in the first st, ch 2, skip 2 sts, repeat around, sl st to join.
Rounds 6 to 7: Ch 1, sc in each sc and 2 sc in each ch-2 space around, sl st to join.
Fasten off and weave in ends.
Straps, Cord & Tassels
Shoulder straps (make 2): With Colour E, ch 9.
Row 1: Sc in the 2nd ch from the hook and in each ch across, ch 1, turn. (8 sc)
Rows 2 to 120: Sc in each st across, ch 1, turn. (8 sc)
This makes a strap about 30 inches long; add or remove rows to adjust the length. Fasten off, leaving a long tail for sewing, and attach the straps to the back of the backpack at the top corners and bottom sides.
Drawstring cord: Ch 150 with white yarn, or use a twisted or braided cord for extra durability, and thread it through the eyelet round of the drawstring channel.
Tassels (make 2): Wrap yarn around a 4 inch piece of cardboard 30 times. Cut one end, tie at the top, and wrap below the top to form the tassel head. Trim the ends evenly. Make the tassels in coordinating peach and coral shades and attach one to each end of the drawstring cord.
Finishing & Assembly
Weave in all remaining ends as you go. For extra durability, add a fabric lining: cut fabric to match the bag shape with a seam allowance, sew it together, and hand stitch it inside the crocheted shell. Block the empty backpack by gently steaming or wet blocking it to even out your stitches and help the hexagons lie flat.
Tips
Cotton yarn holds its shape beautifully for bags and gives crisp stitch definition. Acrylic works too, but the bag may stretch more with heavy use.
Batch your motifs! These little hexagons are quick and satisfying, so settle in with a good podcast and enjoy making them a few at a time.
Keep your whip stitch tension even. Seams that are too tight will pucker the gradient, and seams that are too loose will gap when the bag is full.
Sunset Ombre Gradient Granny Backpack Crochet Pattern
Materials
Steps
- Crochet 28 African flower hexagon motifs in 4 gradient colours with white final rounds
- Whip stitch 20 motifs into 4 rows and join into the bag body tube
- Join 3 burnt orange motifs for the bottom panel and attach it
- Make the 4-motif flap with scalloped edging and attach it to the back
- Add the 2-motif front pocket
- Work the drawstring channel with an eyelet round
- Make 2 shoulder straps, a ch 150 drawstring cord and 2 tassels, and attach everything
- Use cotton yarn for shape and crisp stitch definition
- Keep whip stitch tension even so the gradient lies flat
- Batch the small motifs a few at a time to stay on track
- Add a fabric lining for extra durability


