Easy Crochet Berry Pattern For Fun Decor Ideas
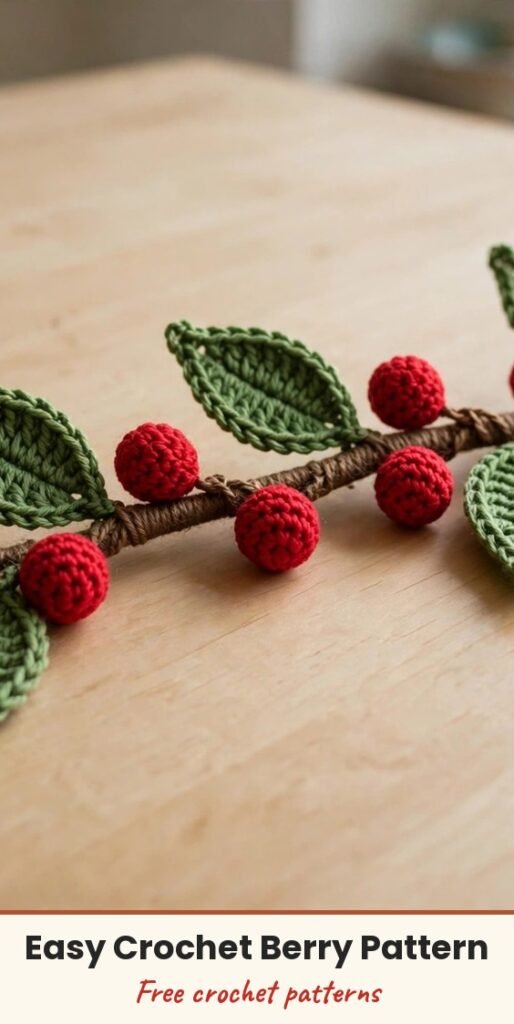
Table of Contents
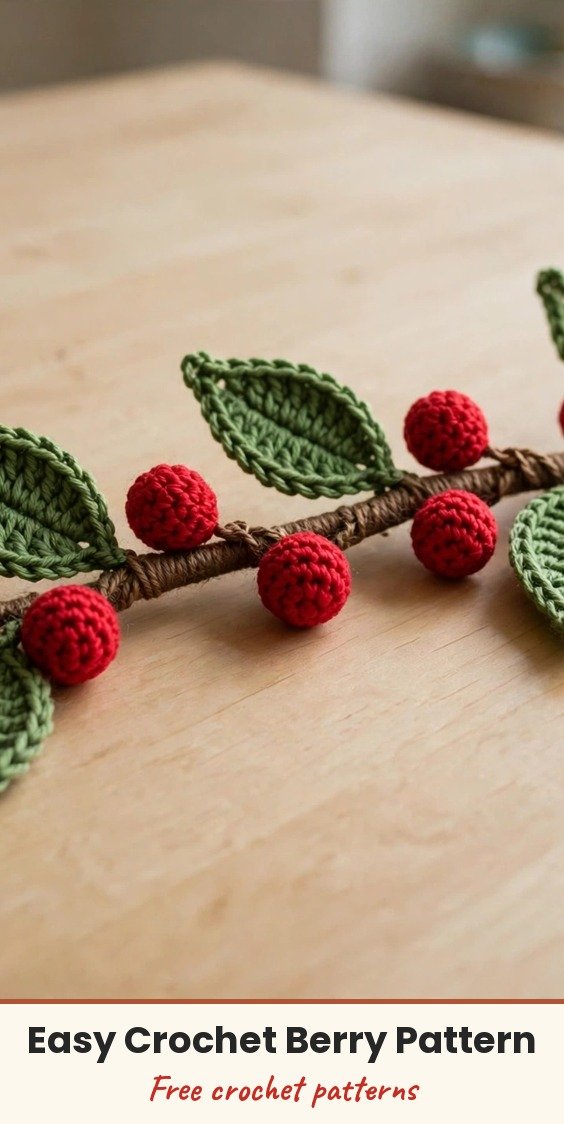
These little crochet berries make me so happy! Each one is a tiny plump sphere with a sweet embroidered dot on top, and when we gather ten berries and five pointed leaves onto a yarn-wrapped wire branch, the whole cluster looks just like a real sprig picked from the garden.
I love how versatile these are. Add a sprig to a headband or a favourite bag, string several branches into a garland, or arrange them on a wreath for cheerful home decor. The berries are worked in simple single crochet rounds, and the leaves are crocheted flat around a chain with a pretty picot edge, so even beginners can enjoy this one.
We will make the leaves first, then the berries, and finish by wrapping crochet wire with yarn and assembling everything into one lifelike branch.
Materials
- 1 ball 4 ply milk cotton yarn in berry red (or your chosen berry colour)
- 1 ball 4 ply milk cotton yarn in green, for the leaves and stem wrapping
- Small amount of contrasting embroidery thread or yarn, for the berry dots
- 2.5 mm crochet hook
- 2 mm x 30 cm floral stem
- 0.5 mm crochet wire
- Small amount of fiberfill stuffing
- Yarn needle
- Stitch marker
- Glue gun
- Scissors
Abbreviations
- ch: chain
- sc: single crochet
- hdc: half double crochet
- dc: double crochet
- sl st: slip stitch
- st/sts: stitch / stitches
- dec: decrease (invisible decrease: insert hook in the front loops of two stitches, yarn over, pull through both loops, yarn over and pull through the final two loops)
Special Stitches
- Picot peak: work 1 sc, ch 1, then sl st in the same space. On the leaf this forms the little peak at the tip detail in Round 2.
- Invisible decrease: insert your hook in the front loops only of the next two stitches, yarn over and pull through both loops, then yarn over and pull through the final two loops. This gives the berries their smooth, tight shaping.
Gauge & Size
- Finished size: one branch cluster made of 10 berries and 5 leaves on a 30 cm stem (berry and leaf size depends on your yarn and tension)
- Construction: leaves crocheted flat in 2 rounds around a foundation chain, berries worked in continuous single crochet rounds and stuffed, all assembled on yarn-wrapped wire
- Skill level: Beginner
Leaf Pattern
Make 5. The leaf is crocheted in rows and features two rounds. Start with green yarn and make a slip knot.
Chain 12 (the slip knot does not count as a stitch).
Round 1, Side 1 (down the chain): In the 2nd chain from the hook, make 1 sc. In the next chain, make 1 hdc. In the next 7 chains, make 1 dc in each (7 dc total). In the next chain, make 1 hdc. In the last chain, make 3 sc. This will form the tip of the leaf.
Round 1, Side 2 (up the chain): Continue working along the other side of the chain, mirroring the stitches: make 1 hdc in the first stitch, then follow the same pattern as the first side up the chain to the starting point. Finish Round 1 by joining with a sl st into the first stitch of the round.
Round 2 (decorative edge): Chain 1. Work around the entire outline of the leaf in a pattern of 1 sc, 1 ch on all stitches along the edge. Where the tip of the leaf is located, make 1 sc, ch 1, sl st in the same space (the peak or picot stitch). Slip stitch into the starting space to end the round. Chain 1 to secure and cut the yarn, leaving a tail of about 10 cm.
Weave in loose ends to secure and tidy the leaf.
Berry Pattern
Make 10. The berry is worked in rounds and includes increasing and decreasing stitches. Start with berry-coloured yarn and make a slip knot, or a magic ring if you prefer.
Round 1: Chain 1 to begin, then work 6 sc into the centre of the ring. Use a stitch marker in the first stitch if needed. (6 sts)
Round 2: In each stitch, make 2 sc (this is an increase). (12 sts)
Round 3: Work 1 sc in each stitch around. (12 sts)
Rounds 4 to 5: Repeat the same pattern from Round 3. Tip: turn the berry inside out before proceeding.
Round 6: Work 6 decreases by combining every 2 stitches, using the invisible decrease method. (6 sts)
Before the berry is fully closed, insert small bits of fiberfill to stuff it. After completing all the decreases, use a yarn needle to pull through the remaining stitches to close the opening tightly.
Cut the yarn with a 20 cm tail for wrapping the stem, and weave in.
Finishing & Assembly
For the optional berry dot, use contrasting embroidery thread or yarn to embroider a small dot on top of each berry for extra charm.
To assemble the branch, use crochet wire to form stems for structure, wrapping them with yarn for a cohesive look. Attach a berry to the wire using its tail, and wrap yarn around the wire under each berry. Similarly, affix the leaves to the wire, spacing them appropriately. Bind the wires or stems together to form the branch, adding the 2 mm x 30 cm floral stem for support.
Block or steam press the leaves to retain their shape, and use floral tape or additional yarn to conceal the wirework for a polished finish.
Tips
If the magic ring feels tricky, try the double knot method instead: it is equally effective for securing the starting loop.
Count your stitches carefully on each berry round and place a stitch marker in the first stitch. This avoids accidental increases or decreases and keeps all your berries the same size.
Arrange the leaves and berries asymmetrically for a natural look, just like a real branch.
Experiment with yarn colours to create different berries, like blueberries or blackberries. A soft shimmer yarn gives a frosted look, and the little berries also make lovely charms, keychains, and embellishments for larger projects.
Easy Crochet Berry Pattern For Fun Decor Ideas
Materials
Steps
- Make 5 leaves: ch 12, work sc, hdc, 7 dc, hdc, 3 sc around the tip and mirror back, then a picot edge round
- Make 10 berries: 6 sc in a ring, increase to 12, work 3 even rounds, then 6 invisible decreases
- Stuff each berry before closing and sew the opening shut with the yarn needle
- Embroider a small contrasting dot on top of each berry
- Wrap crochet wire with yarn to form stems and attach the berries and leaves
- Bind the wired stems around the floral stem to form the branch
- Use a stitch marker in the first stitch of each berry round to keep all berries the same size
- Turn each berry inside out before the decrease round for a neater finish
- Arrange leaves and berries asymmetrically for a natural, real-branch look