Ocean Blue Ombre Crochet Backpack Free Crochet Pattern
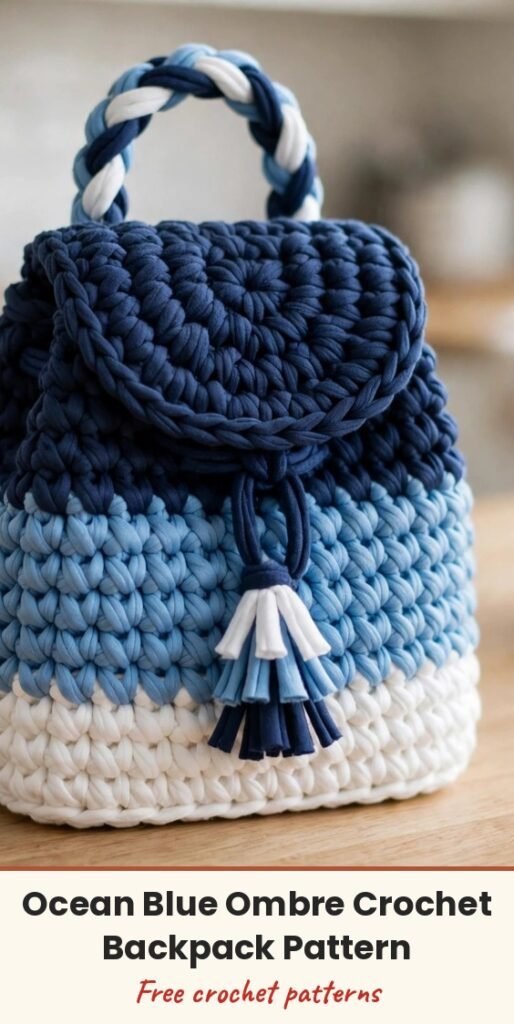
Table of Contents
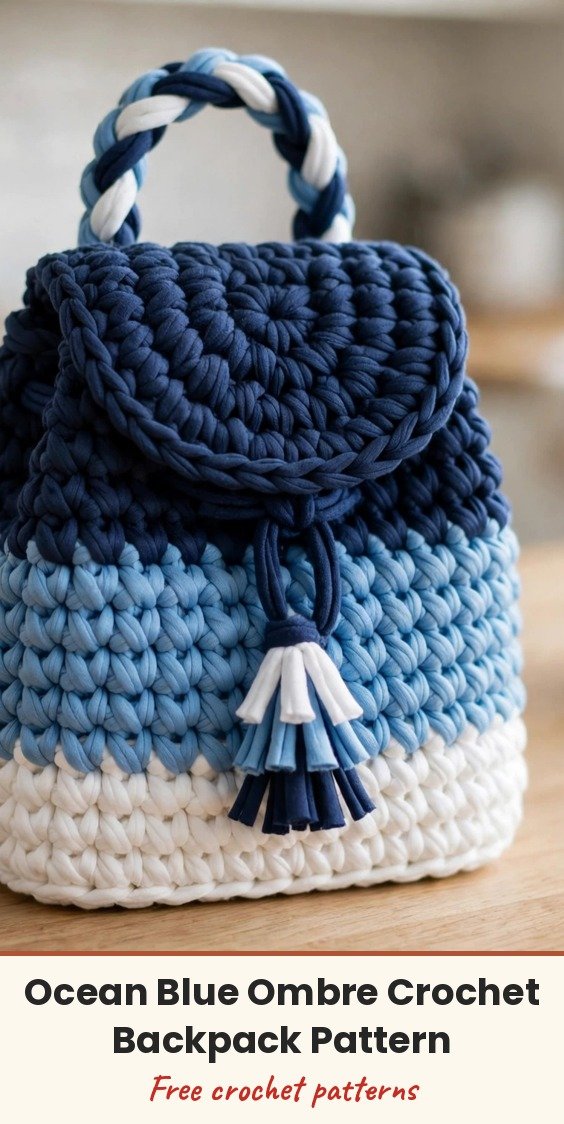
I absolutely love a good mini backpack. There is something so practical about having both hands free while still looking completely put together, and this ocean blue ombre crochet backpack gives you all the boutique style with none of the boutique price tag. The ombre colour blocking from white to sky blue to navy creates such a fresh, modern look for farmers market trips and casual days out.
And honestly? It is way more approachable than it looks. We work from a firm oval base upward in continuous rounds, in dense single crochet with colour-blocked ombre bands: a white base, a gorgeous sky blue body, and deep navy details at the top. Then we add a rounded flap, a drawstring closure through an eyelet round, a braided handle, adjustable shoulder straps and a layered tassel.
The skill level is intermediate: you will want to be comfortable with shaping in the round, neat colour changes, working flap rows, and basic hardware placement. If you can single crochet in the round and follow a simple increase pattern, you have got this. Let us make it together.
Materials
- 45 yards of super bulky tubular cotton or polyester cord yarn (5 to 6mm diameter) in white
- 125 yards of super bulky tubular cotton or polyester cord yarn (5 to 6mm diameter) in sky blue
- 40 yards of super bulky tubular cotton or polyester cord yarn (5 to 6mm diameter) in navy
- Size J/10 (6mm) crochet hook, or size needed to match gauge
- 1 locking stitch marker
- Tapestry needle
- Scissors
- Measuring tape
- 1 small turn-lock clasp or magnetic bag clasp, about 1 inch
- 2 strap adjusters or D-rings (optional)
- Metal cord tips (optional)
- 1 bead, for the tassel cord
Abbreviations
- ch: chain
- sl st: slip stitch
- sc: single crochet
- inc: increase, 2 sc in the indicated stitch
- sc2tog: single crochet 2 together (a decrease)
- BLO: back loop only
- st/sts: stitch / stitches
- rnd: round
- RS: right side
- WS: wrong side
Special Stitches
- Invisible join: cut yarn, pull the tail through the final stitch, thread the needle under both loops of the first stitch of the round, then back down through the center of the last stitch. Tighten gently for a seamless finish.
- Firm single crochet: insert hook under both loops, yarn over, pull up a loop, yarn over, pull through both loops. Keep loops snug but not tight.
- Standing sc colour join: place a slip knot on hook, insert hook in the indicated stitch, yarn over, pull up a loop, yarn over and pull through both loops. This joins a new colour without a slip stitch.
- Cord row for straps: ch 1, sc across. Turn. Repeat rows until the strap length is reached, keeping edges straight.
Gauge & Size
- Finished size: approximately 9 inches wide x 10.5 inches tall x 4 inches deep
- Gauge: 9 sc x 8 rounds = 4 inches in firm single crochet, worked in the round after light steaming
- Construction: oval base worked in continuous rounds, body in single crochet, flat rounded flap, sewn-on straps
- Skill level: Intermediate
Oval Base Pattern
The base creates the foundation for the whole backpack, so take your time here to get it flat and even. Work in white.
Rnd 1: Ch 13. Sc in 2nd ch from hook and next 10 ch, 3 sc in last ch; working on other side of chain, sc in next 10 ch, 2 sc in first ch. (26 sc)
Rnd 2: Inc in first st, sc 10, inc in each of next 3 sts, sc 10, inc in each of next 2 sts. (32 sc)
Rnd 3: (Inc, sc 4) repeat 6 times, inc, sc 1. (38 sc)
Rnd 4: (Inc, sc 5) repeat 6 times, inc, sc 1. (44 sc)
Rnd 5: (Inc, sc 6) repeat 6 times, inc, sc 1. (50 sc)
Rnd 6: (Inc, sc 7) repeat 6 times, inc, sc 1. (56 sc)
Rnd 7: Sc 3, (inc, sc 6) repeat 7 times, inc, sc 4. (64 sc)
Your oval base should lie flat at this point. If it cups upward, your tension is too tight or you need more increases; if it ruffles, your tension is too loose.
Backpack Body Pattern
Now we build the walls of the backpack, working into the back loops only on the first body round to create that nice defined ridge where the base meets the sides. Move your stitch marker up at the first stitch of each round, and join colour changes at the back center of the bag so the joins stay hidden.
Rnd 8: BLO sc around to turn the base upward. (64 sc)
Rnd 9: Sc around in white. (64 sc)
Rnd 10: Sc around in white. (64 sc)
Rnd 11: Sc around in white. (64 sc)
Rnd 12: Sc around in white. (64 sc)
Rnd 13: Sc around in white. (64 sc)
Rnd 14: Join sky blue with a standing sc at back center. Sc around. (64 sc)
Rnd 15: Sc around in sky blue. (64 sc)
Rnd 16: Sc around in sky blue. (64 sc)
Rnd 17: Sc around in sky blue. (64 sc)
Rnd 18: Sc around in sky blue. (64 sc)
Rnd 19: Sc around in sky blue. (64 sc)
Rnd 20: Sc around in sky blue. (64 sc)
Rnd 21: Sc around in sky blue. (64 sc)
Rnd 22: Sc around in sky blue. (64 sc)
Rnd 23: Sc around in sky blue. (64 sc)
Rnd 24: Sc around in sky blue. (64 sc)
Rnd 25: Sc around in sky blue. (64 sc)
Rnd 26: Sc around in sky blue. (64 sc)
Rnd 27: Sc around in sky blue. (64 sc)
Rnd 28: Sc around in sky blue. (64 sc)
Checkpoint: the body should measure approximately 9 inches wide, 4 inches deep, and 10 inches tall from the bottom edge.
Rnd 29: Join navy. Sc around. (64 sc)
Rnd 30: Sc around in navy. (64 sc)
Now the eyelet round, which creates the spaces for the drawstring to weave through and gives the backpack its classic cinched closure.
Rnd 31: (Sc 6, ch 1, skip 1 st, sc 1) repeat 8 times. (56 sc + 8 ch-1 spaces)
Rnd 32: Sc in each sc and ch-1 space around. Invisible join. (64 sc)
Mark the back center and front center. The flap will be sewn to the back over Rnds 30 to 32.
Flap Pattern
The flap is worked flat in rows in navy, starting from a magic ring and increasing outward into a rounded shape.
Row 1: Make a magic ring, ch 1, work 6 sc in ring. Pull ring snug. Turn. (6 sc)
Row 2: Ch 1, inc in each st across. Turn. (12 sc)
Row 3: Ch 1, (sc 1, inc) repeat across. Turn. (18 sc)
Row 4: Ch 1, (sc 2, inc) repeat across. Turn. (24 sc)
Row 5: Ch 1, (sc 3, inc) repeat across. Turn. (30 sc)
Row 6: Ch 1, (sc 4, inc) repeat across. Turn. (36 sc)
Row 7: Ch 1, (sc 5, inc) repeat across. Turn. (42 sc)
Row 8: Ch 1, sc across evenly for a firm outer edge. Do not turn. (42 sc)
Edging: work 21 sc evenly along the straight top edge, then sl st to fasten off. Leave a 24 inch sewing tail. Your flap should be approximately 9.25 inches wide and 4.5 inches deep.
Straps, Handle, Drawstring & Tassel
Shoulder straps (sky blue, make 2): ch 7. Row 1: sc in 2nd ch from hook and each ch across. Turn. (6 sc) Rows 2 to 78: ch 1, sc across. Turn. (6 sc) Fasten off, leaving a long sewing tail. Each strap measures about 34 to 36 inches before hardware adjustment; for shorter straps, remove rows in pairs.
Top handle (navy): make 3 cords, each ch 22, and fasten off. Braid the 3 cords together, knotting both ends securely. Sew the handle ends to the top back, spacing them 3.25 inches apart.
Drawstring (navy): ch 110, keeping the chain even and flexible. Weave it through the 8 eyelets, starting and ending at the front. Add beads or cord tips to the ends for a polished finish.
Layered tassel: cut 16 strands, each 10 inches long: 6 navy, 6 sky blue, 4 white. Fold all strands together over a 12 inch hanging cord. Wrap tightly with navy yarn 0.75 inch below the fold, knot securely, trim the ends straight, and attach to a side ring or flap cord.
Finishing & Assembly
Center the straight edge of the flap over the back top edge, and sew through the flap edge and top band, keeping the seam flat and strong. Close the flap over the front, mark the clasp placement, then attach the lower clasp to the bag front and the upper clasp to the flap. Reinforce the inside with a small felt or fabric square if your hardware has prongs.
Sew the top handle ends securely at the back top edge. Attach the shoulder straps to the upper back and lower back corners, adding D-rings or adjusters if you like. Weave the drawstring through the eyelets, tie the ends, and add cord tips. Attach the tassel at the right front side or to the drawstring.
To block, stuff the backpack with towels until the sides stand evenly, steam lightly without touching the yarn directly, shape the flap curve while warm, and let it dry completely before use. For care, spot clean with cool water and mild soap, reshape while damp, and dry flat, stuffed with towels to maintain the shape. Do not machine dry, and remove the detachable tassel before cleaning.
Tips
For a bag that stands upright, crochet firmly and avoid stretching the cord as you work. The stiffness comes from your tension, so keep it snug and even.
If your base ruffles, your tension is too loose or you have too many increases; block firmly or remove one increase round. If the bag leans, check that the colour joins and flap seam sit at the back center, and stuff it while steaming.
To widen the bag, continue increasing the oval base in the established rhythm until you reach the circumference you want, then keep the final body count divisible by 8 so the eyelets stay evenly spaced. To make it taller, add or remove plain body rounds before the navy top band.
Left-handed makers can follow the same stitch counts; your spiral will travel in the opposite direction, so place the clasp and tassel after trying the flap on the bag.
Ocean Blue Ombre Crochet Backpack Free Crochet Pattern
Materials
Steps
- Work the white oval base in Rounds 1 to 7, growing to 64 sc
- Turn the base upward with a BLO round, then work the white and sky blue body to Round 28
- Add the navy top band, the eyelet Round 31 and the closing Round 32
- Crochet the rounded navy flap in 8 rows and edge the straight side
- Make 2 shoulder straps, the braided navy handle, the ch-110 drawstring and the layered tassel
- Sew on the flap, attach the clasp, handle and straps, and weave in the drawstring
- Stuff with towels, steam lightly and shape to dry
- Crochet firmly and do not stretch the cord as you work; the stiff tension is what lets the bag stand up
- Join colour changes at the back center so all the joins hide under the flap seam
- Keep the final body count divisible by 8 so the eyelets stay evenly spaced
- Reinforce the inside behind pronged clasp hardware with a small felt or fabric square


