Sage Green Mandala Market Bag Free Crochet Pattern
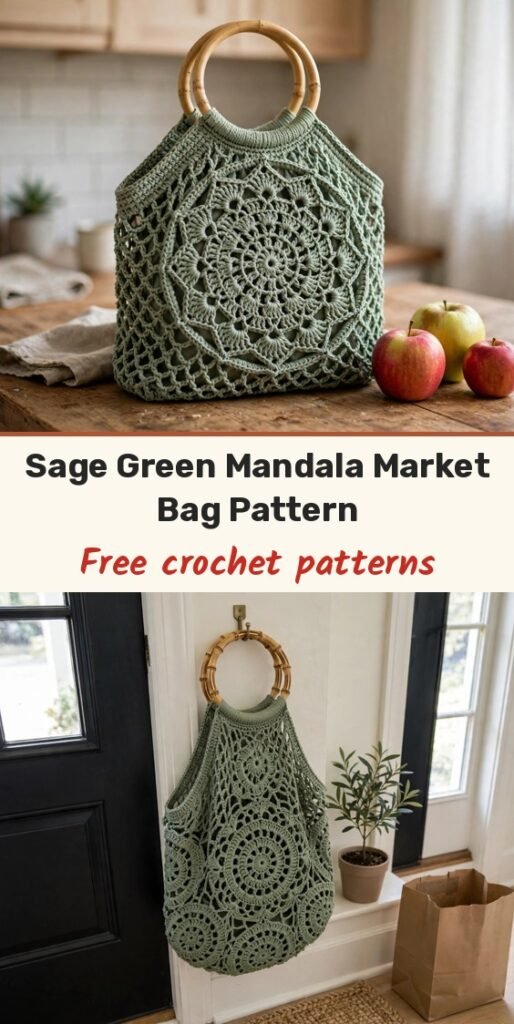
Table of Contents
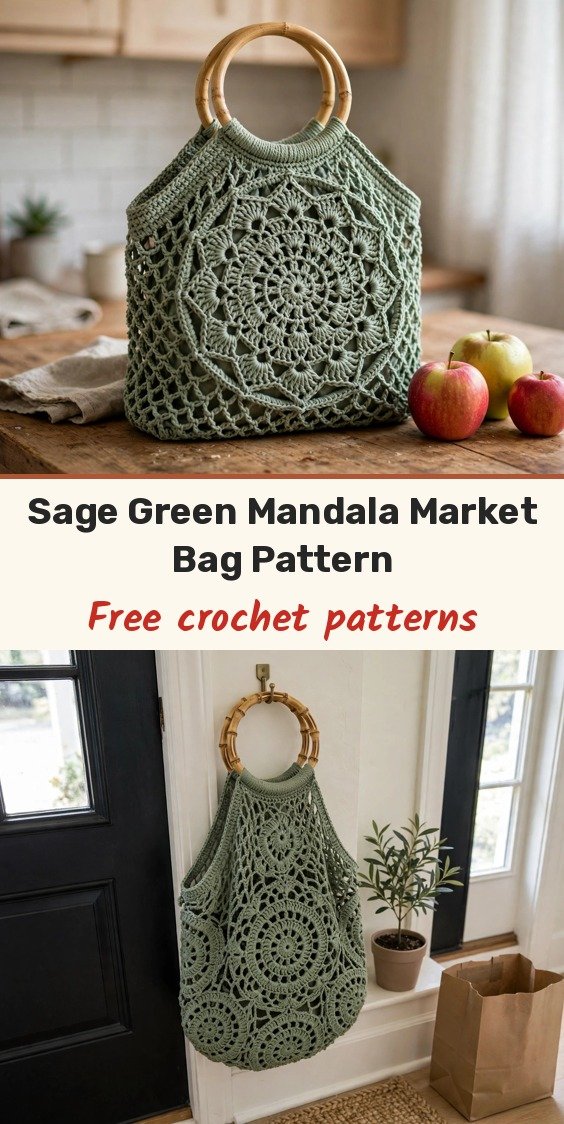
This sage green mandala market bag is the bag I reach for on every market run! Two stunning circular panels radiate outward from a tiny magic ring through shells, lacework and fans, then a gusset strip joins them into a bag with real depth and structure, and bamboo ring handles finish it like something from a boutique.
It measures about 14 inches wide by 14 inches tall with roughly 3 inches of depth, so your produce, library books or yarn haul actually fit inside without bulging awkwardly. The solid cotton yarn is essential here: it keeps the lacework crisp and the bag holding its shape when filled.
We will make two identical mandala panels first (gauge matters, they must match!), then the gusset strip, then seam everything together and crochet the top edging over the bamboo rings. Let us get started.
Materials
- 600 to 700 yards DK weight (light worsted, category 3) 100% cotton yarn in sage green
- 4.0 mm (US G-6) crochet hook
- 2 round bamboo bag handles, 5 inch diameter
- 4 to 6 locking stitch markers
- Yarn needle
- Scissors
- Measuring tape
Abbreviations
- ch: chain
- sl st: slip stitch
- sc: single crochet
- dc: double crochet
- tr: treble crochet
- sk: skip
- sp: space
- ch-sp: chain space
- MR: magic ring
- st/sts: stitch / stitches
Special Stitches
- Shell: work 5 dc into the same stitch or space. This fan-shaped cluster is used through the middle rounds.
- Large shell: work 7 dc into the same stitch or space. Used in the wider outer rounds.
- Standing double crochet: begin with a slip knot on the hook, yarn over, insert the hook into the indicated stitch or space, yarn over and draw up a loop, yarn over and draw through 2 loops, yarn over and draw through the remaining 2 loops. This starts a round without a ch-2 for an invisible join.
- Joined dc cluster (dc-cl): (yarn over, insert hook into the indicated stitch, yarn over, draw up a loop, yarn over, draw through 2 loops) 3 times in the same stitch, yarn over, draw through all 4 loops on the hook.
Gauge & Size
- Finished size: approximately 14 inches wide by 14 inches tall, not including handles; bamboo handles add about 6 inches, for about 20 inches total; gusset depth about 3 inches
- Gauge: 16 dc and 8 rows = 4 inches in solid double crochet; after Round 10 your panel should measure approximately 9 inches in diameter, and approximately 14 inches after all 14 rounds
- Construction: two identical mandala panels worked in continuous rounds, joined by a single crochet gusset strip, with bamboo ring handles crocheted into the top edging
- Skill level: Intermediate
Panel notes: work each panel in continuous rounds from the center outward. Do not turn unless told to, and do not join rounds unless instructed. Use a stitch marker at the beginning of each round and move it up as you go. Both panels must match within a quarter inch before assembly, so check your diameter at the Round 10 checkpoint.
Mandala Panel
Make 2 identical panels.
Round 1: Make a magic ring. Ch 3 (counts as first dc here and throughout), work 11 dc into the ring. Pull the ring closed. Join with sl st to top of beginning ch-3. (12 dc)
Round 2: Ch 1. Work 2 sc into each dc around. Join with sl st to first sc. (24 sc)
Round 3: Ch 4 (counts as dc plus ch 1). (Dc into next sc, ch 1) around. Join with sl st to 3rd ch of beginning ch-4. (24 dc, 24 ch-1 spaces)
Round 4: Sl st into first ch-1 space. Ch 3 (counts as dc). Work 2 dc into the same ch-1 space. Work 3 dc into each ch-1 space around. Join with sl st to top of beginning ch-3. (72 dc)
Round 5: Ch 1. Sc into same stitch. Ch 3. (Sk 2 dc, sc into next dc, ch 3) around, ending sk 2 dc. Join with sl st to first sc. (24 sc, 24 ch-3 spaces)
Round 6: Sl st into first ch-3 space. Ch 3 (counts as dc). Work 4 more dc into the same ch-3 space (first shell made). Ch 2. (Work 5 dc into next ch-3 space, ch 2) around. Join with sl st to top of beginning ch-3. (24 shells of 5 dc, 24 ch-2 spaces)
Round 7: Sl st to the center dc of the first shell (third dc). Ch 1. Sc into same stitch. Ch 5. (Sc into center dc of next shell, ch 5) around. Join with sl st to first sc. (24 sc, 24 ch-5 spaces)
Round 8: Sl st into first ch-5 space. Ch 3 (counts as dc). Work 6 more dc into the same ch-5 space (first large shell of 7 dc made). Ch 3. (Work 7 dc into next ch-5 space, ch 3) around. Join with sl st to top of beginning ch-3. (24 large shells of 7 dc, 24 ch-3 spaces)
Round 9: Sl st to the center dc of the first large shell (fourth dc). Ch 1. Sc into same stitch. Ch 4. Sc into next ch-3 space. Ch 4. (Sc into center dc of next large shell, ch 4, sc into next ch-3 space, ch 4) around. Join with sl st to first sc. (48 sc, 48 ch-4 spaces)
Round 10: Sl st into first ch-4 space. Ch 1. Work 5 sc into the same ch-4 space. Work 5 sc into each ch-4 space around. Join with sl st to first sc. (240 sc)
Checkpoint: after Round 10 your panel should measure approximately 9 inches in diameter laid flat. If it measures more than 9.5 inches, switch to a smaller hook; less than 8.5 inches, switch to a larger hook, and restart if needed so both panels match.
Round 11: Ch 1. Sc into same stitch. Ch 3. Sk 4 sc. (Sc into next sc, ch 3, sk 4 sc) around. Join with sl st to first sc. (48 sc, 48 ch-3 spaces)
Round 12: Sl st into first ch-3 space. Ch 3 (counts as dc). Work 4 more dc into the same ch-3 space (shell). Ch 1. (Work 5 dc into next ch-3 space, ch 1) around. Join with sl st to top of beginning ch-3. (48 shells of 5 dc; 240 dc plus 48 ch-1 spaces)
Round 13: Ch 1. Sc into same stitch (top of beginning ch-3). Ch 2. Sc into next dc. Ch 2. Sk 1 dc (center dc of shell). Sc into next dc. Ch 2. Sc into next dc. Ch 2. Sc into ch-1 space. Ch 2. (Sc into first dc of next shell, ch 2, sc into next dc, ch 2, sk 1 dc, sc into next dc, ch 2, sc into last dc of shell, ch 2, sc into ch-1 space, ch 2) around. Join with sl st to first sc. (240 sc, 240 ch-2 spaces)
Round 14: Sl st into first ch-2 space. Ch 1. Work 3 sc into each ch-2 space around. Join with sl st to first sc. (720 sc)
Final checkpoint: after Round 14 your panel should measure approximately 14 inches in diameter. Fasten off and weave in all ends securely on the wrong side. Weave cotton ends at least 2 to 3 inches in multiple directions, cotton has very little grip.
Gusset Strip
The gusset runs along the bottom and both sides of the bag, connecting the two panels and creating the interior depth. It does not run across the top opening. Measure the circumference of one panel from the top left corner of the opening, down around the bottom, and up to the top right corner: approximately 36 to 38 inches. Mark the top corners on each panel with stitch markers before you begin.
Foundation: Ch 13.
Row 1: Sc into 2nd ch from hook and into each ch across. Turn. (12 sc)
Row 2: Ch 1. Sc into each sc across. Turn. (12 sc)
Repeat Row 2 until the gusset strip measures 37 inches, or the length needed to span from marker to marker on your panel. Fasten off, leaving a 20 inch tail for seaming.
Finishing & Assembly
Step 1: Block both panels and the gusset strip before assembly. Wet block by washing gently in cool water, rolling in a towel to remove excess moisture, then pinning the panels flat to a 14 inch diameter circle. Let everything dry completely.
Step 2: Hold one panel with the wrong side facing up. Align the start of the gusset strip with the stitch marker at the top left corner of the opening. Using the long tail and a yarn needle, whipstitch the long edge of the gusset to the outer edge of the panel, stitch by stitch around the bottom and up to the top right corner marker.
Step 3: Place the second panel wrong side down against the free long edge of the gusset, aligning carefully so the mandala centers match. Whipstitch the second panel to the gusset the same way with a new length of yarn.
Step 4: At the side seams, fold the gusset ends inward and whipstitch them closed neatly.
Step 5, top edging: With the right side facing, join yarn at the top right corner seam. Ch 1 and work approximately 56 sc evenly across the top edge of the back panel, then repeat along the top edge of the front panel. (56 sc each side)
Step 6, handles: Hold one bamboo ring behind the 56 sc along the back panel top. Fold the sc edging strip over the ring toward the wrong side and whipstitch the strip to the inside of the bag edge, encasing the ring. Repeat for the front panel and the second ring.
Step 7: Wrap the base of each bamboo ring where it meets the crochet with several tight wraps of yarn, secure with a knot and weave in the ends.
Tips
Care: machine wash on a gentle cycle in a mesh laundry bag with cold water, or hand wash. Do not tumble dry. Lay flat or hang to dry away from direct sunlight, and re-block if reshaping is needed.
Skip acrylic or wool blends for this bag: they stretch out under weight or felt with washing. Hairy or textured yarns will hide your lovely lacework, so keep it smooth cotton.
If a panel starts to ruffle or cup, adjust your hook size before continuing rather than hoping blocking will fix it. Two matching panels are everything in this design!
Sage Green Mandala Market Bag Free Crochet Pattern
Materials
Steps
- Work the first mandala panel in 14 rounds from a magic ring to a 14 inch circle
- Work a second identical panel and check both match within a quarter inch
- Crochet the gusset strip, 12 sc wide and about 37 inches long
- Block the panels and gusset flat
- Whipstitch the gusset around the bottom and sides of both panels
- Work about 56 sc across each top edge
- Fold the top edging over the bamboo rings and whipstitch to encase them
- Wrap the ring bases with yarn and weave in all ends
- Check the panel diameter after Round 10, it should be about 9 inches
- Weave cotton ends in at least 2 to 3 inches in multiple directions, cotton has little grip
- Use stitch markers at the top corners of each panel before seaming the gusset


