Sage Green Minimalist Backpack Free Crochet Pattern
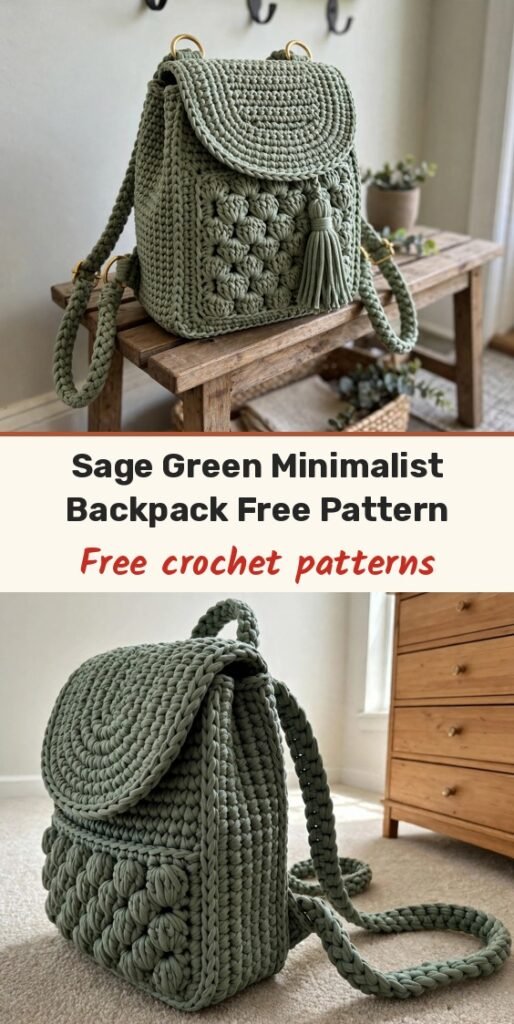
Table of Contents
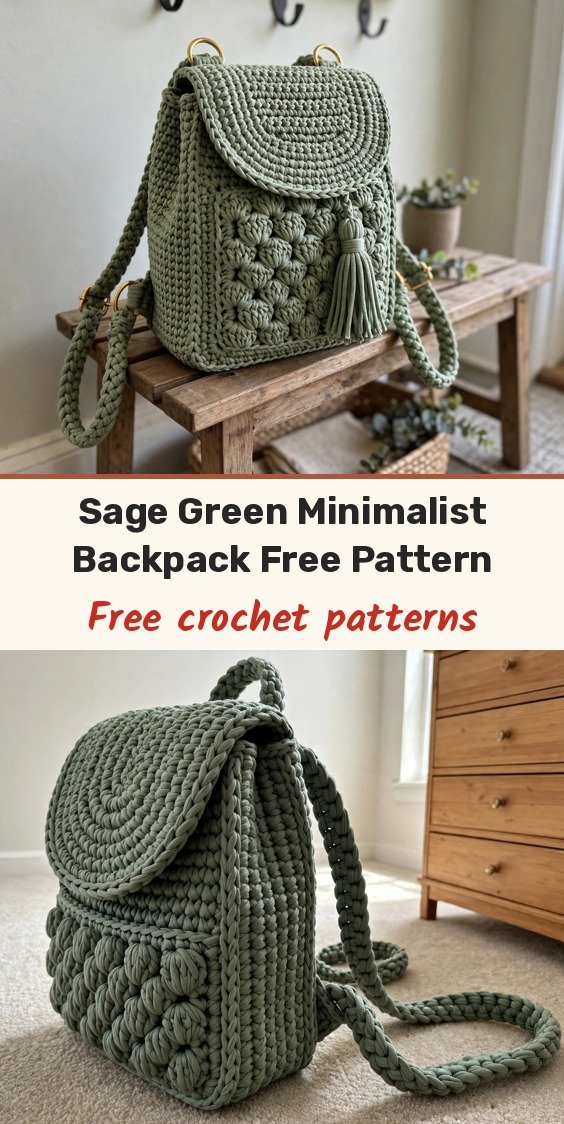
I set out to make a backpack that looked like something you would find in a boutique, and this sage green beauty is exactly that! It is structured enough to stand up on its own, with a rounded flap, a pretty puff stitch panel on the front, braided trim and a sweet tassel closure.
We will build it in pieces: a firm rectangular base first, then the body worked up in joined rounds, then the texture panel, flap, handle and straps made separately and assembled at the end. The secret to that professional finish is the chunky braided cord and a firm gauge, so do swatch before you start.
It finishes at about 9 inches wide, 10.5 inches tall and 4 inches deep — just right for your phone, wallet, keys, a small water bottle and a paperback.
Materials
- 430 to 520 yards of bulky braided cotton or polyester cord, 4 to 5mm diameter, in sage green
- 6.5mm crochet hook, for the main body
- 6.0mm crochet hook, for the straps if needed for a tighter gauge
- 4 gold D-rings or swivel rings
- 2 strap sliders
- 1 magnetic snap or turn-lock closure
- Tapestry needle
- Stitch markers
- Sharp scissors
- Plastic canvas insert, fabric lining, purse feet and 4 to 6 small grommets (optional)
Abbreviations
- ch: chain
- sc: single crochet
- hdc: half double crochet
- dc: double crochet
- inc: increase, 2 sc in the same stitch
- sc2tog: single crochet two together
- sl st: slip stitch
- BLO: back loop only
- st/sts: stitch / stitches
Special Stitches
- Puff stitch: yarn over, insert hook in the indicated stitch and pull up a loop to the height of the row. Repeat that sequence three times in total, yarn over and pull through all loops on the hook, then chain 1 to close. Counts as 1 stitch.
- Surface slip stitch braid: hold the yarn on the wrong side, insert the hook from the right side through the fabric and pull up a loop. Insert into the next spot, pull up a loop and pull it through the loop on your hook. Work loosely so the fabric does not pucker.
Gauge & Size
- Finished size: approximately 9 x 10.5 x 4 inches (23 x 26.5 x 10 cm)
- Gauge: 9 sc and 10 rounds = 4 inches in joined sc rounds with the 6.5mm hook; texture panel 8 stitches and 8 rows = 4 inches after light blocking
- Construction: rectangular base, body in joined rounds, separate panel, flap, handle and straps assembled at the end
- Skill level: Intermediate
Base Pattern
Row 1: Ch 19, sc in the 2nd chain from the hook and in each chain across, turn. (18 sc)
Rows 2 to 9: Ch 1, sc in each stitch across, turn. (18 sc each row)
Edging Round: Ch 1, sc 18 across the top, 2 sc in the corner, sc 7 down the side, 2 sc in the corner, sc 18 along the foundation edge, 2 sc in the corner, sc 7 up the side, 2 sc in the corner, join. (58 sc)
Your base should measure about 8 x 3.75 inches before blocking.
Body Pattern
Round 1: Ch 1, BLO sc in each stitch around, join. (58 sc)
Rounds 2 to 20: Ch 1, sc in each stitch around, join. (58 sc each round)
Round 21 (eyelet round): Ch 1, sc 6, ch 1, skip 1, (sc 8, ch 1, skip 1) 5 times, sc 6, join. (52 sc + 6 ch-1 spaces = 58 positions)
Rounds 22 to 23: Ch 1, sc in each sc and in each ch-1 space around, join. (58 sc each round)
Round 24 (top rim): Ch 1, reverse sc or firm sl st in each stitch around, join and fasten off. (58 sts)
Your body should stand about 10.5 inches tall from base to rim, with a top circumference of approximately 25.5 to 26 inches.
Front Texture Panel
Row 1: Ch 25, sc in the 2nd chain from the hook and in each chain across, turn. (24 sc)
Row 2: Ch 1, sc 2, (puff in the next stitch, sc 3) 5 times, puff in the next stitch, sc 1, turn. (24 sts)
Row 3: Ch 1, sc in each stitch across, turn. (24 sc)
Row 4: Ch 1, sc 4, (puff in the next stitch, sc 3) 5 times, turn. (24 sts)
Rows 5 to 15: Repeat Rows 2, 3 and 4 in sequence — every odd row is a plain sc row, and Rows 6, 8, 10, 12 and 14 repeat Rows 2 and 4 alternately, ending with a Row 2 repeat on Row 14. (24 sts each row)
Border: Sc evenly around the entire panel, placing 2 sc in each corner to keep it flat. Set the panel aside for assembly.
Flap Pattern
Row 1: Ch 33, sc in the 2nd chain from the hook and in each chain across, turn. (32 sc)
Rows 2 to 8: Ch 1, sc in each stitch across, turn. (32 sc each row)
Row 9: Ch 1, sc2tog, sc 28, sc2tog, turn. (30 sc)
Row 10: Ch 1, sc in each stitch across, turn. (30 sc)
Row 11: Ch 1, sc2tog, sc 26, sc2tog, turn. (28 sc)
Row 12: Ch 1, sc in each stitch across, turn. (28 sc)
Row 13: Ch 1, sc2tog, sc 24, sc2tog, turn. (26 sc)
Border: Sc evenly around, placing 2 sc at the upper corners. Add a surface slip stitch braid around the curved edge.
Handle, Straps & Drawstring
Top handle Row 1: Ch 31, sc in the 2nd chain from the hook and in each chain across, turn. (30 sc)
Work 3 more rows of sc for a total of 4 rows. Fold the handle around a 7 inch cord for extra structure if you like, or seam the long edges together, and attach it to two D-rings at the back top edge.
Shoulder straps (make 2) Row 1: Ch 87, sc in the 2nd chain from the hook and in each chain across, turn. (86 sc)
Work 2 more rows of sc for a total of 3 rows. Thread each strap through a slider and the lower side D-rings; the finished strap length adjusts between 24 and 34 inches.
Drawstring: Chain 91 and slip stitch back along the chain, or make a Romanian cord about 34 inches long, and thread it through the eyelets of Round 21.
Tassel: Wrap the cord around something 8 inches long about 10 times, tie it securely at the top, wrap the neck, trim the ends evenly, and attach it to the drawstring or flap hardware.
Finishing & Assembly
Block the body lightly over a box or folded towel form so the sides dry straight.
Centre the front texture panel on the lower front, beginning 1.5 inches above the base, and sew it invisibly around all edges with matching cord and your tapestry needle.
Sew the flap across the back top edge so the curved edge falls over the front panel by about 2.25 inches. Add the magnetic snap or turn-lock under the flap, placing the receiving side above the tassel line.
Attach the upper D-rings near the back corners and the lower rings 1.25 inches above the base on each side, then add the braided surface trim around the flap edge, the side-front seams, the bottom edge and the top handle.
Tips
If your bag feels soft, go down a hook size, use a firmer cord, or add a plastic canvas base insert and a simple fabric lining — that is the true boutique finish.
If the body leans or twists, make sure you join every round, and turn the work every 4 rounds if your stitches bias strongly.
Spot clean with cool water and mild soap, reshape and air dry flat. Avoid machine washing once hardware, lining or a snap is installed.
Sage Green Minimalist Backpack Free Crochet Pattern
Materials
Steps
- Work the rectangular base and its 58-stitch edging round
- Work the body in joined rounds to Round 24 with an eyelet round
- Work the puff stitch front texture panel
- Work the rounded flap with decrease shaping
- Make the top handle, 2 shoulder straps, drawstring and tassel
- Assemble: sew on the panel and flap, add hardware and braided trim
- A firm gauge is what gives the backpack its boutique structure
- Add a plastic canvas base insert and lining for a professional finish
- Spot clean only once hardware is installed


