Mint Green Tiered Shell Dress Free Crochet Pattern
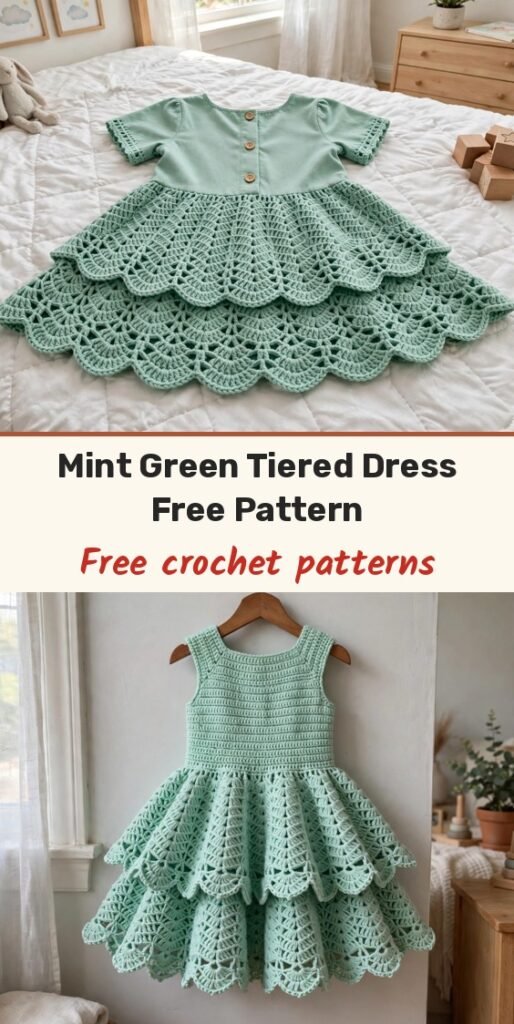
Table of Contents
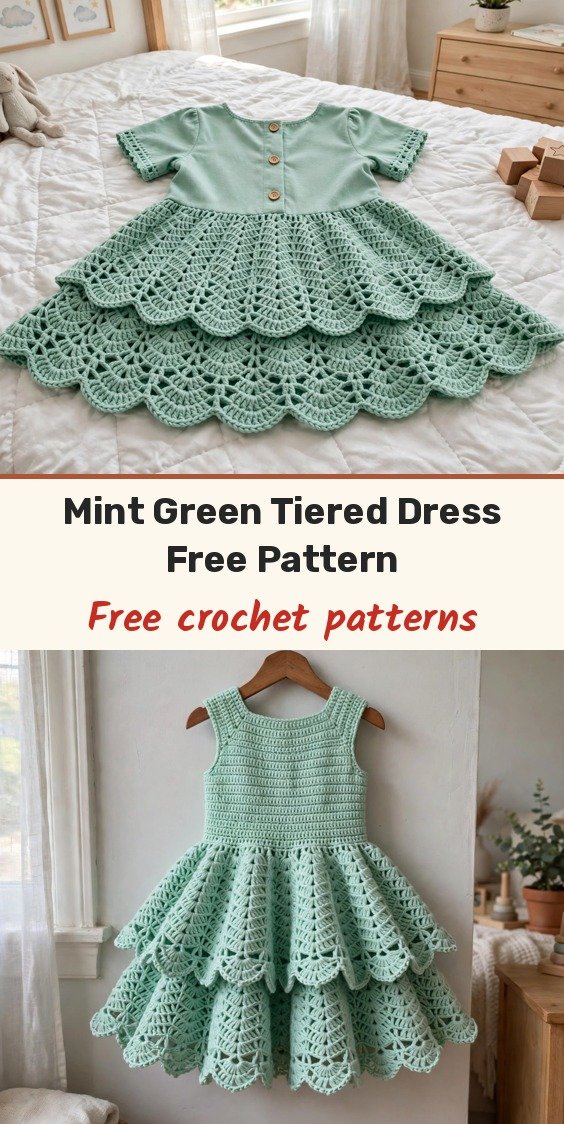
I absolutely melt when I see a toddler in a handmade dress, and this mint green tiered shell dress is such a showstopper! It has a solid, fitted bodice, then the magic happens at the waist where we transition to working in the round and those gorgeous shell fans begin.
The two-tier skirt design is the real star here. We start with 12 shell fans, then double to 24 in the second tier. This creates that wonderful fullness and movement, and when your little one sits down, the skirt spreads out around them like flower petals. The sleeveless design with rounded armholes keeps things comfortable, and a single button closure at the back makes dressing time easier.
This pattern is written for Size 2T to 3T. Size adjustment tips are included at the end if you need to go bigger or smaller.
Materials
- Worsted weight (category 4) yarn in mint green, approximately 400 to 450 yards total; smooth cotton or cotton-blend yarn recommended
- US G-6 / 4.0 mm crochet hook or size needed to obtain gauge
- At least 4 stitch markers
- Yarn needle
- 1 button, 1/2-inch / 12 mm (white or pearl looks lovely)
- Scissors
Abbreviations
- ch: chain
- sl st: slip stitch
- sc: single crochet
- dc: double crochet
- hdc: half double crochet
- sk: skip
- sp: space
- st(s): stitch(es)
- beg: beginning
- rep: repeat
- rnd: round
- RS: right side
- WS: wrong side
- yo: yarn over
Special Stitches
- Shell Fan (shell): 5 double crochets all worked into the same stitch or space. Yarn over, insert hook into indicated stitch or space, yarn over, pull up a loop, yarn over, pull through 2 loops (that is 1 dc made). Without moving to a new stitch, work 4 more dc into that same spot.
- sc2tog (single crochet two together): Insert hook into next stitch, yarn over, pull up a loop (2 loops on hook). Insert hook into following stitch, yarn over, pull up a loop (3 loops on hook). Yarn over, pull through all 3 loops. Counts as 1 stitch.
Gauge & Size
- Finished size: Size 2T to 3T, fits chest 20 to 21 inches / 51 to 53 cm
- Chest at underarm: approximately 20 inches / 51 cm
- Bodice length (shoulder to waist): approximately 7 inches / 18 cm
- Skirt length (waist to hem): approximately 8 inches / 20 cm
- Total length (shoulder to hem): approximately 15 inches / 38 cm
- Skirt circumference at hem: approximately 50 to 54 inches / 127 to 137 cm when fully spread
- Gauge: Single crochet 18 sc x 20 rows = 4 inches / 10 cm worked in rows, blocked; one complete 5-dc shell fan plus its neighbouring ch-2 space = approximately 1.25 inches / 3.2 cm wide
- Construction: back panels and bodice worked flat in single crochet, joined at the waist, skirt worked in the round in two shell tiers
- Skill level: Intermediate
Back Panels Pattern
Section 1: Left Back Panel. The left back panel forms the left shoulder strap, the left side of the neckline, and the left back of the bodice. Foundation: Ch 13.
Row 1 (RS): Sc in 2nd ch from hook and in each ch across. Turn. (12 sc)
Row 2 (WS): Ch 1, sc in each st across. Turn. (12 sc)
Rows 3 to 16: Rep Row 2. Continue even in sc. Turn at end of each row. (12 sc each row)
After Row 16, do not fasten off. Set aside with a stitch marker in the last st to hold your place.
Section 2: Right Back Panel. Work same as Left Back Panel, Rows 1 to 16. (12 sc each row) After Row 16, do not fasten off. Set aside.
Bodice Body Pattern
Section 3: Bodice Body, Joining and Working Across. Before working Row 17: Make a separate chain of 26, sc in 2nd ch from hook and in each ch across (24 sc). This is your front foundation strip. Set it aside.
Row 17, Join Row (RS): With RS facing, return to the active loop of the right back panel. Ch 1, sc in each of the 12 sts of the right back panel, ch 10 (right armhole bridge), sc 24 across your prepared front strip, ch 10 (left armhole bridge), sc in each of the 12 sts of the left back panel. Turn. Row 17 stitch count: 12 sc (right back) + 10 ch + 24 sc (front) + 10 ch + 12 sc (left back) = 68 sts
Row 18 (WS): Ch 1, sc in each of the 12 back sts, sc in each of the 10 ch of the armhole bridge, sc in each of the 24 front sts, sc in each of the 10 ch of the armhole bridge, sc in each of the 12 back sts. Turn. (68 sc)
Rows 19 to 26: Ch 1, sc in each st across. Turn. (68 sc each row)
Checkpoint: After Row 26 your bodice piece should be approximately 7 inches / 18 cm tall from the foundation chain edge.
Section 4: Waist Join. Setup Round: With RS facing, ch 1, sc across the 68 sts of Row 26. When you reach the end, bring the right edge and left edge of the back opening together, sl st through both layers to close the back split at the waist level only. Join to the first sc of this round with sl st to form a round. (68 sc) The back opening above the waist remains open for the button closure.
Section 5: Waist Preparation Round. Transitional Round: Ch 3 (counts as dc), dc in same st, ch 2, sk next 5 sts, (2-dc cluster in next st, ch 2, sk next 5 sts) 10 times, 2-dc cluster in next st, ch 2, sl st to top of beg ch-3. (12 ch-2 sp)
Tier 1 Shell Skirt Pattern
Section 6: Tier 1 Shell Skirt.
Round 1 of Tier 1 (Shell Round): Ch 3, 4 dc in first ch-2 sp (counts as first shell of 5 dc), ch 2, (shell of 5 dc in next ch-2 sp, ch 2) 11 times. Join with sl st to top of beg ch-3. (12 shells, 12 ch-2 sp)
Round 2 of Tier 1: Ch 1, sc in top of joining sl st, ch 3, (sc in ch-2 sp between shells, ch 3) 11 times, sc in last ch-2 sp, ch 3, join to first sc. (12 sc, 12 ch-3 sp)
Round 3 of Tier 1 (Shell Round): Sl st into first ch-3 sp, ch 3, 4 dc in same sp (first shell), ch 2, (shell in next ch-3 sp, ch 2) 11 times. Join with sl st to top of beg ch-3. (12 shells, 12 ch-2 sp)
Checkpoint: After Round 3 of Tier 1, the skirt should measure approximately 2.5 inches / 6.4 cm below the waist.
Tier 2 Shell Skirt Pattern
Section 7: Tier 1 to Tier 2 Expansion. This is where the skirt gets dramatic. We are doubling from 12 shells to 24 shells. Expansion Round: Ch 1, sc in the ch-2 sp after the first shell of Tier 1 Round 3. Working around: (ch 3, sc into the 3rd dc of the next shell (center dc), ch 3, sc into the following ch-2 sp) 12 times around, ending with ch 3, sl st to first sc. (24 ch-3 sp, 24 sc)
Section 8: Tier 2 Shell Skirt.
Round 1 of Tier 2: Sl st into first ch-3 sp. Ch 3, 4 dc in same sp (first shell), ch 2, (shell in next ch-3 sp, ch 2) 23 times. Join to top of beg ch-3. (24 shells, 24 ch-2 sp)
Round 2 of Tier 2: Ch 1, sc in joining point, ch 3, (sc in ch-2 sp between shells, ch 3) 23 times, sc in last ch-2 sp, ch 3, join to first sc. (24 sc, 24 ch-3 sp)
Round 3 of Tier 2: Sl st into first ch-3 sp, ch 3, 4 dc in same sp, ch 2, (shell in next ch-3 sp, ch 2) 23 times. Join to top of beg ch-3. (24 shells, 24 ch-2 sp)
Round 4 of Tier 2: Ch 1, sc in joining, ch 3, (sc in ch-2 sp, ch 3) 23 times, sc in last ch-2 sp, ch 3, join to first sc. (24 sc, 24 ch-3 sp)
Round 5 of Tier 2 (final shell round): Sl st into first ch-3 sp, ch 3, 4 dc in same sp, ch 2, (shell in next ch-3 sp, ch 2) 23 times. Join to top of beg ch-3. (24 shells, 24 ch-2 sp)
Checkpoint: After Round 5 of Tier 2, the skirt should measure approximately 8 inches / 20 cm from the waist.
Finishing & Assembly
Section 9: Hem Finishing Round. Hem Round: Working across the top edge of the Tier 2 Round 5 shells: sc in the ch-2 sp after first shell, (3 sc across the tops of the 5 dc of the next shell, sc in following ch-2 sp) 23 times, 3 sc across tops of last shell. Join with sl st to first sc. Fasten off. (96 sc)
Section 10: Neckline and Armhole Edging. Block your dress before adding the edging for best results. Neckline Edging: With RS facing, attach yarn at the top right corner of the back opening. Work sc evenly around the entire neckline opening: approximately 15 sc down the right back opening edge, approximately 12 sc across the back neck, approximately 15 sc down the left back opening edge, approximately 20 sc across the front neckline. Join with sl st. Do not turn.
Button loop: At the top right corner of the back opening, ch 5, sl st into same corner st to form the button loop. Fasten off.
Armhole Edging: With RS facing, attach yarn at the underarm center of one armhole. Sc evenly around the armhole opening, approximately 36 to 40 sc total. Join with sl st to first sc. Fasten off. Repeat for second armhole.
Section 11: Button Attachment. Sew the button to the left back opening edge at the neckline, aligned with the button loop on the right side.
Weave in all yarn ends securely, working through several stitches in different directions on the wrong side. For wet blocking: soak the finished dress in cool water with gentle wool wash for 15 to 20 minutes, squeeze out excess water, roll in a dry towel and press, then lay flat on a blocking mat and pin the scalloped hem points outward to emphasize each fan shape. Allow to dry completely.
Tips
Make a 5-inch swatch, wash it, block it, then measure before starting the bodice. Adjust your hook size up or down until you hit gauge, because a bodice that does not fit properly is frustrating for everyone.
To size up (4T to 5T): Increase shoulder strap panels from 12 sc to 14 sc wide. Increase front foundation from 24 sc to 28 sc. Create 16 platform ch-2 sp in the transitional round, then double to 32 shells in Tier 2. Add rows to the bodice section (end at Row 28 instead of 26). To size down (12 to 18 months): Decrease shoulder strap panels to 10 sc wide. Decrease front foundation to 20 sc. Create 10 platform ch-2 sp, expanding to 20 shells in Tier 2. End bodice at Row 22.
For cotton versions, machine wash cold on gentle cycle in a mesh laundry bag. Reshape while damp and lay flat to dry. Skip the tumble dryer so the scallops keep their lovely definition.
Mint Green Tiered Shell Dress Free Crochet Pattern
Materials
Steps
- Work the left and right back panels in single crochet
- Join the bodice with armhole bridges and work to Row 26
- Close the waist and work the transitional round
- Work Tier 1 with 12 shells
- Expand to 24 shells and work Tier 2
- Work the hem, neckline and armhole edgings
- Sew on the button and block
- Swatch, wash and block before starting the bodice
- Pin scallop points outward when blocking
- Use a mesh laundry bag for gentle machine washing