How to Crochet a Pebble Stitch Hat In Customizable Pattern – Yarn Items
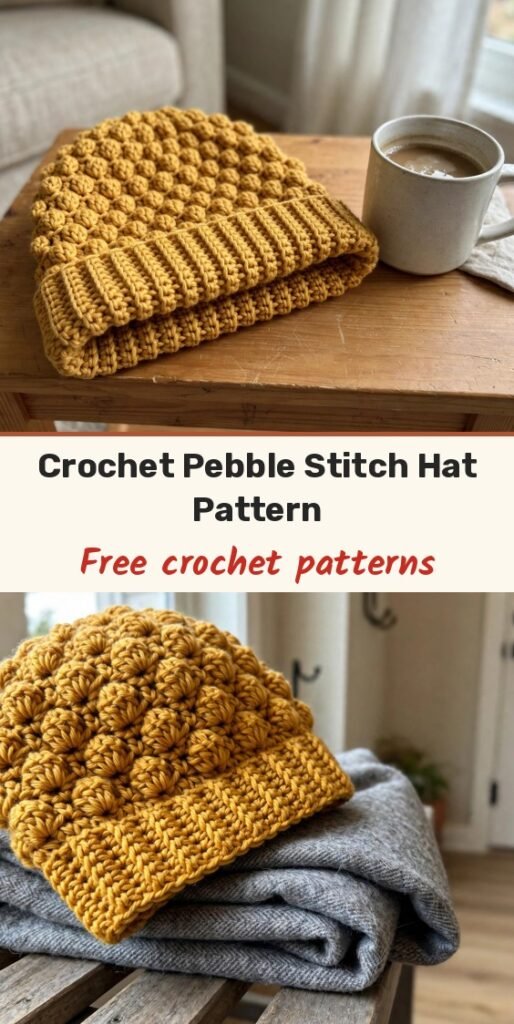
Table of Contents
This pebble stitch hat is one of my favourite cosy makes, because it looks so textured and timeless but is honestly super simple to crochet! We work it bottom-up: first a stretchy ribbed brim, then the soft, bumpy pebble stitch body, and finally neat decreases that shape the crown.
I love that this pattern is completely customizable. You will only need basic materials — worsted-weight yarn and a crochet hook — and you can adjust the brim length and the body height to fit anyone, from kids to adults. Make it in your favourite colour for chilly days, or whip one up as a heartwarming handmade gift.
The pebble texture comes from puff stitches paired with single crochet in a simple four-round repeat, so once you have the rhythm, this hat almost crochets itself. Top it with a pom-pom for a playful finish, or leave it plain for a classic look.
Materials
- Worsted-weight yarn in your favourite colour
- 5 mm crochet hook (for the brim and body)
- Tapestry needle, to weave in ends
- Scissors
- Optional: a faux fur pom-pom or yarn pom-pom for decoration
Abbreviations
- ch: chain
- sc: single crochet
- BLO: back loop only
- sl st: slip stitch
- st/sts: stitch / stitches
Special Stitches
- Pebble stitch: the texture of this hat is made by alternating a puff stitch with a single crochet. The puff stitches create the soft, raised pebble effect, and turning your work at the end of each round makes sure the pebbles pop on the right side of the hat.
Gauge & Size
- Finished size: fully customizable — adjust the brim length and body height to fit kids through adults
- Construction: bottom-up, with a flat ribbed brim seamed into a ring, then the body worked in the round
- Skill level: Beginner friendly
Brim Pattern
The brim is worked flat using back loop single crochets, which gives it that lovely stretchy ribbed feel. Make a slip knot and chain 7 — you can adjust this number for a wider or narrower brim.
Row 1: Skip the first chain. Insert your hook into the second chain and make 1 sc. Repeat 1 sc in every chain across. (6 stitches total) Chain 1 and turn.
Row 2: Make 1 sc in the first stitch (under both loops). Then work 1 BLO sc in the next 4 stitches. Finish with 1 sc in the last stitch (under both loops). Chain 1 and turn.
Repeat Row 2 until the brim fits the circumference of the desired head size. For example, for an adult hat, you might need around 60 rows.
When the brim is complete, fold it in half and slip stitch the two ends together to form a ring. Turn it to the right side.
Hat Body Pattern
Now we shift to working in the round to create the hat body. Along the long edge of the brim, we place evenly spaced single crochets to create the foundation round for the pebble stitch pattern.
Round 1: Work evenly spaced single crochets around one long edge of the brim. Make 1 sc at the top of each row of the brim so the stitches are evenly distributed. Join with a slip stitch to the first sc and chain 1.
Round 2: Turn your work (you will now be working on the wrong side). Make 1 sc into the first stitch. Make a puff stitch into the next stitch. Continue alternating 1 sc and 1 puff stitch around. Join with a slip stitch to the first sc and chain 1.
Round 3: Turn your work (right side facing). Make 1 sc into each stitch (1 sc into the top of the puff stitch and 1 sc into the sc from the previous round) around. Slip stitch to the first sc and chain 1.
Round 4: Turn your work (wrong side facing). Start with a puff stitch into the first stitch. Alternate puff stitch and single crochet around. Join with a slip stitch and chain 1.
Round 5: Turn your work (right side facing). Make 1 sc into each stitch (1 sc into the top of the puff stitch and 1 sc into the sc from the previous round) around. Slip stitch to the first sc and chain 1.
Repeat Rounds 2–5 until the body of the hat reaches your desired height. Remember, you can always add or remove repeats to adjust the size.
Crown Shaping
Once the hat is the desired height, we reduce the number of stitches to shape the crown.
Decrease Round 1: Work a single crochet decrease over every 2 stitches — insert the hook into the front loop of the first stitch, then into the front loop of the second stitch, yarn over, pull through both loops, yarn over, and pull through the final 2 loops. Continue around and join with a slip stitch.
Decrease Round 2: Repeat the same decrease round, working 1 decrease stitch in every 2 stitches, until few stitches remain.
Cut the yarn, leaving a long tail. Use the tapestry needle to weave the tail through the remaining stitches, pull tightly to close the top of the hat.
Finishing & Assembly
Weave in all loose ends with a tapestry needle.
Attach a pom-pom at the top for added style, if you like!
Tips
Can you adjust the size of this hat? Yes! Customize it by adjusting the number of chain stitches for the brim and repeating the main pattern rounds until you reach the fit you want.
Puff stitches can vary in size if your tension shifts, so keep your loops even for a uniform pebble texture.
For cleaner crown shaping, make sure you are working only through the front loops on the decrease rounds, and slip stitch tightly at the end of each round to avoid noticeable gaps.
For a fun variation, experiment with colour changes between rounds to create striped or gradient effects that highlight each puff stitch row, or try a bulky yarn for an extra cosy winter look.

How to Crochet a Pebble Stitch Hat In Customizable Pattern – Yarn Items
Materials
Steps
- Work the ribbed brim flat in back loop sc, starting with a chain of 7
- Repeat the brim row until it fits the head circumference, then slip stitch the ends into a ring
- Work a foundation round of sc along one long edge of the brim
- Alternate puff stitch and sc rounds in the 4-round pebble repeat
- Repeat the pebble rounds until the hat reaches the desired height
- Work front-loop decrease rounds to shape the crown and cinch the top closed
- Weave in ends and add a pom-pom if you like
- Adjust the brim chain for a wider or narrower brim and add or remove repeats for height
- Keep your puff stitch loops even so the pebble texture stays uniform
- Work crown decreases through the front loops only for smoother shaping