Tester Call: Plush Amigurumi Santa Hat Patrik Star Plushie for Gifting
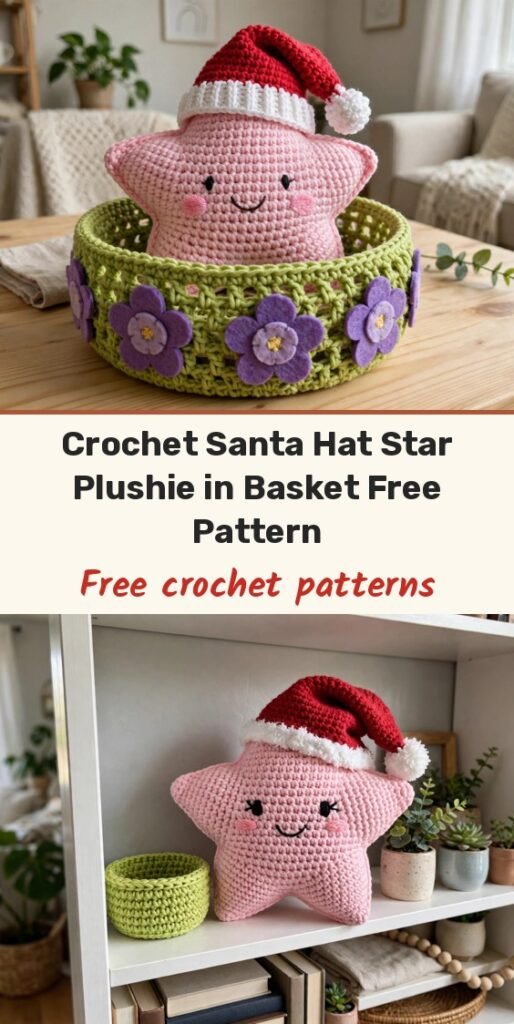
Table of Contents
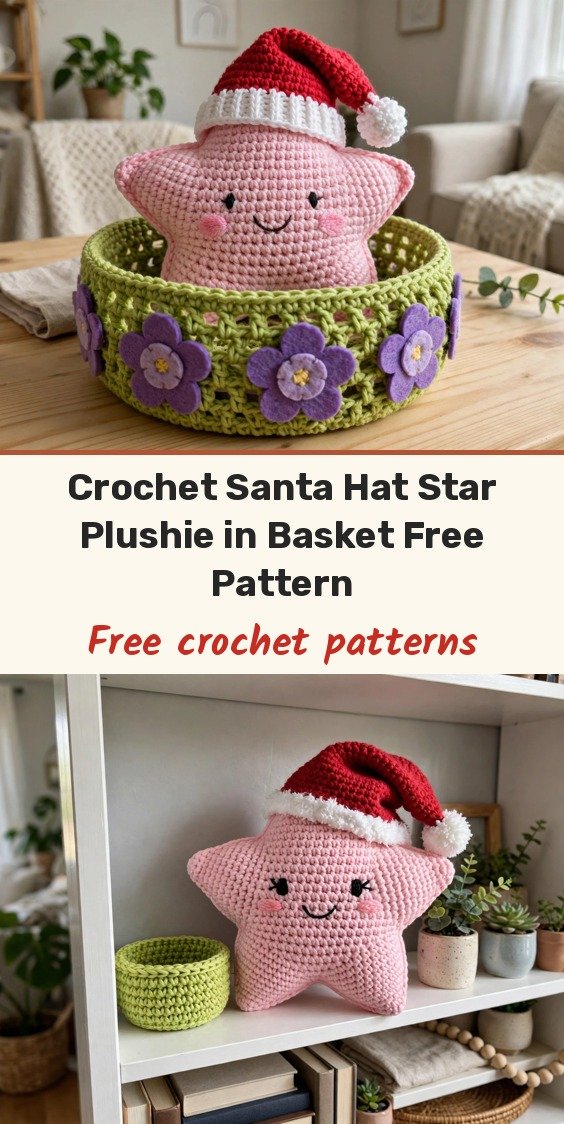
Hi, I am Amy, and this squishy little star dumpling in a Santa hat is pure Christmas silliness in the best way. A soft pink plush star sits inside a lime-green steamer basket decorated with purple felt motifs, and the slouchy red Santa hat on top finishes the whole festive set.
Do not let the number of parts put you off. Each piece is worked in simple single crochet rounds with clear counts: the hat first, then the dumpling, then two matching basket halves hinged together. The plush chenille yarn makes it grow quickly and gives that lovely soft, squeezable finish.
It makes a brilliant gift for anyone who loves cute plushies, and the basket opening and closing is such a fun surprise. Take it one part at a time and enjoy watching the character come together.
Materials
- Plush chenille yarn, super bulky category 6, in pink (Colour A), for the dumpling
- Plush chenille yarn, super bulky category 6, in lime green (Colour B), for the steamer basket
- Plush chenille yarn, bulky size 5, in red and white, for the Santa hat
- Fine cotton or semi-cotton yarn in black, for mouth and eyebrow embroidery
- Strong pink or neutral cotton thread, to cinch the top hole closed
- White felt sheet, for the eye backings
- Purple felt sheet, for the shorts motifs on the basket
- 4.0 mm crochet hook, for the dumpling and basket
- 4.5 mm crochet hook, for the hat
- 8 mm safety eyes, 1 pair, black
- Fiberfill stuffing
- Tapestry or yarn needle
- Stitch marker
- Fabric glue or hot glue, optional, for securing felt pieces
- Scissors
- Sewing pins
Abbreviations
- MR: magic ring (magic circle)
- ch: chain
- sc: single crochet
- inc: increase, 2 sc in the same stitch
- dec: decrease, single crochet 2 stitches together
- sl st: slip stitch
- BLO: back loop only
- FLO: front loop only
- st(s): stitch(es)
Gauge & Size
- Skill level: advanced beginner, US crochet terms
- Finished dumpling: approximately 7 cm (2.8 in) tall and wide
- Work the dumpling and basket in continuous spirals with a stitch marker in the first stitch of each round
- Gauge is not critical for this plush set
Santa Hat
Start with the pompom in white plush yarn.
Pompom, Round 1: 6 sc in a magic ring. (6)
Pompom, Round 2: [Sc 1, inc] x 3. (9)
Pompom, Round 3: [Sc 2, inc] x 3. (12)
Pompom, Round 4: Sc in each st around. (12)
Pompom, Round 5: [Sc 2, dec] x 3. (9)
Fasten off the white yarn, leaving a short tail. Stuff the pompom lightly if desired.
Attach red plush yarn to the remaining 9 stitches of Round 5 for the hat cone.
Round 6: [Dec, sc 7]. (8)
Round 7: [Sc 7, inc]. (9)
Round 8: [Sc 8, inc]. (10)
Round 9: [Sc 9, inc]. (11)
Round 10: [Sc 10, inc]. (12)
Round 11: [Sc 11, inc]. (13)
Round 12: [Sc 12, inc]. (14)
Round 13: [Sc 6, inc] x 2. (16)
Round 14: [Sc 7, inc] x 2. (18)
Round 15: [Sc 8, inc] x 2. (20)
Round 16: [Sc 9, inc] x 2. (22)
Round 17: [Sc 10, inc] x 2. (24)
Round 18: [Sc 11, inc] x 2. (26)
Round 19: [Sc 12, inc] x 2. (28)
Change to white plush yarn for the brim.
Brim, Round 20: Sc in each st around. (28)
Brim, Round 21: Sc in each st around. (28)
Fasten off with an invisible finish or slip stitch, weave in the ends, and shape the hat.
Star Dumpling
Work in continuous spirals using Colour A (pink). Use a stitch marker in the first stitch of each round.
Round 1: In a MR, work 8 sc. [8]
Round 2: 8 inc. [16]
Round 3: (1 sc, inc) x 8. [24]
Round 4: (2 sc, inc) x 8. [32]
Rounds 5 to 8: 32 sc around. [32]
Round 9: (2 sc, dec) x 8. [24]
Make the face before closing. Cut two large, overlapping oval pieces from white felt. Poke a small hole through the centre of each felt piece and insert the safety eyes through the felt. Position the eyes onto the dumpling between Rounds 7 and 8, leaving about 6 stitches visible between them, push the posts through the crochet stitches, and secure the backings firmly inside the body.
Embroider thick, curved, slightly slanted eyebrows above each eye with fine black yarn. Stitch a wide, cheerful curved smile across the lower face, knot the ends, trim, and pull the knots inside the body to hide them.
Round 10: (1 sc, dec) x 8. [16]
Add fiberfill stuffing now. Stuff softly and evenly so the dumpling stays squishy and rounded, not overly rigid.
Round 11: 8 dec. [8]
Round 12, top pleat: Do not close the hole yet. Work into the front loops only (FLO): (inc, 1 sc) x 4. [12]
Cut the plush yarn leaving a small tail of about 10 cm, make a slip stitch into the next stitch to finish the edge neatly, and tuck the tail inside the body.
To cinch the top hole, thread strong thinner cotton thread onto a needle and pass it through the remaining unworked back loops of Round 11, on the inside base of the top ruffle, all the way around. Pull both ends firmly to cinch the hole shut beneath the ruffle, tie 2 to 3 tight knots, and hide the thread ends inside the body.
Steamer Basket
The basket is two identical halves in Colour B (lime green), hinged together. Make 2 halves.
Half, Round 1: In a MR, work 8 sc. [8]
Half, Round 2: 8 inc. [16]
Half, Round 3: (1 sc, inc) x 8. [24]
Half, Round 4: (2 sc, inc) x 8. [32]
Half, Round 5: (7 sc, inc) x 4. [36]
Half, Round 6: In back loops only (BLO), 36 sc around. [36] This forms the sharp bottom edge of the basket.
Half, Rounds 7 to 8: Through both loops, 36 sc around. [36]
For the first half (base), fasten off and cut the yarn. For the second half (lid), do not cut the working yarn.
Joining the halves: align the two open halves edge to edge, right sides facing out. Using the working loop from the second half, join them across 4 to 5 stitches along the back rim by inserting the hook through the BLO of the top half and the corresponding FLO of the bottom half and working 1 sc across each pair. Test-fit the dumpling inside to check the basket opens and closes cleanly, then sl st, fasten off, and weave in the end.
Handle strap: attach Colour B yarn to the top centre of the lid right above the hinge seam. Chain a strip across the top of the dome, approximately 16 to 18 chains or long enough to reach from the back hinge to the front centre edge without pulling tight. Join the end to the front edge with a sc or sl st. Ch 1, turn, and work 1 sc in each chain stitch back toward the starting point. Join with a sl st, fasten off, and weave in the tails.
Finishing & Assembly
Cut 4 to 5 small flower or triangle motifs from purple felt.
Attach the purple felt shapes evenly spaced around the exterior base of the lower steamer basket half, using fabric glue, hot glue, or matching purple thread.
Place the star dumpling inside its lime-green steamer basket and flip the lid shut.
Perch the Santa hat on top of the dumpling to finish the festive set.
Tips
Keep a stitch marker in the first stitch of every spiral round so the counts stay easy to check.
Stuff the dumpling softly. Overstuffing stretches plush stitches and spoils the squishy dumpling shape.
Test-fit the dumpling in the basket before fastening off the hinge, so you can adjust the hinge stitches if needed.
Pin felt pieces in place before gluing so the eye backings and shorts motifs sit evenly.
Tester Call: Plush Amigurumi Santa Hat Patrik Star Plushie for Gifting
Materials
Steps
- Crochet the white pompom, Rounds 1 to 5, to 9 sts
- Work the red hat cone, Rounds 6 to 19, to 28 sts, then the white brim
- Crochet the pink dumpling, Rounds 1 to 11, adding the felt eyes, eyebrows and smile
- Work the FLO top ruffle in Round 12 and cinch the back loops closed
- Crochet two lime-green basket halves to 36 sts
- Hinge the halves together and add the top handle strap
- Glue purple felt motifs to the basket and place the dumpling inside with its hat
- Use a stitch marker in every spiral round to keep counts on track
- Stuff softly so the dumpling stays squishy, not rigid
- Test-fit the dumpling before fastening off the basket hinge
- Pin felt pieces before gluing for even placement


