Crochet 3D Layered Christmas Tree Ornament Pattern

Table of Contents
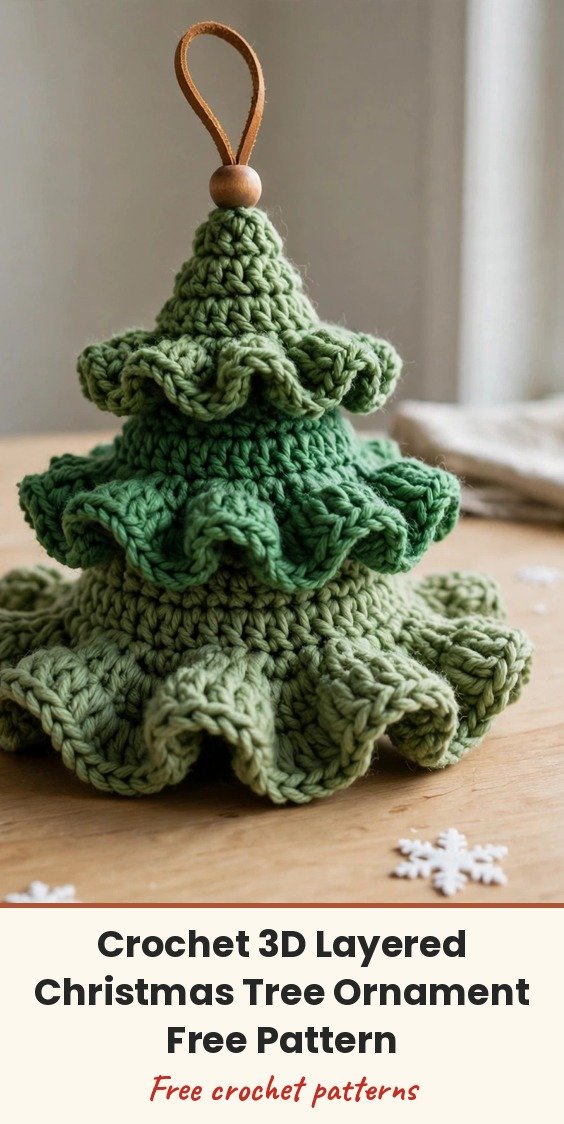
If you love a tree you can hold in one hand, this little layered evergreen is pure joy to make. Three ruffled tiers in graduated sizes stack one inside the next, and suddenly you have a plump, dimensional mini tree that looks far more complicated than it really is.
I reach for this pattern when I need a sweet, quick handmade gift. Add a cord and a wooden bead and it becomes a keychain or bag charm; leave the loop long and it hangs beautifully as an ornament. The back-loop ribbing does all the pretty shaping for you, so settle in with your green yarn and enjoy how fast these tiers grow.
Materials
- Cotton yarn in Christmas green
- Cotton yarn in light or olive green
- 3.0 mm crochet hook
- Leather cord or strap for the hanger
- 1 wooden bead
- Sewing needle
- Scissors
- Small snowflake appliques, optional, for decoration
Abbreviations
- ch: chain
- sc: single crochet
- hdc: half double crochet
- sl st: slip stitch
- BLO: back loop only
Gauge & Size
- Gauge: not critical for this ornament; keep your tension even so the ribbed tiers sit neatly
- The tree is made of 3 individual layered cones (small, medium, large) stacked from top to bottom
- Layer 1 has 16 rows, Layer 2 has 18 rows, and Layer 3 has 20 rows
- All rows after the first are worked in the back loops only for a ribbed texture
Layered Christmas Tree Pattern
Layer 1: Top Layer (Smallest Cone)
Starting chain: Ch 10. (10 ch)
Row 1: Starting from the 3rd chain from the hook, work 3 hdc, then 3 sc, then 2 sl st. Turn.
Row 2: Ch 1, turn. Working in BLO, work 5 sc, then 3 hdc. Turn.
Row 3: Ch 2, turn. Working in BLO, work 3 hdc, then 3 sc, then 2 sl st. Turn.
Row 4: Ch 1, turn. Working in BLO, work 5 sc, then 3 hdc. Turn.
Repeat Rows 3 and 4 continuously until you reach a total of 16 rows. Finish with 1 ch and turn.
Seaming into a cone: Fold the piece in half, bringing the first and last rows together to form a tube.
Join the edges by working slip stitches through the corresponding stitches on both sides, working through the back loop on one side and the remaining chain or back loop on the other, matching stitch for stitch.
Fasten off, leaving a long yarn tail.
Turn the cone inside out. Thread the yarn tail through the top opening and pull tight to cinch the top closed. Secure with knots on the inside.
Layer 2: Middle Layer (Medium Cone)
Starting chain: Ch 12. (12 ch)
Row 1: Starting from the 3rd chain from the hook, work 4 hdc, then 3 sc, then 3 sl st. Turn.
Row 2: Ch 1, turn. Working in BLO, work 6 sc, then 4 hdc. Turn.
Row 3: Ch 2, turn. Working in BLO, work 4 hdc, then 3 sc, then 3 sl st. Turn.
Row 4: Ch 1, turn. Working in BLO, work 6 sc, then 4 hdc. Turn.
Repeat Rows 3 and 4 until you reach a total of 18 rows.
Seaming: Follow the same seaming and cinching instructions as Layer 1.
Layer 3: Bottom Layer (Largest Cone)
Starting chain: Ch 14. (14 ch)
Row 1: Starting from the 3rd chain from the hook, work 5 hdc, then 4 sc, then 3 sl st. Turn.
Row 2: Ch 1, turn. Working in BLO, work 6 sc, then 4 hdc. Turn.
Row 3: Ch 2, turn. Working in BLO, work 5 hdc, then 4 sc, then 3 sl st. Turn.
Row 4: Ch 1, turn. Working in BLO, work 6 sc, then 4 hdc. Turn.
Repeat Rows 3 and 4 until you reach a total of 20 rows.
Seaming: Follow the same seaming and cinching instructions as Layers 1 and 2.
Finishing & Assembly
Prepare the hanger: Take a piece of leather cord, fold it into a loop, and thread a wooden bead through both ends to secure the loop at the top.
Stack the tree: Thread the top of the leather cord down through the center of the smallest cone (Layer 1), then the medium cone (Layer 2), and finally the large cone (Layer 3).
Secure the layers: Glue or sew the base of each upper layer snugly into the top opening of the layer directly beneath it, so they stack nicely like a Christmas tree.
Decorate: Glue small white snowflake appliques or beads onto the tree tiers as desired.
Tips
- Count your rows as you go; the graduated row counts (16, 18, and 20) are what give the tree its tidy, stepped shape.
- Alternate the two greens between layers for a soft, natural evergreen look.
- Cinch each cone top firmly before stacking so the tiers nest together without gaps.
- Swap the leather cord for a ribbon loop if you prefer a softer ornament hanger.
Crochet 3D Layered Christmas Tree Ornament Pattern
Materials
Steps
- Crochet Layer 1, the smallest cone, over 16 ribbed rows
- Seam Layer 1 into a cone and cinch the top closed
- Crochet Layer 2, the medium cone, over 18 rows and seam it
- Crochet Layer 3, the largest cone, over 20 rows and seam it
- Make a leather cord loop and thread on a wooden bead
- Thread the cord through all three cones to stack the tree
- Glue or sew the layers together and add decorations
- Count rows carefully so the three tiers graduate evenly
- Alternate the two greens between layers for depth
- Cinch each cone top firmly so the layers nest without gaps


