Sunset Orange Ruffle Crochet Dress Free Crochet Pattern
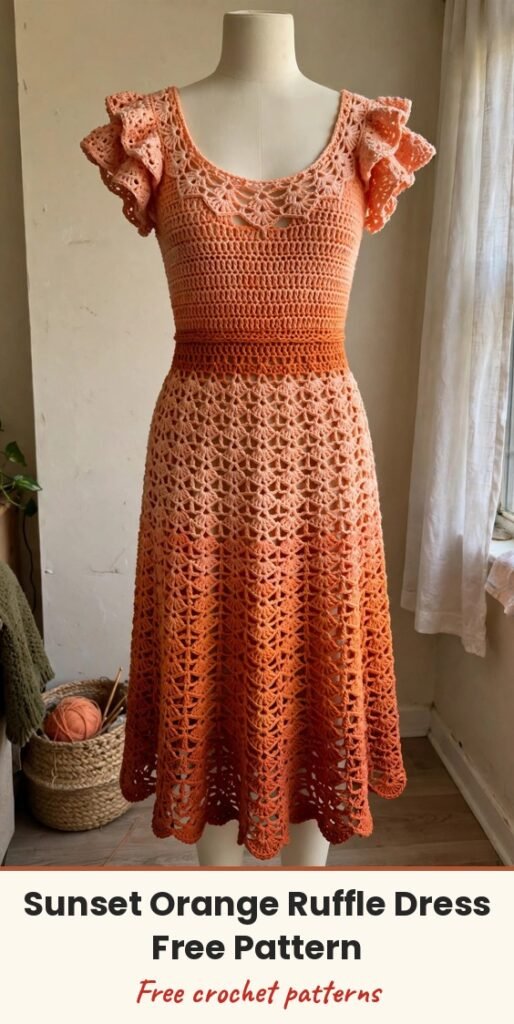
Table of Contents
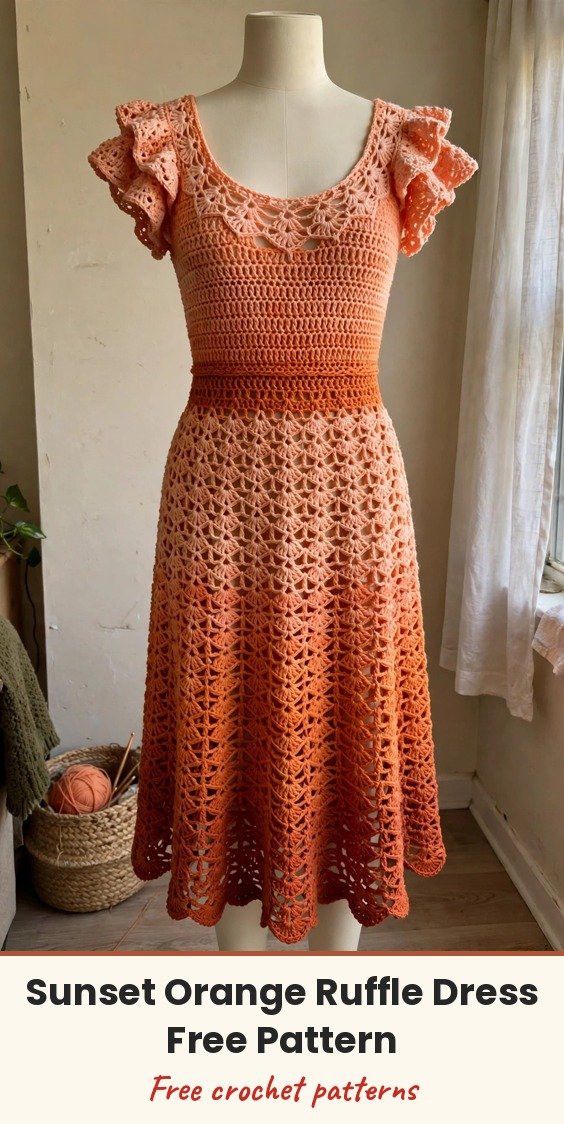
This sunset orange dress is the one I reach for when I want a handmade garment that really makes people look twice! I love the colour journey, from soft peach-coral at the neckline down to rich burnt terracotta at the hem, and those double-ruffle cap sleeves are such a romantic finishing touch.
We will work the front and back bodice panels separately as flat pieces to shape the scoop necklines, join them at the underarms with a simple chain bridge, and then work in rounds from there. The waistband is dense single crochet, the skirt flares into a full A-line with regular increases, and a scalloped edging finishes the hem. The instructions below are written for size Medium, with the other sizes following the same counts pattern in the source notes: bust 30 / 33 / 36 / 39 / 42 / 45 inches for XS / S / M / L / XL / 2XL.
This is an advanced intermediate project, so take your time, swatch carefully, and try the bodice on before you join the skirt. I promise the result is worth every stitch!
Materials
- DK weight (CYCA 3 / Light) yarn in a gradient colourway from peach-coral to burnt orange terracotta, 1,800 yards / 1,645 m for size M (XS 1,400, S 1,600, L 2,000, XL 2,250, 2XL 2,500 yards)
- US E-4 (3.5mm) crochet hook, for the bodice and waistband
- US F-5 (3.75mm) crochet hook, for the skirt and ruffles
- Yarn needle, for weaving in ends
- At least 8 stitch markers
- Scissors
- Measuring tape
- Blocking mats and rustproof pins
- Optional: thin cotton slip dress or lining if your yarn is not fully opaque at gauge
Abbreviations
- ch: chain
- sl st: slip stitch
- sc: single crochet
- sc2tog: single crochet two together
- dc: double crochet
- ch-sp: chain space
- sk: skip
- st/sts: stitch / stitches
- rnd/rnds: round / rounds
- RS: right side
- WS: wrong side
- PM: place marker
Special Stitches
- Shell: work 5 dc all into the same stitch or chain space
- V-Stitch: work 1 dc, ch 1, 1 dc all into the same stitch or chain space
- Shell Lace Pattern (worked in rounds, stitch count must be a multiple of 6): Round 1 (RS): Ch 3 (counts as first dc), 2 dc in same st (half shell at beginning), sk 2 sts, sc in next st, sk 2 sts, Shell in next st, sk 2 sts, sc in next st, sk 2 sts, repeat to last 3 sts, 2 dc in same st as beginning ch-3, sl st to top of beginning ch-3 to join. Round 2: Ch 1, sc in same st, ch 2, sc in centre dc of Shell, ch 2, sc in sc between Shells, ch 2, repeat around, end sc in centre dc of last Shell, ch 2, sl st to first sc to join. Round 3: Sl st into first ch-2 sp, ch 3 (counts as dc), 4 dc in same ch-2 sp (half shell), sc in next ch-2 sp, Shell in next ch-2 sp, sc in next ch-2 sp, repeat around, sl st to top of beginning ch-3 to join. Round 4: Ch 1, sc in same st, ch 2, sc in centre dc of Shell, ch 2, sc in sc between Shells, ch 2, repeat around, end sc in centre dc of last Shell, ch 2, sl st to first sc to join. Repeat Rounds 1 to 4 for the pattern.
- Scallop Edging (used at the hem): Round 1: Sc evenly around edge, 1 sc per st, sl st to join. Round 2: Sl st into first sc, ch 3, 2 dc in same sc, sk 2 sc, sl st in next sc, sk 2 sc, 3 dc in next sc, repeat around, sl st to join.
Gauge & Size
- Finished size: size M bust 36 inches, waist 30 inches, total length 43 inches; sizes XS to 2XL also given in the source (bust 30 to 45 inches)
- Gauge: 22 sc and 24 rows = 4 inches with E-4 hook; one full 6-stitch Shell Lace repeat = 1.25 inches and 4 rows = 1.5 inches with F-5 hook
- Construction: front and back bodice panels worked flat, joined at the underarms, then bust, waistband and skirt worked in rounds; ruffle sleeves worked separately and attached at the end
- Skill level: Advanced Intermediate
Front Bodice Panel
The front panel is worked flat, beginning at the centre neckline chain. With the E-4 hook, ch 61.
Row 1 (RS): Sc in 2nd ch from hook and in each ch across, turn. (60 sc)
Row 2 (WS): Ch 1, 2 sc in first st (inc), sc in each st to last st, 2 sc in last st (inc), turn. (62 sc)
Row 3: Ch 1, 2 sc in first st, sc to last st, 2 sc in last st, turn. (64 sc)
Row 4: Ch 1, 2 sc in first st, sc to last st, 2 sc in last st, turn. (66 sc)
Row 5: Ch 1, 2 sc in first st, sc to last st, 2 sc in last st, turn. (68 sc)
Row 6: Ch 1, 2 sc in first st, sc to last st, 2 sc in last st, turn. (70 sc)
Row 7: Ch 1, 2 sc in first st, sc to last st, 2 sc in last st, turn. (72 sc)
Row 8: Ch 1, sc in each st across (no increase), turn. (72 sc)
Rows 2 to 7 shape the gradual U-curve of the scoop neck. Now we work straight, then move into the shell lace.
Rows 9 to 11: Ch 1, sc in each st across, turn. (72 sc each row)
Row 12: Begin Shell Lace Pattern Row 1 worked flat: Ch 3 (counts as dc), 2 dc in same st (half shell at beginning edge), sk 2 sts, sc in next st, sk 2 sts, Shell in next st, sk 2 sts, sc in next st, across to last 3 sts, sk 2 sts, 3 dc in last st, turn. (12 shells for M)
Row 13 (Shell Lace Row 2): Ch 1, sc in first st, ch 2, sc in centre dc of each Shell, ch 2, sc in sc between Shells, ch 2, across, sc in top of turning chain, turn.
Row 14 (Shell Lace Row 3): Sl st into first ch-2 sp, ch 3 (counts as dc), 4 dc in same sp (half shell), sc in next ch-2 sp, Shell in next ch-2 sp, sc in next ch-2 sp, across, 3 dc in last ch-2 sp (half shell), ch 1, turn.
Row 15 (Shell Lace Row 4): Ch 1, sc in first st, ch 2, sc in centre dc of Shell, ch 2, sc in sc, ch 2, across, sc in top of last st, turn.
Rows 16 to 27: Repeat Shell Lace Rows 1 to 4 three more times.
Set the front panel aside. Do not fasten off.
Back Bodice Panel
The back panel mirrors the front with a slightly shallower scoop, with 4 increase rows instead of 6. With the E-4 hook, ch 67.
Row 1 (RS): Sc in 2nd ch from hook and in each ch across, turn. (66 sc)
Row 2: Ch 1, 2 sc in first st, sc to last st, 2 sc in last st, turn. (68 sc)
Row 3: Ch 1, 2 sc in first st, sc to last st, 2 sc in last st, turn. (70 sc)
Row 4: Ch 1, 2 sc in first st, sc to last st, 2 sc in last st, turn. (72 sc)
Row 5: Ch 1, sc in each st across, turn. (72 sc)
Rows 6 to 27: Work exactly as Rows 8 to 27 of the Front Bodice Panel.
Do not fasten off.
Joining & Bust
Lay the two panels with RS facing outward. With the back panel active yarn, ch 6 for the underarm chain, sl st into the first st of the front panel edge, continue working across all 72 front sts in sc, ch 6 for the second underarm, sl st into the first st of the back panel, and continue across all 72 back sts. The total round count after joining is 72 (front) + 6 (underarm ch) + 72 (back) + 6 (underarm ch) = 156 sts. Join with sl st to the first st of the round, and PM at each underarm chain centre.
Rounds 1 to 16: Work Shell Lace Pattern Rounds 1 to 4 four times total. (156 sts each round for M)
Waistband
Switch to the E-4 hook and work in sc only.
Transition Round: Ch 1, sc in each st around, join. (156 sc)
Waistband Round 1: Ch 1, sc in each st around, join. (156 sc)
Waistband Round 2: Ch 1, sc in each st around, join. (156 sc)
Waistband Round 3: Ch 1, (sc in next 24 sts, sc2tog) 6 times, join. (150 sc)
Waistband Round 4: Ch 1, sc in each st around, join. (150 sc)
Waistband Round 5: Ch 1, (sc in next 23 sts, sc2tog) 6 times, join. (144 sc)
Waistband Rounds 6 and 7: Ch 1, sc in each st around, join. (144 sc)
Waistband Round 8: Ch 1, (sc in next 22 sts, sc2tog) 6 times, join. (138 sc)
Waistband Rounds 9 and 10: Ch 1, sc in each st around, join. (138 sc)
Skirt
Switch to the F-5 hook. The skirt uses the Shell Lace Pattern with regular increases every 4 rounds.
Skirt Setup Round: Ch 1, sc in each st around, placing markers at 6 evenly spaced points, join. (138 sc)
Skirt Rounds 1 to 4: Shell Lace Pattern. (138 sts)
Increase Round A: Ch 1, (sc in next 22 sts, 2 sc in next st) 6 times, join. (144 sts)
Skirt Rounds 5 to 8: Shell Lace Pattern. (144 sts)
Increase Round B: Ch 1, (sc in next 23 sts, 2 sc in next st) 6 times, join. (150 sts)
Continue this pattern, adding 6 stitches every increase round until you reach the desired length. For size M, continue through Increase Round C (156 sts), Increase Round D (162 sts), Increase Round E (168 sts), Increase Round F (174 sts), Increase Round G (180 sts), Increase Round H (186 sts), Increase Round I (192 sts), Increase Round J (198 sts) and Increase Round K (204 sts).
Finish with the Scallop Edging at the hem.
Finishing & Assembly
Weave in all ends securely before blocking. For wool or wool blends, wet block by soaking the dress in lukewarm water with a drop of wool wash, then gently squeeze out the excess water and lay it flat to dry. For acrylic, spray blocking works well. Pin the skirt flat to shape the A-line silhouette and allow it to dry completely before wearing or attaching the ruffle sleeves.
The ruffles are worked separately and seamed to the armhole openings. Work the ruffle into the armhole edge, creating that beautiful double-ruffle cap sleeve effect you see in the finished dress.
Tips
Take your time with this project. At 60 to 80 hours of work, this is not a weekend make, but the result is a stunning handmade garment you will treasure.
Try the bodice on before joining the skirt to check the fit at the waist. You can add or remove a waistband round if needed.
If you are nervous about the lace pattern, practise on a small swatch first until the 4-round repeat feels automatic.
Choose a smooth DK yarn so the shell lace detail stays crisp, and avoid fuzzy or highly textured yarns that would hide the pattern.
Sunset Orange Ruffle Crochet Dress Free Crochet Pattern
Materials
Steps
- Work the front bodice panel flat, shaping the scoop neckline to 72 sc
- Work the shell lace rows to Row 27 and set aside
- Work the back bodice panel with a shallower scoop to 72 sc
- Join the panels at the underarms with chain bridges (156 sts)
- Work 16 rounds of shell lace for the bust
- Work the single crochet waistband, decreasing to 138 sc
- Work the shell lace skirt with increase rounds up to 204 sts
- Finish with scallop edging, block, and attach the ruffle sleeves
- Swatch in both stitch patterns and block the swatch before measuring
- Try the bodice on before joining the skirt to check the waist fit
- Practise the 4-round shell lace repeat on a swatch first
- Use a smooth DK yarn so the shell lace detail stays crisp


