Stylish Crochet Lacy Cuff Free Pattern For Everyday Wear
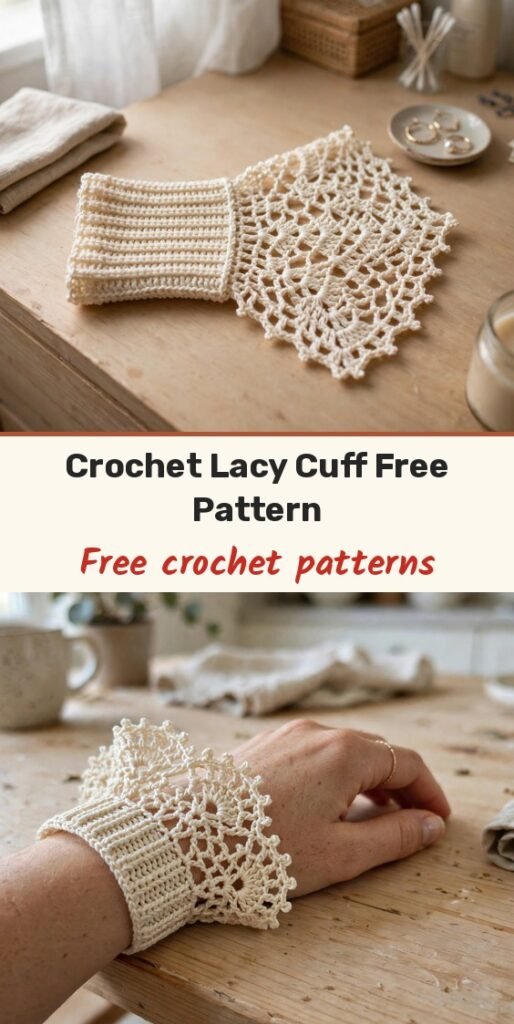
Table of Contents
I love a small project that makes an everyday outfit feel special, and this lacy cuff does exactly that! We will begin with a soft ribbed base that stretches comfortably around your wrist, then build seven rounds of delicate lace on top.
The lace uses arches, V-stitches and expanded V-stitches, with gentle increases that flare the cuff out prettily, and it finishes with a decorative picot edge. It is light, comfortable, and such a sweet handmade gift.
This is an intermediate project, best for crocheters who are comfortable working in the round, changing stitch patterns, creating decorative edges and joining pieces. The whole pattern is worked in US crochet terms.
Materials
- Fine or sport-weight yarn
- Crochet hook in the size recommended for your yarn, for example 2.5 mm to 3 mm
- Yarn needle
- Scissors
Abbreviations
- ch: chain
- sc: single crochet
- dc: double crochet
- sl st: slip stitch
- st/sts: stitch / stitches
- blo: back loop only
- rep: repeat
Special Stitches
- V-Stitch: (dc, ch 2, dc) all in the same stitch or space.
- Expanded V-Stitch: (2 dc, ch 2, 2 dc) all in the same stitch or space.
- Picot: ch 3, sl st into the front two loops of the previous stitch.
- Back Loop Single Crochet (sc blo): a single crochet made only in the back loop of the stitch, used for the ribbing to achieve its texture.
- Joining Slip Stitch Through Both Loops: a sl st worked through both pieces to join them.
Gauge & Size
- Gauge: 32 rows of single crochet in back loop only (the base) should measure about 16 cm (6.25 inches) long; gauge is not essential for this small, stretchy accessory but is a helpful reference
- Finished size: fits a standard wrist of approximately 16 cm (6.25 inches) circumference, and measures approximately 3 inches (7 to 8 cm) wide; width varies with yarn choice, and the fit is intended to be snug but comfortable
- Construction: ribbed base worked flat and joined in the round, then seven rounds of lace worked on top with a picot finish; adjust the fit by increasing or decreasing the base rows as needed for your wrist size, and keep the transition from base to lace seamless for structural integrity
- Skill level: Intermediate
Ribbed Base Pattern
Foundation: Chain 16 (ch 16).
Row 1: Skip the first chain. Single crochet in the back loop (sc blo) of the second chain from hook. Continue sc blo in the next 14 chains. (15 sc total)
Rows 2 to 32: Ch 1, turn. Single crochet in the back loop only (sc blo) across (14 sc), with the final stitch of each row made under both loops for a neat edge.
Joining: Fold the work to form a ring. Slip stitch (sl st) the two short ends together for all 15 stitches, working through both top loops to join and form a ribbed cuff.
Lace Foundation Pattern
Round 1: Ch 1. Crochet 32 single crochets (sc) in the round, working into the horizontal rows along the ribbed base. Join with sl st.
Round 2 (Arches): Ch 1, sc into the same stitch. Ch 3, skip 1 st, sc in next st; rep around. Join with sl st.
Lace Pattern
Round 3: Into each ch-3 arch, work a standard V-stitch (dc, ch 2, dc). Ch 1, skip 3 sts, repeat into the next arch. Continue around. Join with sl st.
Round 4: Into each V-stitch from the previous round, work (dc, ch 2, dc) V-stitch. Between each, ch 1 and dc into the middle stitch between Vs (in the ch-1 space between Vs). Continue around. Join with sl st.
Round 5 (Increases): In each V-stitch, work an expanded V-stitch (2 dc, ch 2, 2 dc). Between expanded Vs, ch 1 and dc in the next space between Vs. Continue around. Join with sl st.
Round 6: In the centre of each expanded V, work 6 dc. Ch 1, sc and ch 1 in the middle dc of the previous row. Repeat pattern around. Join with sl st.
Round 7 (Final Row, Picots): Work a dc with a picot (ch 3, sl st into front two loops) into every dc and sc of the previous round, skipping all ch stitches. Repeat around. Join with sl st.
Finishing & Assembly
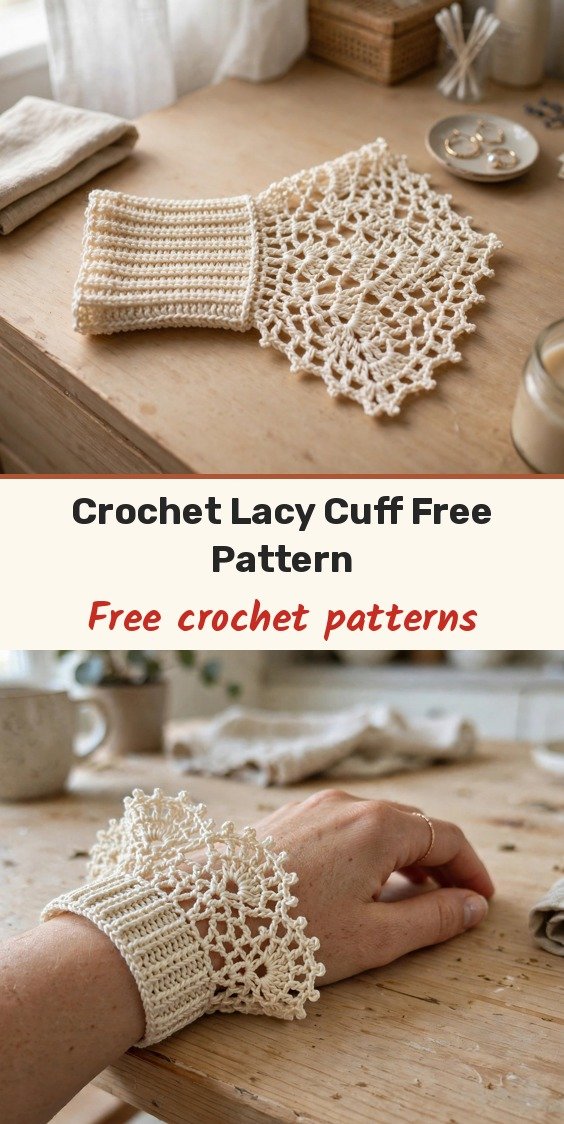
The ribbed base forms a soft, stretchy cuff that fits securely around the wrist, and the lace pattern provides a flared, decorative finish with picots for added elegance.
The finished cuff measures approximately 6.25 inches (16 cm) in circumference and 3 inches (7 to 8 cm) wide. Block gently if you like, to open up the lace details.
Tips
Wear your cuff as a bracelet to add a delicate touch to an outfit, or wrap it around a ponytail as a pretty hair accessory.
It layers beautifully with other jewellery, and it makes a thoughtful handmade gift for someone special.
If your wrist is smaller or larger than the standard size, simply work fewer or more ribbing rows before joining the base into a ring, and keep your Round 1 single crochet count even so the lace arches sit neatly.
Stylish Crochet Lacy Cuff Free Pattern For Everyday Wear
Materials
Steps
- Chain 16 and work the ribbed base in sc blo for 32 rows
- Slip stitch the short ends together to form a ring
- Work 32 sc around the base for Lace Round 1
- Work the ch-3 arches in Round 2
- Work V-stitches in Rounds 3 and 4
- Work expanded V-stitch increases in Round 5
- Work the 6-dc fans in Round 6
- Finish with the picot edge in Round 7 and block gently
- Use back loops only for the ribbing so the base stays stretchy
- Make the final stitch of each ribbing row under both loops for a neat edge
- Adjust the fit by adding or removing ribbing rows before you join the ring
- Block gently at the end to open up the lace and picots