Lavender Wildflower Journal Cover Free Crochet Pattern
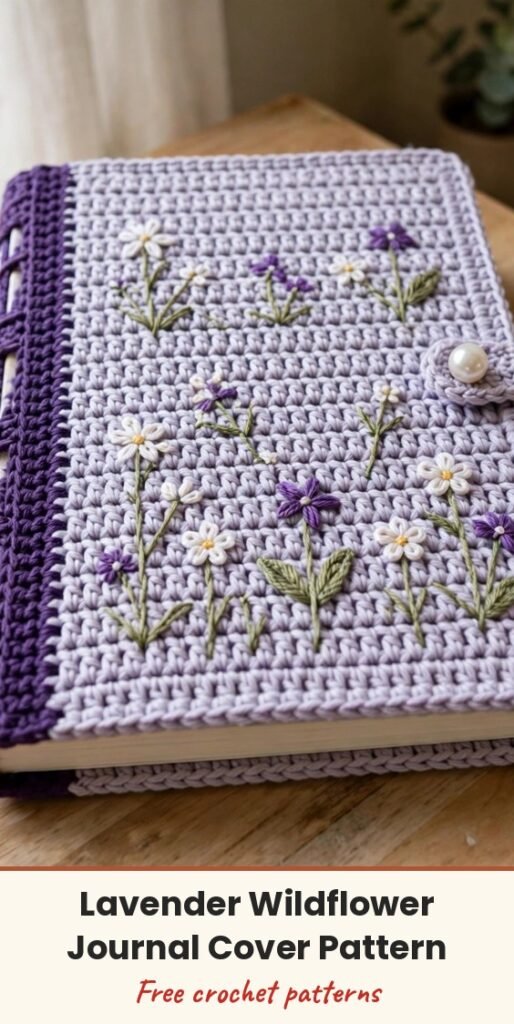
Table of Contents
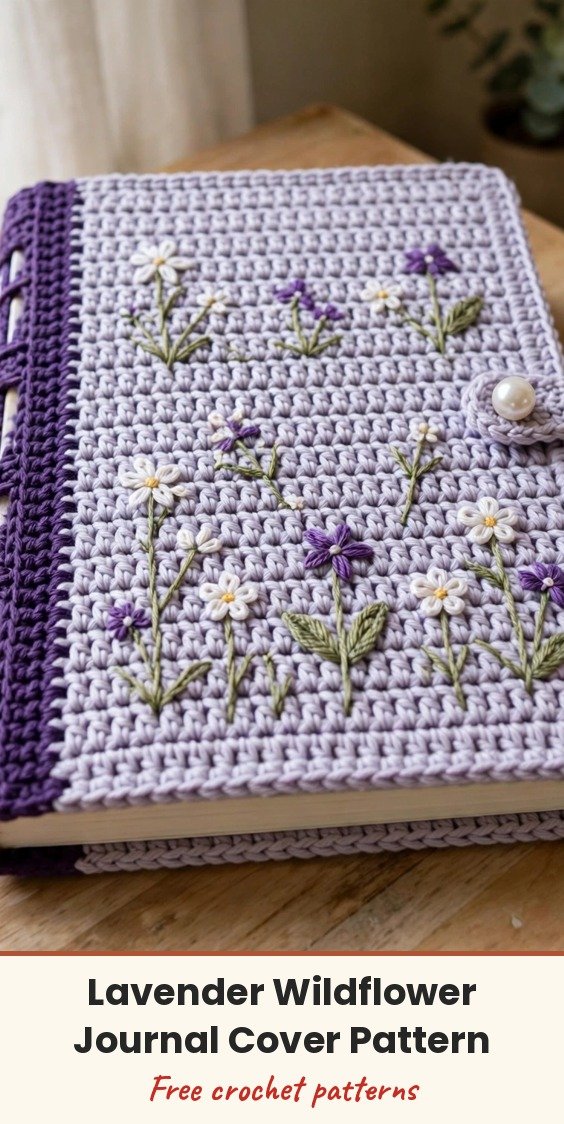
If you love giving handmade gifts with a real heirloom feel, this lavender wildflower journal cover is going to make your heart sing! We will crochet a simple single crochet cover that wraps snugly around a standard A5 hardcover journal, then add the sweetest scattered wildflower embroidery on top.
The body of the cover is worked entirely in single crochet, which creates a dense, fabric-like texture that holds its structure beautifully around the journal. No complicated stitch patterns to memorise here, just calm, relaxing rows.
After the crocheting, we fold and seam interior slip pockets, add a violet spine strip and a button tab, and then the magic happens with simple lazy daisy and straight stitch embroidery. Expect about 7 to 11 hours in total, and a finished cover you will treasure.
Materials
- Approximately 220 yards of light lavender worsted weight cotton or cotton-blend yarn (main colour)
- Approximately 40 yards of deep violet worsted weight cotton or cotton-blend yarn (contrast colour)
- Embroidery floss, 1 skein each in white, deep purple or violet, and sage green
- US E-4 / 3.5 mm crochet hook
- Yarn needle with a blunt tip and large eye, for seaming
- Embroidery needle, sharp with a medium eye
- 1 pearl or white shank button, approximately 0.5 inch / 12 mm diameter
- Scissors
- Stitch markers, at least 4
- Rust-proof pins for blocking
- A5 hardcover journal, for fitting
Abbreviations
- ch: chain
- sl st: slip stitch
- sc: single crochet
- hdc: half double crochet
- st/sts: stitch / stitches
- RS: right side
- WS: wrong side
- rep: repeat
- blo: back loop only
Special Stitches
Single Crochet in Back Loop Only (sc blo): Insert your hook under the back loop only of the indicated stitch, the loop farther from you as the work faces you. Yarn over and pull up a loop, yarn over and pull through both loops on the hook. This creates a subtle ridge and is used for joining seams.
Gauge & Size
- Finished size: flat and open approximately 13.5 inches wide x 8.75 inches tall; closed around an A5 journal approximately 6 inches wide x 8.75 inches tall, with an approximately 1 inch spine
- Gauge: 22 sc x 26 rows = 4 inches, measured after light blocking
- Construction: one flat rectangle folded into slip pockets, with a sewn-on spine strip, button tab, and surface embroidery
- Skill level: Intermediate
Main Body
The main body is worked as one long flat rectangle. When folded at two marked points, it creates the front and back cover pockets.
Foundation: With the main colour, chain 109. (109 ch)
Row 1 (RS): Sc in second ch from hook, sc in each ch across, ch 1, turn. (108 sc)
Rows 2 through 57: Sc in each st across, ch 1, turn. (108 sc per row)
After Row 57, do not turn. Fasten off, leaving a 24-inch sewing tail. Your piece should measure approximately 19.5 inches wide and 8.75 inches tall.
Place a stitch marker between stitches 16 and 17 on Row 1 to mark the right pocket fold line, about 3 inches from the right edge. Place a second marker between stitches 92 and 93 on Row 1 to mark the left pocket fold line, about 3 inches from the left edge.
Folding & Seaming
Fold the right edge inward at the right marker so stitches 1 through 16 overlap the wrong side of the rectangle, creating a 3-inch pocket on the right, and pin it in place. Fold the left edge inward at the left marker so stitches 93 through 108 overlap the wrong side, and pin that pocket in place too.
Using your sewing tail and yarn needle, whipstitch or single crochet seam the top edges of both pockets closed along Row 57, working through both layers. Repeat for the bottom edges along Row 1 at both folded ends.
Slide your A5 journal into the pockets to check the fit. The journal boards should slip in snugly without gaping or pulling.
Spine Strip
The spine strip adds that contrasting deep violet band on the left side of the front cover.
Foundation: With the contrast colour, chain 8. (8 ch)
Row 1: Sc in second ch from hook, sc in each ch across, ch 1, turn. (6 sc)
Rows 2 through 57: Sc in each st across, ch 1, turn. (6 sc per row)
After Row 57, fasten off, leaving a 20-inch tail. Position the strip vertically along the left edge of the front of the assembled cover, approximately 0 to 0.1 inch from the left edge, with the right side of the strip facing out, aligned exactly with the top and bottom of the cover. Pin it in place, then whipstitch all four edges of the strip to the cover with small, even stitches.
Button Tab
Row 1: With the main colour, chain 7. Sc in second ch from hook and in each ch across. (6 sc)
Rows 2 through 8: Ch 1, turn, sc in each st across. (6 sc per row)
At the end of Row 8, do not fasten off. Fold the piece in half lengthwise to form the tab body, approximately 0.75 inch wide and 1 inch long.
Joining: Ch 1, slip stitch along the long open edge to close, creating a flat oval tab.
Button Loop: Ch 8, sl st into the first ch to form a small loop. Fasten off, leaving a 12-inch tail for sewing.
Position the tab on the right side edge of the assembled cover, centred vertically at approximately 4.25 inches from the top or bottom edge, with the tab body flat against the right side of the cover and the loop extending beyond the right edge. Stitch the tab body firmly to the cover, taking at least 8 passes through its base. To place the button, close the cover around the journal, loop the button loop around where it falls naturally on the back cover, mark that point, then open the cover and sew the button at the mark.
Embroidery
Work all embroidery with 2 strands of embroidery floss, from the right side of the cover. On the spine strip, work a vertical column of alternating white daisy blossoms and small purple four-petal flowers, each spaced approximately 0.6 inch apart, for approximately 13 to 14 flowers in total.
White Daisy Blossoms: Work lazy daisy stitch. Bring the needle up at the centre point, insert it back down into the same hole leaving a small loop, bring the needle up approximately 0.2 inch away inside the loop, pull through until the loop lies flat, then insert the needle down over the tip of the loop to anchor it. Repeat to make 5 to 6 petals radiating from the same centre, using white floss, and add 2 straight stitches in green for small leaves at the base.
Purple Four-Petal Flowers: Work exactly as the daisy blossoms but with 4 petals in deep purple floss, slightly shorter at 0.15 inch, and add a small white straight stitch dot at the centre.
On the front cover, work approximately 10 to 12 small flower groupings scattered across the front panel with a natural, organic distribution, more flowers in the upper half and a few larger clusters toward the lower right. Each grouping has 1 to 2 white daisy blossoms, 1 to 2 purple four-petal flowers, 2 to 4 green stems in straight stitch at 0.3 to 0.5 inch long, and 2 to 4 leaves in lazy daisy stitch at 0.15 inch long. There is no rigid grid, so work intuitively for that scattered wildflower effect!
Optional Crocheted Rose
Foundation: With the contrast colour, ch 36.
Row 1: 3 sc in second ch from hook, 3 sc in each ch across. Fasten off, leaving a 10-inch tail.
Roll the strip tightly from one end to the other to form a rose shape, and use the tail to stitch through the base several times to secure it. The finished rose is approximately 1 inch in diameter.
Leaf (make 2): With green embroidery floss or a small amount of green yarn, ch 8. Sl st in second ch from hook, sc in next ch, hdc in next 2 ch, sc in next ch, sl st in last ch. Fasten off, leaving a tail, and attach both leaves to the base of the rose. Use your rose as a pin on the cover, on a hair clip, or as a bookmark.
Finishing & Assembly
Before embroidery, wet block the assembled cover. Dampen it with cool water, press out the excess moisture with a clean towel, and pin it to a blocking mat at 13.5 inches x 8.75 inches. Allow it to dry completely, 8 to 24 hours depending on humidity. Weave in all crochet yarn tails securely on the wrong side before the embroidery step.
After embroidery, lightly steam the front of the cover from 1 to 2 inches away with a steam iron set to low cotton. Do not press directly onto the embroidery, as this will flatten the lazy daisy loops, and trim any floss tails to 0.1 inch after securing.
For a standard composition notebook (7.5 x 9.75 inches), chain 75 for approximately 74 sc and work 64 rows, adjusting the spine strip to 64 rows. For a pocket-sized journal (3.5 x 5.5 inches), chain 43 for approximately 42 sc and work 36 rows, adjusting the spine strip to 36 rows.
Tips
Gauge is critical for this project. A looser gauge makes a floppy, oversized cover, and a tighter gauge makes it too stiff to open smoothly, so work a 5-inch swatch, block it, and measure the centre 4 inches before you begin.
Choose a smooth, tightly plied cotton with low fuzz. Fuzzy yarns will obscure your embroidery, and stretchy yarns will not hold the rigid journal in place properly.
If you are new to embroidery, practise the lazy daisy on a swatch first. The cotton fabric has excellent stitch definition, so you can see exactly where to place your needle.
For care, machine wash on a gentle cycle in cool water inside a mesh laundry bag with mild detergent, reshape and lay flat to dry, and store flat or standing upright to avoid creasing the embroidery.
Lavender Wildflower Journal Cover Free Crochet Pattern
Materials
Steps
- Work the main body rectangle in single crochet, 108 sts for 57 rows
- Fold and seam both ends into slip pockets and check the journal fit
- Work and sew on the violet spine strip, 57 rows
- Work the button tab with its ch-8 loop and sew on the button
- Embroider the spine column and scattered front wildflowers
- Make the optional crocheted rose if you like
- Block, steam lightly, and weave in all ends
- Block and measure a 5-inch swatch first, fit depends on gauge
- Weave in all crochet tails on the wrong side before embroidering
- Steam from 1 to 2 inches away, never press directly on the embroidery