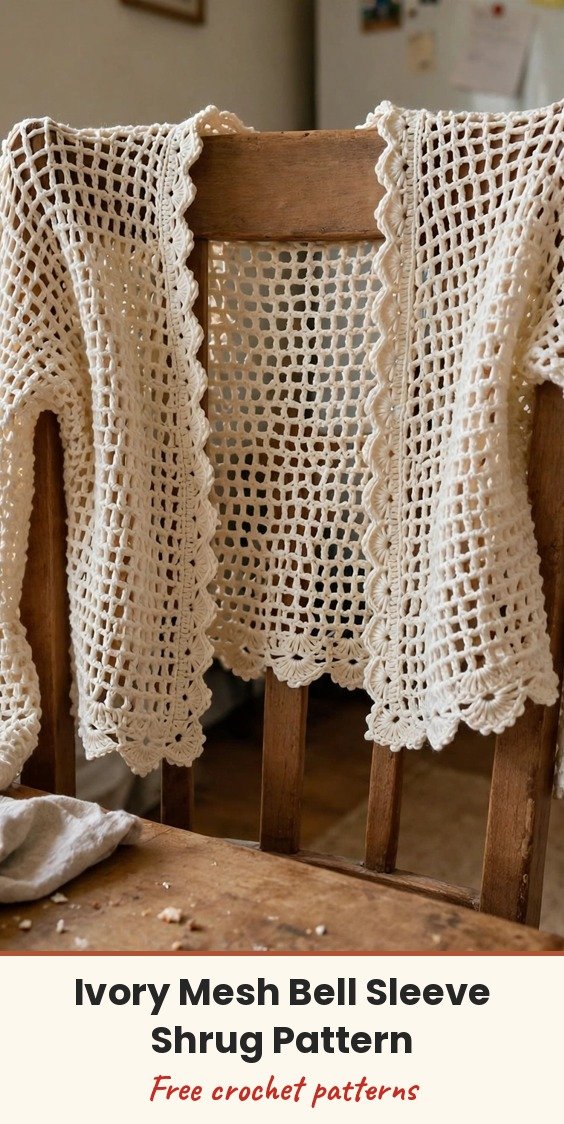
Ivory Bridal Mesh Crochet Bell Sleeve Shrug Pattern
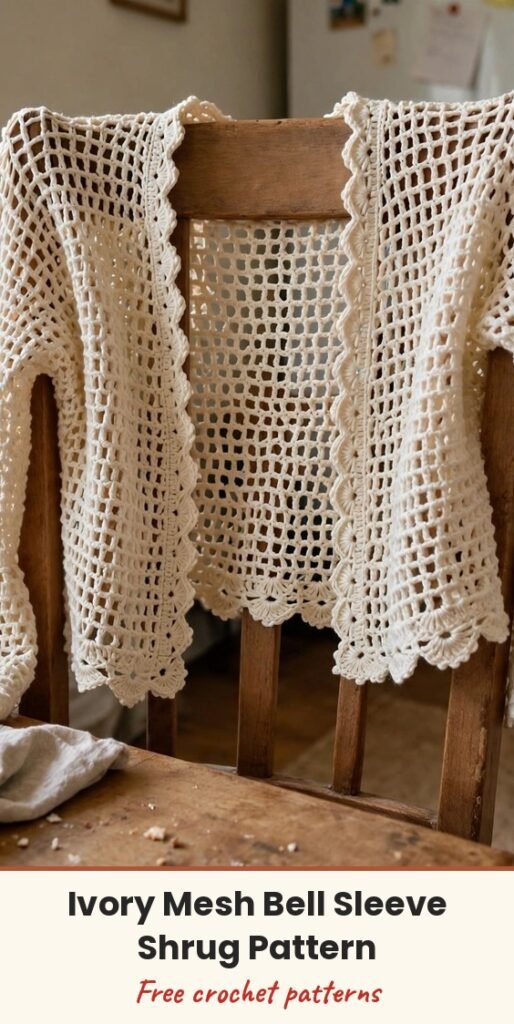
Table of Contents
This dreamy little shrug is one of my favourite layering pieces! The open filet-style mesh keeps it light and romantic, the cropped shape sits at the natural waist, and those dramatic bell sleeves give it such lovely vintage flair. It is designed to be worn open in the front, framing whatever you wear underneath.
We will work it in simple pieces: a back panel, two front panels, and two sleeve tubes worked in the round, then seam everything together and finish with a sweet scalloped edging. The mesh is just a two-row repeat, so once you find the rhythm it becomes wonderfully meditative.
It is intermediate beginner friendly. If you can chain, double crochet, and count stitches, you can make this shrug with me.
Materials
- 400 to 500 yards of fingering weight yarn (size 1 super fine), cotton blend, bamboo blend, or silk blend in natural ivory or cream
- 3.25 mm crochet hook (US D/3)
- Tapestry needle for weaving in ends and seaming
- 4 to 6 stitch markers
- Measuring tape
- Scissors
Abbreviations
- ch: chain
- dc: double crochet
- sc: single crochet
- sl st: slip stitch
- ch-sp: chain space, the gap created by chains in the previous row; work into these spaces, not into the chains themselves
- st/sts: stitch / stitches
Gauge & Size
- Gauge: 20 stitches and 10 rows = 4 inches in mesh pattern
- Finished size: cropped shrug worn open at the front; back panel approximately 16 inches wide by 12 inches tall, each front panel approximately 8 inches wide by 12 inches tall, sleeves approximately 15 inches long
- Construction: back and front mesh panels seamed at shoulders and sides, sleeves worked in the round and attached, scalloped edging added last
- Skill level: Intermediate beginner friendly
Mesh Pattern
The whole shrug uses this simple filet-style mesh repeat, worked flat for the panels.
Row 1: Dc in 5th ch from hook, (ch 1, skip 1 ch, dc in next ch) repeat across.
Row 2: Ch 4 (counts as dc + ch 1), turn, dc in next dc, (ch 1, dc in next dc) repeat across.
Back Panel Pattern
Foundation: Ch 82.
Row 1: Dc in 5th ch from hook (skipped chains count as dc + ch 1), (ch 1, skip 1 ch, dc in next ch) repeat across. (40 dc, 39 ch-1 spaces)
Row 2: Ch 4 (counts as dc + ch 1), turn, dc in next dc, (ch 1, dc in next dc) repeat across. (40 dc, 39 ch-1 spaces)
Rows 3 through 30: Repeat Row 2.
Your back panel should measure approximately 16 inches wide and 12 inches tall. Fasten off and weave in ends.
Front Panel Pattern
Make 2 identical front panels, one left and one right.
Foundation: Ch 42.
Row 1: Dc in 5th ch from hook, (ch 1, skip 1 ch, dc in next ch) repeat across. (20 dc, 19 ch-1 spaces)
Row 2: Ch 4, turn, dc in next dc, (ch 1, dc in next dc) repeat across. (20 dc, 19 ch-1 spaces)
Rows 3 through 30: Repeat Row 2.
Your front panel should measure approximately 8 inches wide and 12 inches tall. Fasten off.
Bell Sleeve Pattern
Make 2 sleeves, worked in the round from the shoulder down so they flare toward the wrist.
Foundation: Ch 48, sl st to first ch to form a ring. Be careful not to twist.
Round 1: Ch 4 (counts as dc + ch 1), skip 1 ch, dc in next ch, (ch 1, skip 1 ch, dc in next ch) repeat around, ch 1, sl st to 3rd ch of beginning ch-4 to join. (24 dc, 24 ch-1 spaces)
Round 2: Ch 4, dc in next dc, (ch 1, dc in next dc) repeat around, ch 1, sl st to 3rd ch of beginning ch-4. (24 dc, 24 ch-1 spaces)
Rounds 3 through 8: Repeat Round 2.
Round 9 (Increase Round): Ch 4, dc in same st, ch 1, dc in next dc, (ch 1, dc in next dc) repeat around to last dc, ch 1, 2 dc in last dc, ch 1, sl st to join. (26 dc)
Rounds 10 through 12: Work even in mesh pattern. (26 dc, 26 ch-1 spaces)
Round 13 (Increase Round): Ch 4, dc in same st, (ch 1, dc in next dc) repeat around, working 2 dc in the last dc, ch 1, sl st to join. (28 dc)
Rounds 14 through 16: Work even. (28 dc, 28 ch-1 spaces)
Round 17 (Increase Round): Increase as before. (30 dc)
Rounds 18 through 20: Work even. (30 dc, 30 ch-1 spaces)
Round 21 (Increase Round): Increase as before. (32 dc)
Rounds 22 through 26: Work even. (32 dc, 32 ch-1 spaces)
Round 27 (Increase Round): Increase as before. (34 dc)
Rounds 28 through 30: Work even. (34 dc, 34 ch-1 spaces)
Your sleeve should measure approximately 15 inches from shoulder to wrist, with a noticeable flare at the cuff. Fasten off, leaving a long tail for attaching to the body.
Finishing & Assembly
Shoulder seams: Lay the pieces flat with right sides facing up, with the back panel in the centre. Whipstitch or mattress stitch the top 3 inches of each front panel to the corresponding 3 inches of the back panel, leaving the centre 10 inches of the back open for the neck.
Side seams: Starting from the bottom, seam 5 inches up each side, leaving 7 inches open for the armholes.
Attaching the sleeves: Turn the body inside out. Pin the top of one sleeve (Round 1) around one armhole opening, matching the underarm of the sleeve to the side seam, and whipstitch the sleeve to the armhole, easing any extra fabric as needed. Repeat for the second sleeve, then turn right side out.
Scalloped edging: Join yarn at the bottom right front corner with a sl st. Work (sc in next st or space, skip 1 st, 5 dc in next st, skip 1 st) repeat around the entire outer edge, sl st to first sc to join, and fasten off. Join yarn at the underarm of one sleeve and work the same scallop pattern around the cuff opening, then repeat for the second sleeve.
Weave in all ends with your tapestry needle. Blocking is essential for this piece: soak the finished shrug in lukewarm water with a drop of wool wash for 15 minutes, squeeze out excess water without wringing, lay flat, pin the mesh open, shape the bell sleeves so they flare evenly, and let dry completely, usually 24 to 48 hours.
Tips
For a smaller size, reduce your foundation chains by 10 stitches on each panel. For a larger size, add 10 stitches to each foundation chain and work 2 to 4 additional rows for more length.
For longer sleeves, continue working even rounds after Round 30, adding increases every 4 rounds if you want more flare. For a less dramatic bell, skip one or two of the increase rounds.
Keep your tension consistent, because mesh shows every inconsistency, and count your stitches at the end of every few rows on the body panels.
Use stitch markers at the beginning of rounds when working the sleeves, and please do not skip blocking. It relaxes the stitches, opens the pattern, and makes the whole shrug look so much more professional.
Ivory Bridal Mesh Crochet Bell Sleeve Shrug Pattern
Materials
Steps
- Work the back mesh panel in 30 rows
- Work 2 front mesh panels in 30 rows each
- Seam the shoulders and sides, leaving armholes open
- Crochet 2 bell sleeves in the round to Round 30
- Attach the sleeves to the armholes
- Add scalloped edging around the body and cuffs
- Block the finished shrug flat
- Count stitches every few rows on the mesh panels
- Mark the start of each sleeve round with a stitch marker
- Blocking is essential to open up the mesh
- Add or remove 10 foundation chains per panel to resize