Free Crochet Chewbacca Baby Pattern
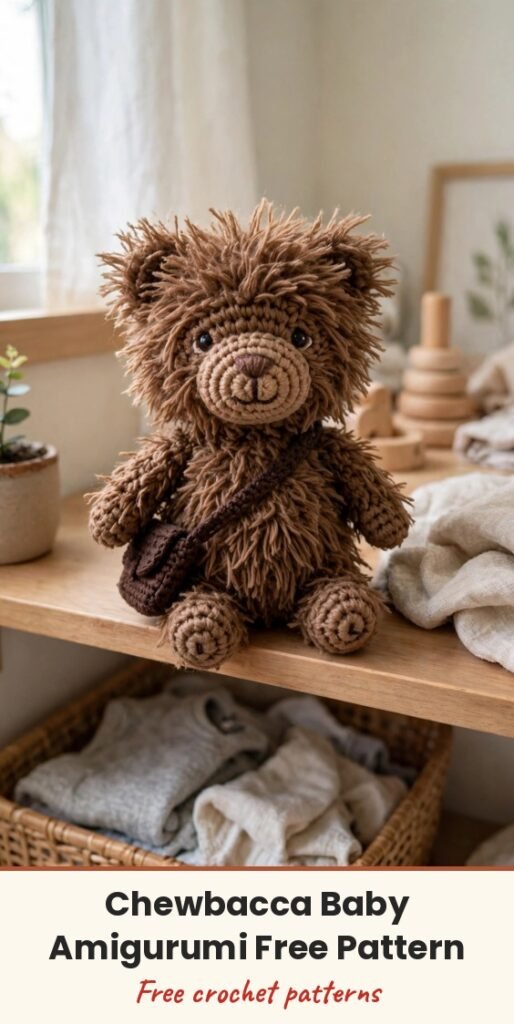
Table of Contents
Who says a mighty Wookiee can’t be irresistibly adorable? This baby-sized version of the famous co-pilot captures all the heart and loyalty of the original, wrapped up in fuzzy yarn and pint-sized charm!
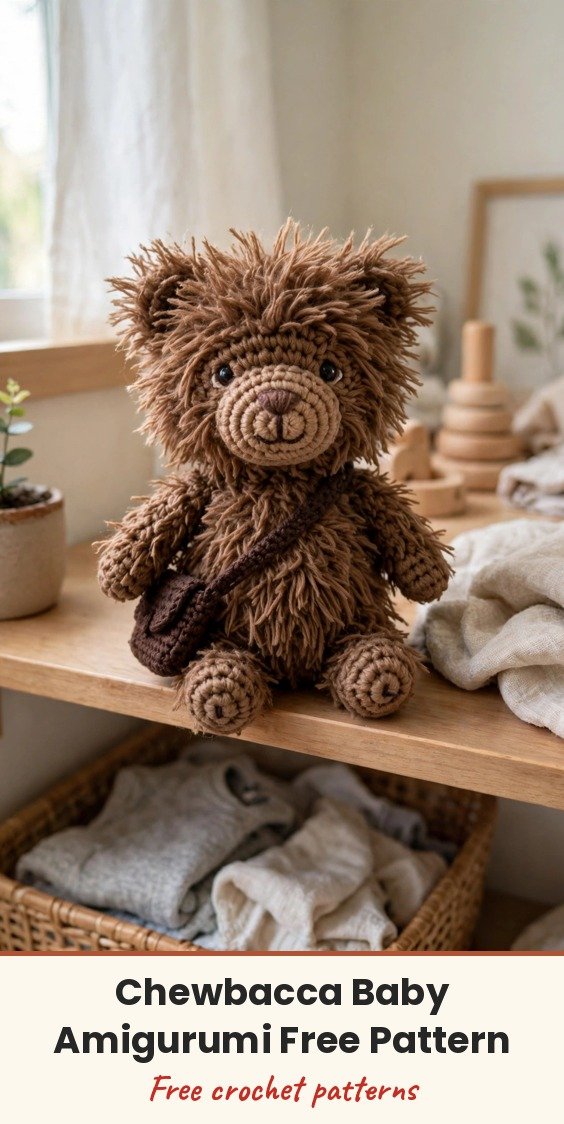
His signature bandolier-style bag, tufted fur look, and gentle embroidered expression are reimagined in miniature form, making him instantly lovable. Whether he is nestled on a bookshelf, traveling in a backpack as a keychain, or guarding a nursery, this tiny friend fits seamlessly into everyday spaces.
The pattern is approachable for a variety of skill levels, yet the finished result is detailed enough to delight even the most devoted fans. We will work the legs, body, and head in simple single crochet rounds, then add the arms and his little bag. Let’s make him!
Materials
- Yarn in brown tones (3 mm thickness), for the body, head, arms and bag
- 2.5 mm crochet hook
- Wool needle (yarn needle)
- Polyester filling (stuffing)
- 1 pair of safety eyes, 7 mm
- Silicone or hot glue gun, for attaching the head and arms
- Skewer or small stick, to help with stuffing
Abbreviations
- SC: single crochet
- INC: increase (2 SC in the same stitch)
- DEC: decrease (single crochet decrease)
Gauge & Size
- Finished size: a small baby-sized amigurumi figure, suitable as a keychain, souvenir or nursery decoration
- Construction: legs worked separately and joined into the body, head worked separately and attached, arms and bag accessory added at the end
- Skill level: Easy to Intermediate (suitable for beginners with basic crochet knowledge)
Legs
Make 2 legs.
Round 1: Start with a magic ring. Crochet 8 SC into the ring. (8 SC)
Round 2: INC in each stitch around. (16 SC)
Rounds 3 to 5: SC in each stitch around. (16 SC each round)
Finish off the first leg. Repeat for the second leg but do not finish off.
Joining Legs and Body
Round 6: Join the two legs together by SC around both legs. (32 SC)
Rounds 7 to 10: SC in each stitch around. (32 SC per round)
Round 11: (SC in the next 14 stitches, DEC) repeat around. (30 SC)
Round 12: SC in each stitch around. (30 SC)
Round 13: (SC in the next 8 stitches, DEC) repeat around. (27 SC)
Round 14: (SC in the next 7 stitches, DEC) repeat around. (24 SC)
Round 15: SC in each stitch around. (24 SC)
Round 16: (SC in the next 2 stitches, DEC) repeat around. (18 SC)
Rounds 17 to 18: SC in each stitch around. (18 SC per round)
Round 19: (SC in the next 2 stitches, INC) repeat around. (24 SC)
Round 20: (SC in the next 3 stitches, INC) repeat around. (30 SC)
Round 21: (SC in the next 4 stitches, INC) repeat around. (36 SC)
Rounds 22 to 25: SC in each stitch around. (36 SC per round)
Round 26: (SC in the next 4 stitches, DEC) repeat around. (30 SC)
Round 27: (SC in the next 3 stitches, DEC) repeat around. (24 SC)
Round 28: (SC in the next 2 stitches, DEC) repeat around. (18 SC)
Round 29: (SC in the next stitch, DEC) repeat around. (12 SC)
Round 30: 3 DEC. Finish off and close the opening.
Stuff the body firmly as you go, using the skewer or small stick to push the filling into the legs and corners.
Head
Round 1: Start with a magic ring. 6 SC into the ring. (6 SC)
Round 2: INC in each stitch around. (12 SC)
Round 3: (SC in the next stitch, INC) repeat around. (18 SC)
Round 4: (SC in the next 2 stitches, INC) repeat around. (24 SC)
Round 5: (SC in the next 3 stitches, INC) repeat around. (30 SC)
Round 6: (SC in the next 4 stitches, INC) repeat around. (36 SC)
Round 7: (SC in the next 5 stitches, INC) repeat around. (42 SC)
Rounds 8 to 16: SC in each stitch around. (42 SC per round)
Round 17: (SC in the next stitch, INC 3DC, skip 1, SC in the next stitch) repeat around.
Round 18: SC in back loops only. (24 SC)
Attach the safety eyes between rounds 13 and 14, with 8 stitches apart. Embroider the nose and mouth. Stuff the head, then attach the head to the body with silicone or hot glue.
Arms
Make 2 arms.
Round 1: Magic ring with 5 SC. (5 SC)
Round 2: INC in each stitch around. (10 SC)
Rounds 3 to 8: SC in each stitch around. (10 SC per round)
Flatten and close the opening by SC. Attach the arms to the body with silicone or hot glue.
Bag Accessory
Base: Chain 6, SC in the next 5 stitches, chain 1 and turn. (5 SC)
Rounds 2 to 3: SC in the next 5 stitches, chain 1, and turn. (5 SC)
Make a chain long enough to fit around the body (around 20 chains). Attach the chain to the bag base and secure the ends, so the little bag hangs bandolier-style across his body.
Finishing & Assembly
Attach the head to the body with silicone or hot glue, and attach the arms the same way. If you are using safety eyes, the tutor’s suggestion is to melt the backs slightly to secure them in place.
Check that all parts are firmly attached, add any final tufts or embroidery touches you like, and your baby Wookiee is ready to gift, display, or hang as a keychain.
Tips
Continuously check the stitch count at the end of each round to ensure accuracy and a consistent shape.
Use a skewer or small stick to help push stuffing into the small parts like the legs and arms.
For a fuzzy, furry look, gently brush the finished figure with a clean, dry brush once assembly is complete.
Free Crochet Chewbacca Baby Pattern
Materials
Steps
- Crochet 2 legs and join them into the body in Round 6
- Work the body rounds up to Round 30, stuffing as you go
- Crochet the head and attach safety eyes between Rounds 13 and 14
- Embroider the nose and mouth and attach the head to the body
- Crochet 2 arms, flatten and close, then attach
- Make the little bag with its chain strap and hang it bandolier-style
- Check the stitch count at the end of every round for a consistent shape
- Use a skewer to push stuffing into the legs and other small parts
- Attach the head and arms with silicone or hot glue for a firm hold
- Brush the finished figure gently for a soft, furry look


