Cozy Tan Kitty Face Tote Bag Free Crochet Pattern
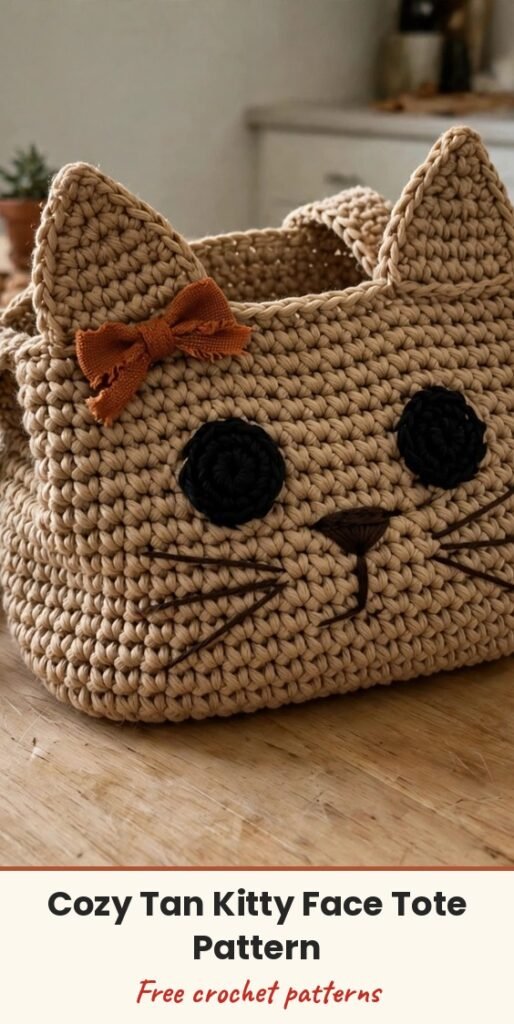
Table of Contents
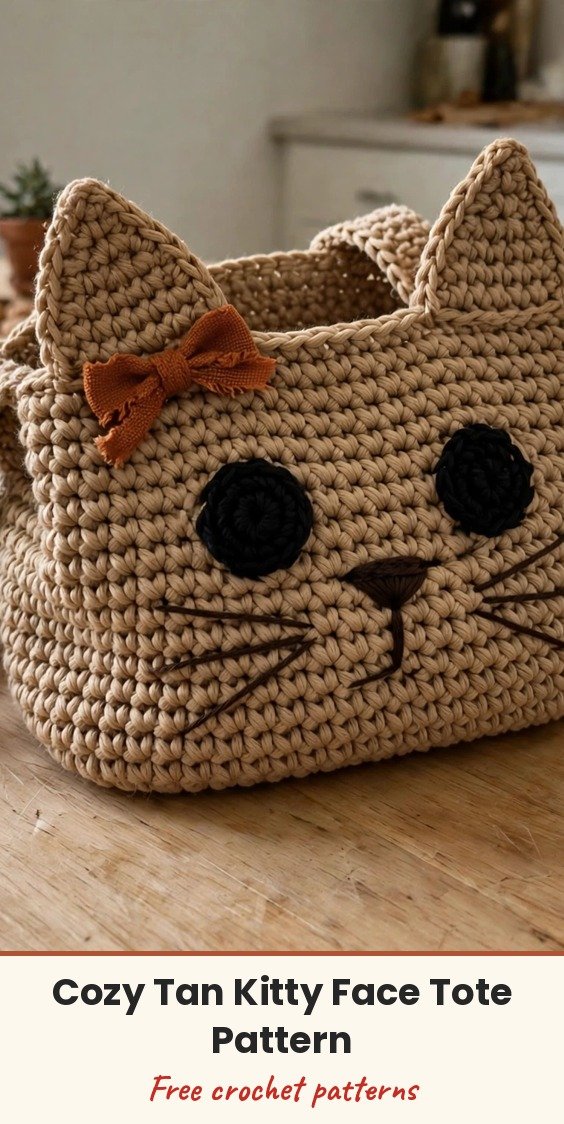
When I sat down to design this bag, I had one goal in mind: something equal parts functional and absolutely adorable! This cozy tan tote carries your everyday essentials, and that sweet kitty face, with its pointy ears and little rust bow, makes people smile every single time.
We will work two flat single crochet panels for the body, then make the ears, nose, bow and D-ring tabs separately and attach them at the end, so you can customise the placement until it looks just right. Single crochet gives us a dense, sturdy fabric that is perfect for a bag that needs to hold its shape.
The finished tote measures approximately 14 inches wide by 12 inches tall, not including the ears, and it works up faster than you might think. The main body is repetitive in the best way, making it a perfect project for a cosy evening of stitching!
Materials
- Approximately 400 yards of worsted weight yarn (category 4) in tan / beige, cotton or cotton blend recommended for structure
- Approximately 30 yards of dark brown yarn, for the inner ears, nose and whiskers
- Approximately 20 yards of rust / burnt orange yarn, for the bow
- Size H/8 (5.0mm) crochet hook, or size needed to achieve gauge
- Two 18mm black safety eyes (or buttons if preferred)
- Two gold D-rings, 1 inch size
- Yarn needle, for weaving in ends and assembly
- Stitch marker
- Scissors
- Polyester fiberfill, for light ear stuffing (optional)
Abbreviations
- ch: chain
- sc: single crochet
- inc: increase, work 2 single crochet stitches into the same stitch
- dec: decrease, single crochet two together
- sl st: slip stitch
- hdc: half double crochet
- FO: fasten off
- st/sts: stitch / stitches
Gauge & Size
- Finished size: approximately 14 inches wide by 12 inches tall, not including ears
- Gauge: 14 sc and 16 rows = 4 inches in single crochet
- Construction: two flat body panels joined at the sides and bottom, with ears, face details, bow and D-ring tabs made separately and sewn on
- Skill level: Confident Beginner to Intermediate
Body Panels Pattern
Make 2 identical panels. Working in rows creates a nice structured fabric. With tan yarn and the H hook:
Row 1: Ch 50, sc in 2nd ch from hook and in each ch across. (49 sts)
Row 2: Ch 1, turn, sc in each st across. (49 sts)
Rows 3 to 48: Repeat Row 2. (49 sts each row)
At the end of Row 48, FO and weave in ends. Your panel should measure approximately 14 inches wide by 12 inches tall. I like to place a stitch marker at the beginning of my rows so I do not accidentally skip or add stitches at the edges.
Outer Ears Pattern
Make 2. These are the tan portions of the ears that face outward. With tan yarn:
Row 1: Ch 16, sc in 2nd ch from hook and in each ch across. (15 sts)
Row 2: Ch 1, turn, sc in each st across. (15 sts)
Row 3: Ch 1, turn, dec, sc across to last 2 sts, dec. (13 sts)
Row 4: Ch 1, turn, sc in each st across. (13 sts)
Row 5: Ch 1, turn, dec, sc across to last 2 sts, dec. (11 sts)
Row 6: Ch 1, turn, sc in each st across. (11 sts)
Row 7: Ch 1, turn, dec, sc across to last 2 sts, dec. (9 sts)
Row 8: Ch 1, turn, sc in each st across. (9 sts)
Row 9: Ch 1, turn, dec, sc across to last 2 sts, dec. (7 sts)
Row 10: Ch 1, turn, dec, sc across to last 2 sts, dec. (5 sts)
Row 11: Ch 1, turn, dec, sc, dec. (3 sts)
Row 12: Ch 1, turn, sc3tog. (1 st)
FO, leaving a long tail for sewing.
Inner Ears Pattern
Make 2. These dark brown triangles sit inside the outer ears. With dark brown yarn:
Row 1: Ch 12, sc in 2nd ch from hook and in each ch across. (11 sts)
Row 2: Ch 1, turn, dec, sc across to last 2 sts, dec. (9 sts)
Row 3: Ch 1, turn, sc in each st across. (9 sts)
Row 4: Ch 1, turn, dec, sc across to last 2 sts, dec. (7 sts)
Row 5: Ch 1, turn, sc in each st across. (7 sts)
Row 6: Ch 1, turn, dec, sc across to last 2 sts, dec. (5 sts)
Row 7: Ch 1, turn, dec, sc, dec. (3 sts)
Row 8: Ch 1, turn, sc3tog. (1 st)
FO, leaving a tail for sewing.
Nose & Bow Pattern
The nose is a simple triangle worked from the bottom up. With dark brown yarn:
Row 1: Ch 8, sc in 2nd ch from hook and in each ch across. (7 sts)
Row 2: Ch 1, turn, dec, sc 3, dec. (5 sts)
Row 3: Ch 1, turn, dec, sc 1, dec. (3 sts)
Row 4: Ch 1, turn, sc3tog. (1 st)
FO, leaving a long tail for sewing. For the bow centre, with rust yarn:
Row 1: Ch 5, sc in 2nd ch from hook and in each ch across. (4 sts)
Rows 2 to 6: Ch 1, turn, sc in each st across. (4 sts)
FO, leaving a long tail. For each bow loop (make 2):
Row 1: Ch 12, sc in 2nd ch from hook and in each ch across. (11 sts)
Rows 2 to 4: Ch 1, turn, sc in each st across. (11 sts)
FO, leaving a tail. To assemble the bow, bring the short ends of one loop piece together to form a loop and whip stitch the ends together, then repeat with the second loop. Stack both loops on top of each other, slightly offset, wrap the bow centre piece tightly around the middle, and stitch it in place on the back.
D-Ring Tabs Pattern
Make 2. These tabs hold the hardware for attaching a strap later. With tan yarn:
Row 1: Ch 8, sc in 2nd ch from hook and in each ch across. (7 sts)
Rows 2 to 8: Ch 1, turn, sc in each st across. (7 sts)
FO, leaving a long tail.
Finishing & Assembly
Now comes the satisfying part where everything comes together! Lay one inner ear piece on top of one outer ear piece, centring it with a small border of tan showing around the edges, and whip stitch the inner ear to the outer ear around all edges. Repeat for the second ear. If you like, add a small amount of fiberfill before closing completely to give the ears slight dimension.
Lay one body panel flat with the right side facing up as your front panel. Position the safety eyes approximately 4 inches down from the top edge and 4 inches apart, push the posts through the fabric and secure the backs. Centre the triangle nose approximately 2 inches below the eyes, with the point facing down, and whip stitch it in place. Using dark brown yarn and a yarn needle, embroider three straight whisker stitches on each side of the nose, angling outward, each about 1.5 to 2 inches long. Position the assembled bow near the right ear area, about 2 inches from the top edge and 2 inches from the right side, and stitch it securely in place.
Thread one D-ring onto a tab piece, fold the tab in half lengthwise with the D-ring at the fold, position it at the top corner of the front panel about 1 inch from the side edge, and stitch the raw ends securely to the inside of the panel. Repeat on the opposite corner. Hold both panels together with right sides touching, and single crochet through both layers down the side, across the bottom, and up the other side, leaving the top open. Turn the bag right side out. Position the ears on the top edge of the front panel only, about 3 inches from each side edge, with the base of each ear overlapping the top of the bag by about 1 inch, and whip stitch securely along the base. Weave in all remaining ends and give your bag a gentle steam block if you like.
Tips
Change the colours for a whole family of cats: try grey for a silver tabby look or orange for a ginger cat.
Add a purchased chain strap or crochet a long strap to clip onto the D-rings for crossbody wear.
If this bag is for a small child, use buttons sewn on securely instead of safety eyes.
Spot clean as needed with mild soap and water, or hand wash in cool water and lay flat to dry so the shape stays lovely.
Cozy Tan Kitty Face Tote Bag Free Crochet Pattern
Materials
Steps
- Work two body panels of 49 sc by 48 rows
- Work two outer ears, tapering from 15 sts to 1 st
- Work two inner ears, tapering from 11 sts to 1 st
- Work the triangle nose, bow pieces and two D-ring tabs
- Sew the inner ears to the outer ears
- Attach the eyes, nose, whiskers and bow to the front panel
- Join the panels, attach the ears and D-ring tabs, and weave in ends
- Place a stitch marker at the start of rows to keep edges straight
- Check eye placement carefully before securing the safety eye backs
- Use buttons instead of safety eyes for a small child
- Clip a chain or crochet strap onto the D-rings for crossbody wear


