Baby Blue Daisy Barrel Bag Free Crochet Pattern
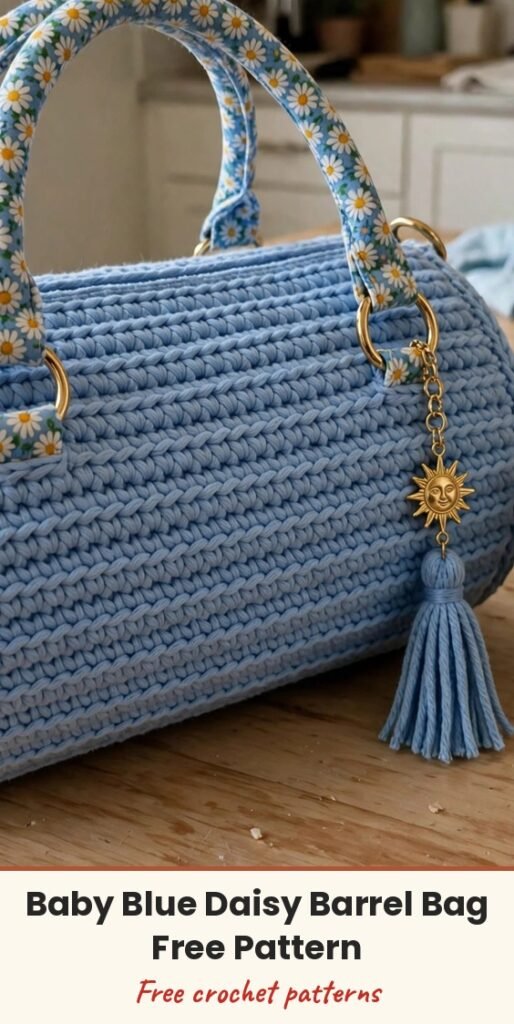
Table of Contents
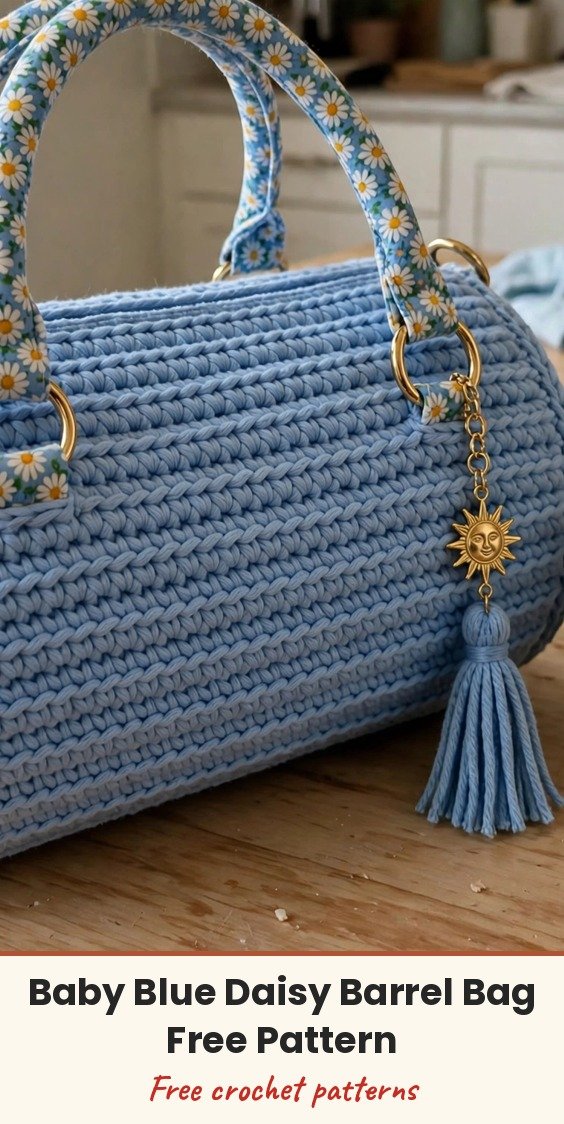
This baby blue daisy barrel bag is one of those projects that looks far more impressive than it actually is to make, and I love that about it! If you can crochet a rectangle and a circle, you can absolutely make this structured little bag, with its pretty daisy-print fabric end caps, gold hardware and sweet sun charm tassel.
We will build it in friendly pieces. First we crochet a flat rectangle in half double crochet and seam it into a tube for the body. Then we make two circular end caps, join each one to a daisy-print fabric circle, and seam the caps onto the tube. A simple lining, two grommets, D-rings and the ready-made daisy rope handles finish it off beautifully.
It is an intermediate project, but please do not let that scare you. If you have made a basic bag or worked in the round before, you already have the skills, and I will walk you through every step.
Materials
- Baby blue medium weight yarn, Category 4 or Worsted weight, approximately 300 yards (275 meters)
- US J-10 (6.0mm) crochet hook
- 2 daisy-print fabric-wrapped rope handles, each approximately 10 to 11 inches long, with gold barrel end caps and attached D-rings
- 4 gold D-rings, 1 inch wide
- 1 gold sun burst tassel charm, approximately 3 to 4 inches long
- 2 circles of daisy-print cotton fabric, each cut to 7 inches diameter
- 2 circles of fusible craft stabilizer or heavy interfacing, each 7 inches diameter
- 1 piece of coordinating lining fabric, approximately 12 x 24 inches
- 2 gold grommets or eyelets, 3/8 inch, with setting tool
- Sewing thread and needle to match the fabric
- Stitch markers
- Yarn needle or tapestry needle
- Scissors
- Fabric glue or hot glue gun (optional)
Abbreviations
- ch: chain
- sl st: slip stitch
- sc: single crochet
- hdc: half double crochet
- st/sts: stitch / stitches
- rnd: round
- RS: right side
- WS: wrong side
- pm: place marker
Special Stitches
- Slip Stitch Edging Join: with the right side facing you, insert your hook through the crochet edge stitch and through the corresponding fabric edge at the same time. Draw your yarn through both layers and through the loop on your hook. This is how we attach the fabric circles to the crocheted end caps, and it creates a neat, professional-looking join.
Gauge & Size
- Gauge: 14 hdc x 10 rows = 4 inches (10 cm), worked flat in turning rows with a US J-10 (6.0mm) hook, blocked. To swatch: chain 18, hdc in 3rd ch from hook and in each ch across (16 hdc), then work 12 rows of hdc, block and measure the centre 4 inches
- Finished size: body circumference approximately 22 inches (56 cm), body length approximately 10 inches (25.5 cm), each end cap approximately 7 inches (18 cm) diameter, height standing upright approximately 7 inches, handle drop approximately 5 inches (12.5 cm)
- Construction: flat hdc rectangle seamed into a tube, two spiral sc end caps joined to fabric circles, caps seamed to the tube, optional lining, grommets, D-rings and handles added last
- Skill level: Intermediate
Bag Body Pattern
The body is worked as a flat rectangle that we seam into a tube. Your target rectangle is 22 inches wide (this becomes the circumference) by 10 inches tall (this becomes the barrel length).
Foundation chain: Ch 79.
Row 1 (RS): Ch 2 (does not count as st, here and throughout), hdc in 3rd ch from hook, hdc in each ch across. Turn. (77 hdc)
Row 2: Ch 2, hdc in each st across. Turn. (77 hdc)
Rows 3 to 25: Repeat Row 2, turning at the end of each row. (77 hdc each row)
After Row 25, do not fasten off. Leave a long tail of approximately 24 inches for seaming. Your rectangle should measure approximately 22 inches wide and 10 inches tall.
Seaming the body tube: fold your rectangle in half lengthwise so the two short edges (the 10-inch edges) meet. Using your long tail and a tapestry needle, whipstitch or mattress stitch these short edges together to form a tube. This seam becomes the back centre of your bag. Weave in the end securely. You now have a crocheted tube approximately 22 inches around and 10 inches long.
End Cap Pattern
Make 2. Each end cap is worked in continuous spiralling rounds from the centre outward. Use a stitch marker to track where each round begins, because we do not join at the end of rounds. Start with a magic ring, or ch 4 and join with sl st to form a ring.
Round 1: Ch 1 (does not count as st), work 6 sc into ring, do not join. Pm in first st. (6 sc)
Round 2: 2 sc in each st around. (12 sc)
Round 3: (Sc in next st, 2 sc in next st) 6 times. (18 sc)
Round 4: (Sc in next 2 sts, 2 sc in next st) 6 times. (24 sc)
Round 5: (Sc in next 3 sts, 2 sc in next st) 6 times. (30 sc)
Round 6: (Sc in next 4 sts, 2 sc in next st) 6 times. (36 sc)
Round 7: (Sc in next 5 sts, 2 sc in next st) 6 times. (42 sc)
Round 8: (Sc in next 6 sts, 2 sc in next st) 6 times. (48 sc)
Round 9: (Sc in next 7 sts, 2 sc in next st) 6 times. (54 sc)
Round 10: (Sc in next 8 sts, 2 sc in next st) 6 times. (60 sc)
Round 11: (Sc in next 9 sts, 2 sc in next st) 6 times. (66 sc)
Round 12: (Sc in next 10 sts, 2 sc in next st) 6 times. (72 sc)
Round 13: (Sc in next 11 sts, 2 sc in next st) 6 times. (78 sc)
Do not fasten off. You will continue directly into the edging and fabric join. Before this step, fuse your interfacing to the wrong side of each fabric circle and trim both the fabric and interfacing to 7 inches diameter. You can clip small notches around the perimeter every 1/2 inch so the fabric lies flat when attached.
Edging and fabric join round: hold the fabric circle against the wrong side of your crocheted end cap, aligning the edges. Using the slip stitch edging join, insert your hook through the next sc on the crochet edge and through the edge of the fabric circle at the same time, draw the yarn through both layers and through the loop on your hook. Continue this join in each sc all the way around, joining the fabric circle to the crochet end cap. Join with a sl st to the first joining sl st. Fasten off and weave in ends.
Your completed end cap shows the daisy fabric on one face and the crochet on the other, with a clean slip stitch border around the edge. Each end cap should measure approximately 7 inches diameter, even and flat with no ruffling or curling. Make a second end cap the same way.
Finishing & Assembly
Joining the end caps to the body tube: place one end cap against one open end of your body tube with the daisy fabric side facing outward, away from the bag interior, and align the edges. Using your main colour yarn and a tapestry needle, whipstitch the outer edge of the end cap to the edge of the body tube, going through the outermost loops of both pieces. Work all the way around, distributing any fullness evenly. Fasten off and weave in ends. Repeat for the second end cap on the other end of the tube. Your bag should now be a firm barrel shape, approximately 10 inches long and 7 inches in diameter at each end.
Lining the bag (optional but recommended): cut your lining fabric into one rectangle measuring approximately 23 x 11 inches. Fold it lengthwise with right sides together and sew the long edge to create a tube with a 1/2-inch seam allowance. Press the seam. Fold under 1/2 inch at each end. Insert the lining tube into your crochet bag body so the folded ends align with the inside of each end cap, and hand stitch or fabric glue the folded lining edge to the inside of the bag along both circular seam lines.
Installing the gold grommets: mark two grommet positions on the top side of your body, one on the front centre approximately 1/2 inch down from the top edge, and one on the back centre in the same position. Using your grommet tool, punch a small hole through the crochet fabric (and lining if present) and set one gold grommet at each marked position, following your grommet package instructions.
Attaching D-rings and handles: cut two yarn tabs, each approximately 3 inches long, from your main colour yarn, or use a folded double length of yarn for extra strength. Fold each tab through a D-ring to create a loop. Align each D-ring tab 1 inch to the left and right of the front grommet, so you have two D-rings on the front top edge. Slip stitch each tab firmly to the top row of the bag body on the inside, making 6 to 8 securing stitches around the tab through the crochet fabric and lining. Repeat for two D-rings at the back grommet location. If your pre-made handles come with their own D-ring and barrel connector hardware already assembled, simply loop each handle’s D-ring over the D-rings you sewed onto the bag. Attach your daisy-print rope handles by slipping the handle end hardware connectors through the corresponding D-rings and closing the barrel connectors. Finally, clip your gold sun tassel charm through the front centre D-ring or grommet eyelet.
Weave in all remaining yarn ends securely, going in two directions for each tail, then trim all ends close to the fabric. Check all your seam lines around the end cap joins and re-stitch any gaps you notice.
Blocking: lightly mist the crochet body with cool water, gently shape the tube by hand into an even cylinder, and stuff the interior loosely with crumpled tissue paper or a rolled towel to hold the shape while drying. Allow to dry completely on a clean surface away from direct heat.
Tips
To make the bag longer, add more rows to the body rectangle before seaming. Every 4 additional rows adds approximately 1.6 inches to the body length, and the end caps stay the same.
To make the bag wider, add more increase rounds to the end caps and add more stitches to the body rectangle width proportionally. For every 1 inch added to the diameter, add approximately 11 additional stitches to your starting chain.
To make a smaller clutch version, reduce the starting chain to 55 stitches (giving approximately 53 working hdc) and work only 18 rows for the body. Work the end caps only to Round 9 (54 sts) for an approximately 5-inch diameter.
For care, hand wash in cool water with mild detergent, press out excess water without wringing, and roll in a clean towel to remove more moisture. Reshape into a cylinder, stuff lightly while drying, and air dry flat away from heat and direct sunlight. The fabric end panel inserts are best kept dry, so blot them immediately with a clean cloth if the bag gets wet. Do not machine wash or tumble dry.
Baby Blue Daisy Barrel Bag Free Crochet Pattern
Materials
Steps
- Crochet the hdc body rectangle, 77 sts across for 25 rows
- Seam the rectangle into a tube
- Crochet two spiral sc end caps out to 78 sts
- Join a daisy fabric circle to each end cap with slip stitch edging
- Whipstitch the end caps onto the body tube
- Add the optional lining
- Set two gold grommets
- Attach four D-rings, the rope handles and the sun tassel charm
- Block the body into an even cylinder
- Check your gauge on this one, because the rectangle has to fit around the circular end panels
- Use a stitch marker in the first stitch of the spiral end caps, since the rounds are not joined
- Clip small notches around the fabric circles so they lie flat against the caps
- Stuff the bag lightly with tissue while it dries so it keeps its barrel shape


