Dusty Rose Openwork Draped Poncho Free Crochet Pattern
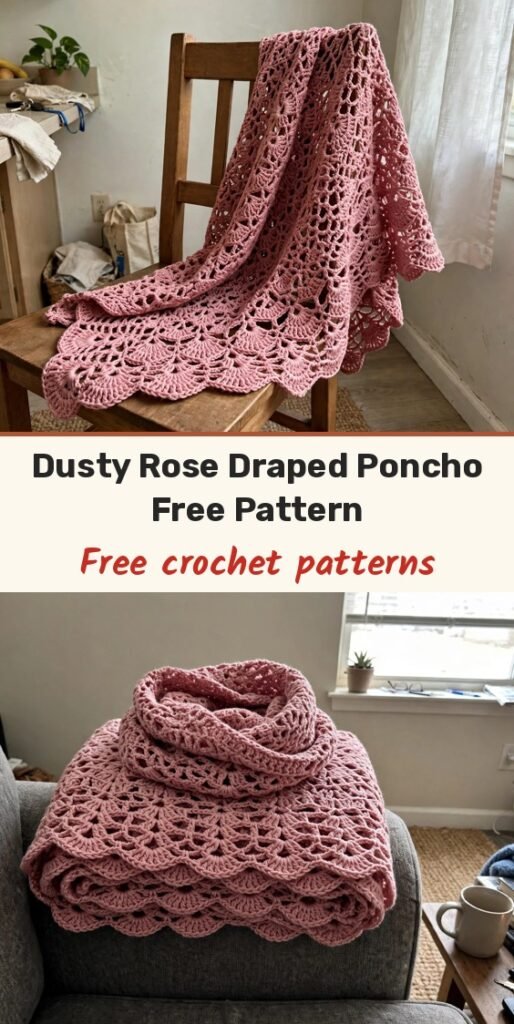
Table of Contents
I call this poncho my wearable hug! The shell-and-mesh lace looks intricate, but it settles into a steady, predictable rhythm after the first few rows, and the gentle A-line drape is flattering on just about everyone.
We will crochet two large rectangular panels from the hem upward, taper the sides with half-shell decreases, seam them at the shoulders, and finish with a long cowl-scarf that wraps around your neck and cascades down the front.
Each panel measures 36 inches wide at the hem and 28 inches at the shoulder, with a length of 40 inches, and the finished bust circumference is approximately 56 inches of beautiful drape.
Materials
- 1,800 yards worsted weight yarn (Category 4) in dusty rose
- US J-10 / 6.0mm crochet hook, or the size needed to obtain gauge
- Yarn needle with a large eye
- Rust-proof pins and blocking mats
- Scissors
- 4 stitch markers
Abbreviations
- ch: chain
- ch-sp: chain space
- dc: double crochet
- hdc: half double crochet
- sc: single crochet
- sk: skip
- sl st: slip stitch
- sp: space
- st(s): stitch or stitches
- rep: repeat
- beg: beginning
- RS: right side
- WS: wrong side
- t-ch: turning chain
- yo: yarn over
- pm: place marker
Special Stitches
- Shell stitch: work 5 dc all into the same stitch or space.
- V-stitch: work (dc, ch 1, dc) all into the same stitch or space.
- Mesh unit: work (ch 1, sk 1 st, dc into next st), or (dc into ch-sp, ch 1, sk, dc into next ch-sp).
- Beginning shell: at the start of a shell row, work ch 3 (counts as first dc), then 4 dc into the same space, for one full shell.
- Half shell decrease: work 3 dc instead of 5 dc into the same stitch or space at the beginning or end of a shell row, reducing the width by approximately one-half shell unit per edge.
Gauge & Size
- Finished size: each panel 36 inches wide at the hem, 28 inches at the shoulder and 40 inches long; cowl-scarf 8 inches wide and 72 inches long; total bust circumference approximately 56 inches, fitting sizes S through 3X depending on drape
- Gauge: 14 stitches and 8 rows = 4 inches in the openwork shell mesh pattern, after blocking; one 6-stitch repeat measures approximately 1.7 inches wide and ten rows approximately 5 inches tall
- Construction: two identical tapered panels worked flat from the hem up, shoulder seams, and a seamed cowl-scarf attached at the neck
- Skill level: Intermediate
Panel Pattern (Make 2)
The lace repeat is a multiple of 6 stitches plus 2. Side tapering is worked with half-shell decreases at both edges every 10 rows, starting after the first 20 rows. The turning chain counts as the first dc throughout, and you will work into chain spaces rather than individual chain stitches. Block before seaming, please, it makes such a difference to the drape.
Foundation: Chain 129.
Row 1 (RS): Ch 3 (counts as dc here and throughout), dc into 4th ch from hook and into each ch across. (127 dc)
Row 2 (WS): Ch 3, turn. Dc in next dc. (Ch 1, sk 1 dc, dc in next dc) rep to last dc, dc in last dc. (65 dc)
Row 3 (RS): Ch 3, turn. (Shell into next ch-sp, ch 1, sk next dc, dc into next ch-sp, ch 1) rep across, ending dc into last dc. You will work 20 complete repeats, plus an edge dc at each end. (122 dc)
Row 4 (WS): Ch 3, turn. Dc into next dc. Ch 1, sk next dc, dc into next dc, ch 1, sk next dc, dc into next dc, ch 1, dc into next dc, ch 1, sk next dc, dc into next dc. Rep across to last st, dc in last dc. (65 dc)
Row 5 (RS): Ch 3, turn. Dc in next dc. Ch 1, sk next dc. (Shell into next ch-sp, ch 1, sk next dc, dc into next ch-sp, ch 1, sk next dc) rep across, ending dc in last dc. (122 dc)
Row 6 (WS): Repeat Row 4. (65 dc)
Row 7 (RS): Repeat Row 3. (122 dc)
Row 8 (WS): Repeat Row 4. (65 dc)
Row 9 (RS): Repeat Row 5. (122 dc)
Row 10 (WS): Repeat Row 4. (65 dc)
Checkpoint: after Row 10 your panel should measure approximately 5 inches from the bottom of Row 2, showing 4 complete horizontal bands of shells in a staggered brick formation.
Rows 11 through 20: Continue repeating the pattern sequence, alternating between the Row 3 shell alignment and the Row 5 shell alignment, with mesh rows between. RS shell rows have 122 dc and WS mesh rows have 65 dc.
Checkpoint: after Row 20 the panel should measure approximately 10 inches tall and 36 inches wide (approximately 32 inches before blocking).
Row 21 (RS, Taper Row 1): Ch 3, turn. Work 3 dc (half-shell) into the first ch-sp instead of a full shell. Continue the pattern across. At the final ch-sp before the last dc, work 3 dc (half-shell) instead of a full shell. Dc into last dc. (118 dc)
Row 22 (WS): Ch 3, turn. Dc into next dc. (Ch 1, sk next dc, dc into next dc) rep, adjusting to fit the 118-dc row. End dc in last dc. (61 dc)
Rows 23 through 30: Continue the shell-mesh alternation with the narrowed stitch count. RS shell rows have 118 dc and WS mesh rows have 61 dc.
Checkpoint: after Row 30 the panel should measure approximately 15 inches tall and 34 inches wide.
Row 31 (RS, Taper Row 2): Work half-shells at each edge as in Row 21. (114 dc)
Row 32 (WS): Mesh row adjusted to the new count. (59 dc)
Rows 33 through 40: Continue the pattern. RS shell rows have 114 dc and WS mesh rows have 59 dc.
Row 41 (RS, Taper Row 3): Work half-shells at each edge. (110 dc)
Row 42 (WS): Adjusted mesh row. (57 dc)
Rows 43 through 50: Continue the pattern. RS shell rows have 110 dc and WS mesh rows have 57 dc.
Checkpoint: after Row 50 the panel should measure approximately 25 inches tall and 32 inches wide.
Row 51 (RS, Taper Row 4): Work half-shells at each edge. (106 dc)
Row 52 (WS): Adjusted mesh row. (55 dc)
Rows 53 through 60: Continue the pattern. RS shell rows have 106 dc and WS mesh rows have 55 dc.
Row 61 (RS, Taper Row 5): Work half-shells at each edge. (102 dc)
Row 62 (WS): Adjusted mesh row. (53 dc)
Rows 63 through 70: Continue the pattern. RS shell rows have 102 dc and WS mesh rows have 53 dc.
Row 71 (RS, Taper Row 6): Work half-shells at each edge. (98 dc)
Row 72 (WS): Adjusted mesh row. (51 dc)
Rows 73 through 80: Continue the pattern without further decreases. RS shell rows have 98 dc and WS mesh rows have 51 dc.
Checkpoint: after Row 80 your panel should measure approximately 40 inches from the top of the hem row to the working edge, and approximately 28 inches wide. This is the shoulder edge.
Panel Border
Work one row of sc evenly around all four edges of the panel to stabilise it for seaming. On the hem edge, work sc into each ch of the foundation chain. (127 sc)
On the side edges, work approximately 2 sc per dc row-end and 1 sc per ch row-end, adjusting to keep the edges flat. On the shoulder edge, work sc into each st across. (98 sc)
Join with sl st. Fasten off and weave in ends. Make a second identical panel, and label each panel at the shoulder edge with a stitch marker before seaming.
Cowl-Scarf Pattern
Foundation: Chain 255.
Row 1: Ch 3, turn. Dc into 4th ch from hook and each ch across. (254 dc)
Row 2: Ch 3, turn. Dc in next dc. (Ch 1, sk 1 dc, dc in next dc) rep to last dc, dc in last dc. (128 dc)
Row 3: Ch 3, turn. Dc in next dc. Ch 1. (Shell into next ch-sp, ch 1, dc into next ch-sp, ch 1) rep 41 times (42 repeats total), dc in last dc. (254 dc)
Row 4: Ch 3, turn. Repeat the Row 2 mesh structure, working dc above the 2nd and 4th dc of each shell and in each ch-sp between shells. (128 dc)
Row 5: Repeat Row 3 with staggered shell placement. (254 dc)
Rows 6 through 15: Continue alternating mesh and shell rows as established.
Row 16: Ch 3, turn. Dc in each dc and in each ch-sp across, working dc into every ch-1 space to close the mesh for the final row. (254 dc)
Fasten off, leaving a 24-inch tail for seaming.
Finishing & Assembly
For the shoulder seam, lay both panels flat with right sides facing up and align the two shoulder edges. Seam a 12-inch section at each end, leaving a central 4-inch neck opening between the seamed sections. Hold the panels with right sides together and use a whipstitch or mattress stitch through both layers, working from the far left edge for 12 inches, then reattaching at the right end and seaming inward for 12 inches. The front panel hangs open, the back panel hangs as the closed back, and the side openings serve as arm openings.
For the scarf, fold it in half lengthwise so the long edges meet. Using the long tail and a tapestry needle, whipstitch the two long edges together along approximately two-thirds of the length (approximately 48 inches), leaving the remaining one-third (approximately 24 inches) open. The closed section wraps around the back of your neck and the open section fans out as the draped front.
Centre the seamed section of the scarf at the centre back neck seam. Whipstitch the top edge of the closed scarf tube to the interior of the neck opening, working around the full 4-inch opening and extending approximately 1 inch onto each shoulder seam, so the scarf hangs freely at the front.
Wet block the finished poncho: submerge the panels and scarf in cool water with a little gentle wool wash, press out the water without wringing, roll in a clean dry towel, then pin the panels to 36 inches wide at the hem, 28 inches at the shoulder and 40 inches tall, and the scarf to 72 inches long and 8 inches wide. Allow 24 to 48 hours to dry completely.
Tips
For a smaller fit (XS to S), reduce the foundation chain by 12 stitches (2 full repeats) per panel and begin tapering at Row 15 instead of Row 20.
For a larger fit (4X to 5X), add 12 stitches (2 full repeats) per panel and allow approximately 200 additional yards of yarn.
Each 10 rows equals approximately 5 inches of length. Remove or add rows in groups of 2, before the taper section, to keep the stitch pattern intact.
Store the poncho flat or loosely rolled rather than hanging, since the weight of the open lace can stretch the shoulder seam over time.
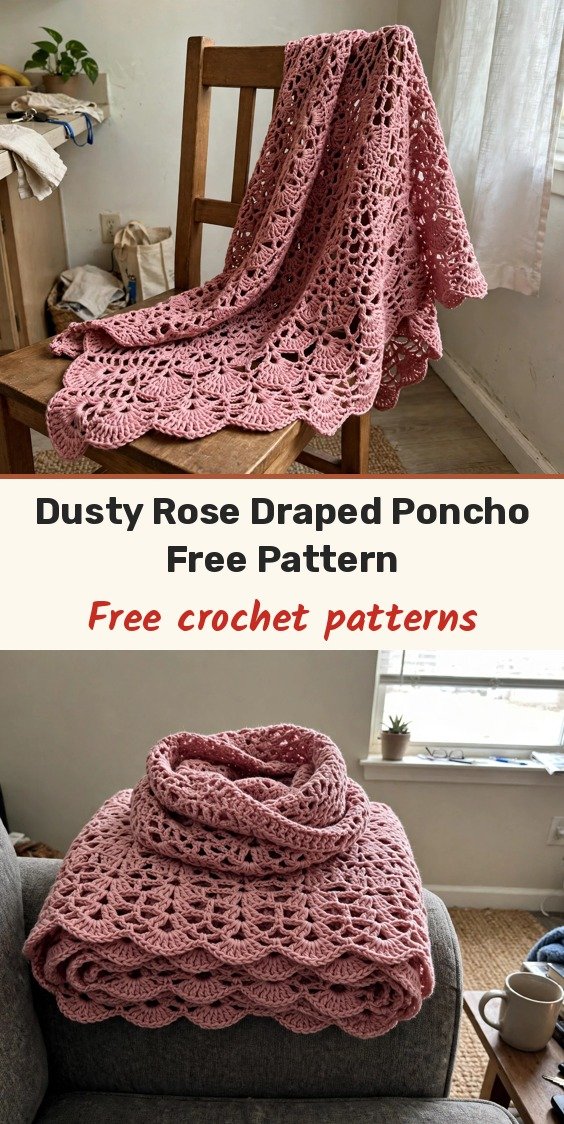
Dusty Rose Openwork Draped Poncho Free Crochet Pattern
Materials
Steps
- Work the first tapered lace panel from the hem to Row 80
- Work the panel border and make a second identical panel
- Seam the shoulders, leaving a 4 inch neck opening
- Work the cowl-scarf in shell and mesh rows to Row 16
- Seam two-thirds of the scarf into a tube
- Attach the scarf around the neck opening
- Block the panels and scarf to the finished measurements
- Work into chain spaces rather than individual chains for clean lace
- Keep the half-shell tapers on Rows 21, 31, 41, 51, 61 and 71
- Block before seaming so the lace opens fully
- Store flat or loosely rolled to protect the shoulder seam