Spring Garden Granny Square Bag Free Crochet Pattern
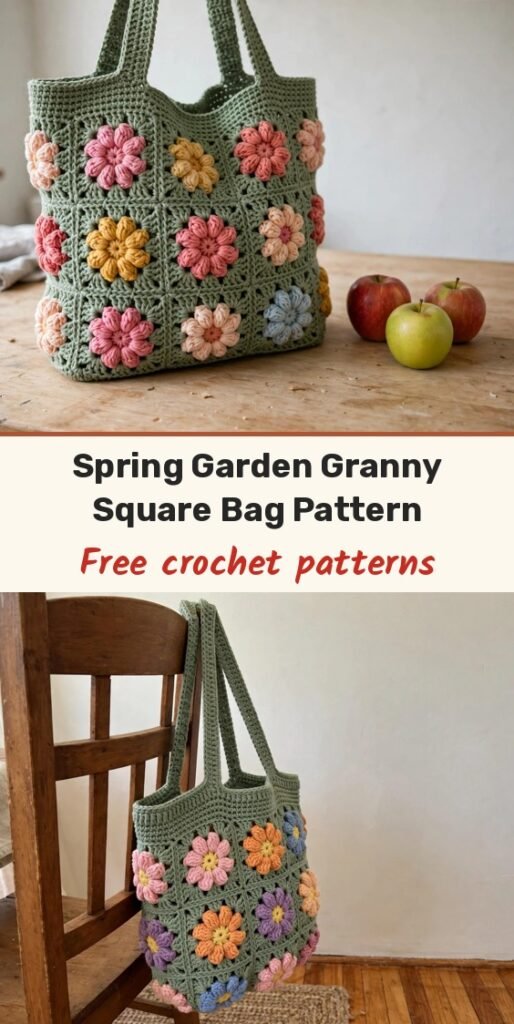
Table of Contents
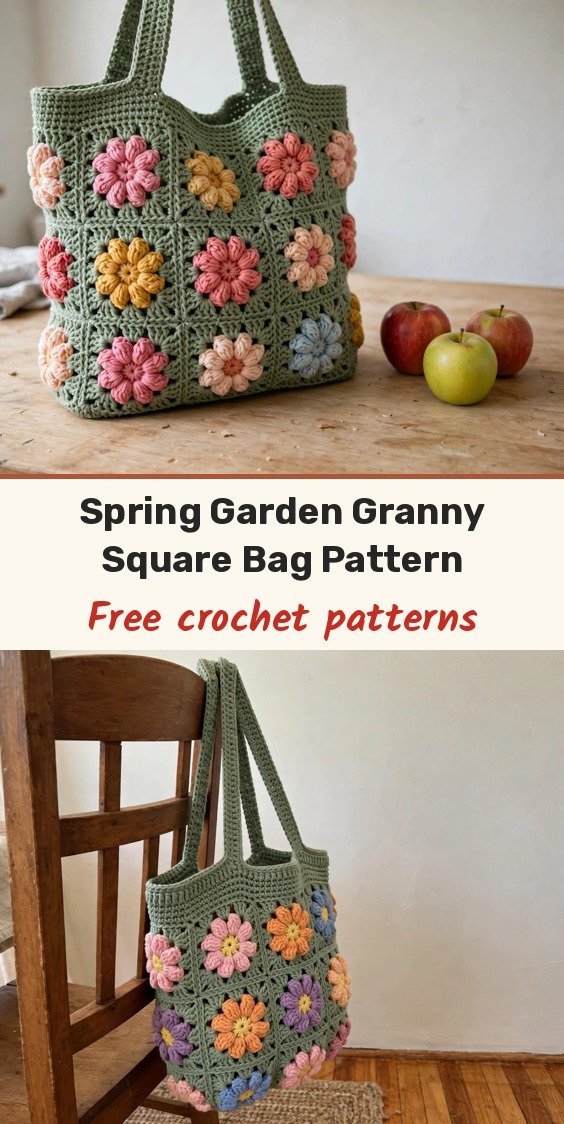
I call this one the Spring Garden tote, and I love that it feels like carrying a little wildflower patch around with you! We will crochet 18 floral granny squares with cheerful puff stitch blooms, join them into front and back panels, add a sturdy gusset for depth, and finish with a clean top band and two comfortable shoulder straps.
Each square frames its puffy flower in soft sage green, and because we block every square to exactly 4.5 inches before joining, the panels come together beautifully square and even. The finished bag is roomy enough for a farmers market haul or a stack of library books.
There is even an optional matching mini pouch at the end if you would like a coordinated set for stitch markers, cards or earbuds. Let me walk you through everything, one square at a time.
Materials
- Approximately 680 yards (622 meters) worsted weight cotton or cotton blend yarn in total: sage main color 420 yards (384 meters), plus 40 to 60 yards (37 to 55 meters) each of flower colors in 5 to 6 colors
- US G/6 (4 mm) crochet hook, or size needed to match gauge
- Tapestry needle
- Locking stitch markers
- Scissors
- Pins
- Blocking mat
- Optional: fabric lining for durability
- Optional: magnetic snap for closure
- Optional: 1 button for the mini pouch
Abbreviations
- ch: chain
- ch-sp: chain space
- dc: double crochet
- hdc: half double crochet
- rep: repeat
- rnd: round
- RS: right side
- sc: single crochet
- sl st: slip stitch
- sp: space
- st/sts: stitch / stitches
- WS: wrong side
- yo: yarn over
Special Stitches
- Puff petal: yarn over, insert hook in the indicated stitch or space, yarn over and pull up a loop. Repeat this sequence 3 more times (4 total yarn overs and pull ups), so you have 9 loops on your hook. Yarn over and pull through all loops on hook. Chain 1 to close the puff. Keep your tension loose enough that pulling through all those loops does not feel like a struggle
- Standing single crochet: make a slip knot on your hook, insert hook in the indicated stitch, yarn over and pull up a loop, yarn over and pull through both loops. This joins a new color cleanly without the bulk of a slip knot showing
- Invisible join: cut yarn and pull the tail through your final stitch. Thread the tail onto your tapestry needle, insert the needle under both loops of the first stitch of the round, then bring the needle back down through the center of the final stitch
- Mattress seam: hold both pieces with right sides facing up and, working with your tapestry needle, catch the outer loops or inside bars of matching edge stitches, pulling gently every few stitches to close the seam with even tension
Gauge & Size
- Gauge: 18 sc and 20 rows = 4 inches (10 cm) in firm single crochet, blocked. Square checkpoint: one completed flower square, after Round 5 and blocking, should measure 4.5 inches (11.5 cm)
- Finished size: approximately 13.5 inches wide (34 cm), 15 inches tall (38 cm) and 3.5 inches deep (9 cm), not including the strap drop of about 9 inches (23 cm)
- Construction: 18 flower squares joined into two 3 by 3 panels, joined with a long sc gusset strip, finished with a top band and 2 straps
- Skill level: Intermediate
Flower Square Pattern
Make 18 squares in total, using varied petal colors for that garden style mix. Block every single square to 4.5 inches (11.5 cm) before joining them together.
Round 1 (flower center): With your flower center color (yellow, pink, or white), make a magic ring. Chain 1. Work 12 sc into the ring. Join with a slip stitch to the first sc. (12 sc)
Round 2 (petals): Join your petal color. Chain 1. Work 1 puff petal in each sc around. Join to the first petal’s closing chain. (12 petals, 12 chain spaces)
Round 3 (first border): Join sage in any chain space. Treat this space as a corner. (3 dc, ch 2, 3 dc) in the corner space. Chain 1. Work 3 dc in the next space. Chain 1. Work 3 dc in the next space. Chain 1. Repeat 3 more times (4 times total). Join. (48 dc, 8 ch-1 spaces, 4 ch-2 corners)
Round 4 (second border): Chain 1. In each corner ch-2 space, work (2 sc, ch 2, 2 sc). Work 1 sc in each dc and 1 sc in each ch-1 space around. Join. (72 sc, 4 corner spaces)
Round 5 (final border): Chain 1. In each corner ch-2 space, work (2 sc, ch 2, 2 sc). Work 1 sc in each sc around. Join invisibly. Fasten off. (88 sc, 4 corner spaces, 22 sc per side)
Before moving on, verify your square: each side should have 22 sc between corners, and a row of 3 squares should measure about 13.5 inches (34 cm) after blocking and seaming.
Joining the Panels
Arrange 9 squares for the front panel and 9 squares for the back panel, each in a 3 wide by 3 tall grid. Mix your flower colors so no two identical flowers sit directly next to each other.
Place two squares right sides together for a hidden seam, or right sides up for a visible decorative seam. Match the 22 edge stitches on one square to the 22 edge stitches on the next square, and sew or slip stitch through corresponding stitches. Keep your corners aligned and do not seam into the ch-2 corner spaces unless you are closing a panel corner.
Join the vertical seams first (3 vertical joins per panel), then join the horizontal seams (3 horizontal joins per panel). Each panel has 6 short internal seams total. Each finished panel should measure about 13.5 inches wide by 13.5 inches tall (34 by 34 cm) before adding the top band, and the outside perimeter of each panel stays open for attaching the gusset and top band.
Gusset Pattern
The gusset gives your bag depth and structure. It runs from the top of one side, down, across the bottom, and up the other side.
Row 1: With sage, chain 17. Sc in the 2nd chain from hook and in each chain across. Chain 1, turn. (16 sc)
Rows 2 to 203: Sc in each stitch across. Chain 1, turn after every row except the final row. (16 sc per row, approximately 40.5 inches or 103 cm long in total)
Attaching the gusset: Pin the gusset starting from the top left edge of your front panel. Continue down the side, across the bottom, and up the opposite side. The 16 stitch width creates the bag depth. Seam in place. Repeat for the back panel.
Top Band Pattern
Round 1: Join sage at the back top center. Sc evenly around the top opening: 66 across the front, 66 across the back, 16 across each gusset end. Join. (164 sc)
Round 2: Chain 1. Sc around, decreasing 4 stitches evenly spaced. Join. (160 sc)
Rounds 3 to 8: Chain 1. Sc in each stitch around. Join each round. Fasten off after Round 8. (160 sc)
Strap Pattern
Make 2 straps. Chain 11.
Row 1: Sc in the 2nd chain from hook and in each chain across. (10 sc)
Rows 2 to 80: Chain 1, turn. Sc in each stitch across. (10 sc)
Edging: Sc evenly around all strap edges, working 3 sc in each corner for smooth turning. Fasten off.
Attaching the straps: Position each strap on the inside of the top band, about 3 inches (7.5 cm) from the side seams. For maximum durability, sew a 2 inch (5 cm) rectangle with an X inside the rectangle. This distributes the weight and prevents the straps from pulling loose. Your finished strap drop should be approximately 9 inches (23 cm).
Optional Mini Pouch
This little pouch coordinates perfectly with your tote. Body Row 1: With sage, chain 25. Sc in the 2nd chain from hook and in each chain across. Chain 1, turn. (24 sc)
Rows 2 to 42: Sc in each stitch across. Chain 1, turn. (24 sc)
Folding and seaming: Fold the lower 28 rows upward to create the pocket portion, leaving 14 rows for the flap. Seam both sides closed. Pocket depth: approximately 2.8 inches (7 cm).
Flap edging: Sc evenly around the flap. At the center point, work chain 6 to create a button loop.
Flower accent: Make Rounds 1 and 2 of the flower motif only and sew it to the pouch flap. Add a button to the pouch front so the ch-6 loop closes neatly over it.
Finishing & Assembly
Weave in all yarn ends on the wrong side, and take your time with this step. Steam lightly or wet block the entire bag to square up the panels and calm any seam puckering.
For bags that will carry heavy items, consider adding a fabric lining; it protects the crochet and adds durability. For an extra crisp upper edge, sew grosgrain ribbon or cotton webbing just inside the top band before attaching the straps.
Tips
Cotton yarn gives this bag the structure it needs to hold its shape. Avoid very stretchy acrylic for the straps unless you plan to add lining or webbing reinforcement.
If your squares come out different sizes, block them all to 4.5 inches before joining, and make sure you work those 4 decreases in Top Band Round 2 with a firm tension throughout the band.
Gusset width controls how deep your bag sits: at the stated gauge, 12 sc gives about 2.75 inches (7 cm), 16 sc gives about 3.5 inches (9 cm), and 20 sc gives about 4.5 inches (11.5 cm).
Hand wash in cool water, reshape while damp and dry flat. Cotton bags may stretch when wet, so support the full bag while lifting and drying, and never hang it by the straps while wet.
Spring Garden Granny Square Bag Free Crochet Pattern
Materials
Steps
- Make 18 puff flower squares in 5 rounds and block each to 4.5 inches
- Join squares into two 3 by 3 panels of 9 squares each
- Work the 16-sc gusset strip for about 203 rows and seam it around both panels
- Work the top band from 164 sc down to 160 sc over 8 rounds
- Make and attach 2 straps with boxed X stitching
- Optionally make the matching mini pouch with a flower flap
- Block every square to exactly 4.5 inches before joining
- Mix flower colors so no two identical flowers sit side by side
- Sew straps with a rectangle and X for maximum durability
- Support the whole wet bag when lifting it to dry flat