Sage Green Botanical Leaf Table Runner Free Crochet Pattern
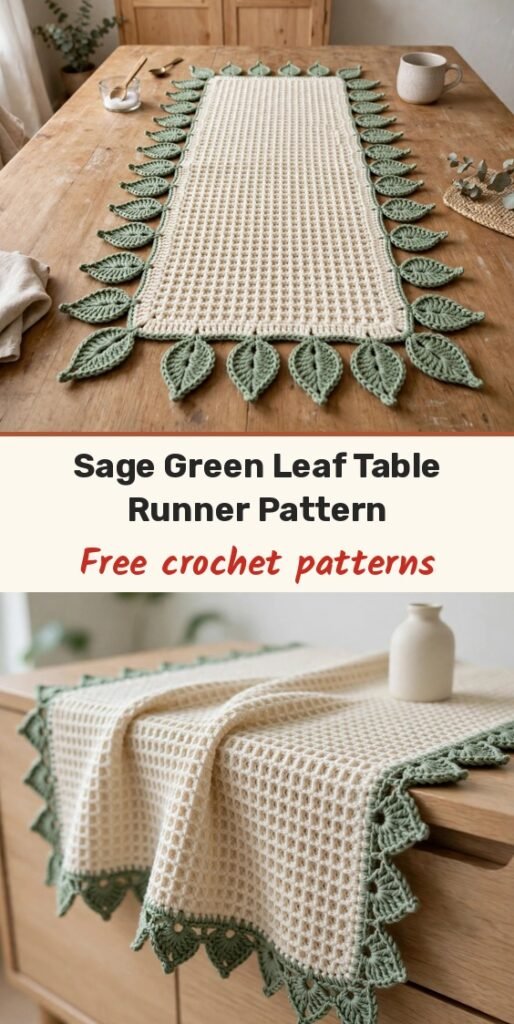
Table of Contents
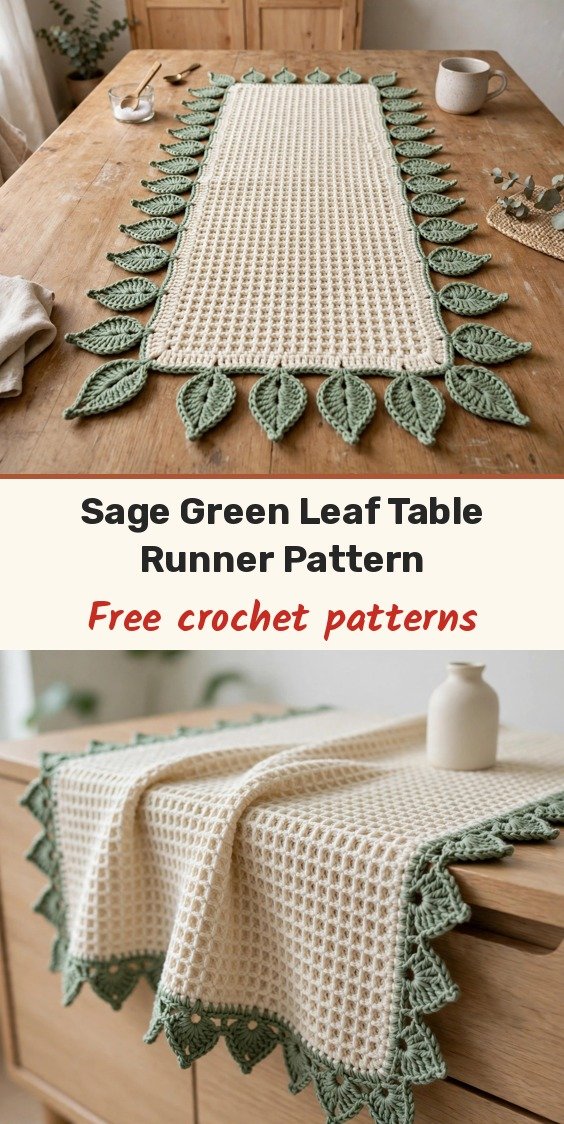
This table runner makes me so happy every time I lay it out! We start with a cream waffle-texture centre panel, then we crochet a whole pile of sage green leaves, 76 of them, and stitch them all the way around the edges with their tips pointing outward. It looks incredibly impressive on the table, but it breaks down into such manageable, meditative steps.
The centre panel alone measures about 8 inches wide by 42 inches long, and the leaves add roughly 3 inches on each side. The repetitive leaf making is my favourite part; once you find your rhythm, they work up quickly.
This is an intermediate project. You will want to feel comfortable with front post and back post double crochet for the waffle texture, and if post stitches are new to you, a small practice swatch first is a lovely idea.
Materials
- 350 yards of worsted weight cotton yarn in cream or natural (Yarn A)
- 500 yards of worsted weight cotton yarn in sage green (Yarn B)
- 4.0 mm crochet hook (US G-6)
- Yarn needle
- Scissors
- Blocking mats and pins
- Stitch markers (optional, helpful for leaf placement)
Abbreviations
- ch: chain
- sl st: slip stitch
- sc: single crochet
- hdc: half double crochet
- dc: double crochet
- tr: treble crochet
- FPdc: front post double crochet
- BPdc: back post double crochet
- dc2tog: double crochet two together
- st(s): stitch(es)
- sk: skip
- sp: space
- rep: repeat
- RS: right side
- WS: wrong side
- pm: place marker
- beg: beginning
- rem: remaining
- tog: together
- yo: yarn over
- lp(s): loop(s)
Special Stitches
- Waffle stitch: the textured grid of the centre panel, worked over a multiple of 3 stitches plus 2, alternating a BPdc row and an FPdc row over a first row of plain dc. The full rows are given in the panel pattern below, and the turning chain does not count as a stitch in this pattern.
- FPdc (front post double crochet): yarn over, insert hook from front to back to front around the post of the indicated stitch below, yarn over and pull up a loop, then yarn over and pull through 2 loops twice.
- BPdc (back post double crochet): yarn over, insert hook from back to front to back around the post of the indicated stitch below, yarn over and pull up a loop, then yarn over and pull through 2 loops twice.
- dc2tog (double crochet two together): yarn over, insert hook into first stitch, yarn over, pull up a loop, yarn over, pull through 2 loops. Yarn over, insert hook into next stitch, yarn over, pull up a loop, yarn over, pull through 2 loops (3 loops on hook). Yarn over, pull through all 3 loops.
Gauge & Size
- Gauge: 16 stitches and 12 rows = 4 inches in waffle stitch pattern using Yarn A and a US G-6 hook, after blocking; 1 leaf = approximately 2.5 inches long by 1.5 inches wide after blocking
- Finished size: centre panel approximately 8 inches wide by 42 inches long, with the leaf border adding roughly 3 inches on each side
- Construction: centre panel worked lengthwise in 126 rows, 76 identical leaves made separately and whipstitched around all four edges
- Skill level: Intermediate
Centre Panel Pattern
With Yarn A (cream) and your G-6 hook, we work the panel lengthwise. The panel is 32 stitches wide and 126 rows long.
Foundation chain: Ch 35.
Row 1 (RS): Dc in 4th ch from hook, dc in each ch across. (32 dc)
Row 2 (WS): Ch 2, turn. BPdc around each of the 32 sts across. (32 sts)
Row 3 (RS): Ch 3, turn. FPdc around each of the 32 sts across. (32 sts)
Rows 4 through 126: Repeat Rows 2 and 3 alternately, ending after a Row 3 repeat (RS row). (32 sts per row throughout)
Your centre panel should measure approximately 8 inches wide by 42 inches long. Fasten off Yarn A, weave in ends, and block the centre panel thoroughly before adding the leaves.
Leaf Pattern
Make 76 leaves total. You may need to adjust this count slightly after a test placement. Each leaf starts at the base and works toward a pointed tip, with a centre ridge created by slip stitches. Use Yarn B (sage green) and the G-6 hook.
Foundation: Ch 12. This is the centre spine of your leaf.
Row 1 (RS, first side): Sc in 2nd ch from hook, hdc in next ch, dc in next ch, tr in next ch, dc in next ch, hdc in next ch, sc in next ch, sl st in next ch. Leave remaining 3 ch unworked. Do not turn. (8 sts worked into the chain)
Row 1 continued (second side): Without turning, rotate work 180 degrees. Work into the unused loops of the same foundation chain, starting from where you placed the sl st. Sl st into the first unused ch loop, sc in next ch, hdc in next ch, dc in next ch, tr in next ch, dc in next ch, hdc in next ch, sc in next ch. (8 sts on second side, 16 total working sts plus the tip sl st)
Centre vein: Turn the leaf so RS faces you. Sl st down the centre of the leaf from tip to base by inserting your hook under both loops of each pair of corresponding stitches along the spine chain. Sl st in each of the 11 ch along the spine, working from tip toward stem. (11 sl sts along spine)
Fasten off, leaving a 12 inch tail for attachment. Make 4 or 5 sample leaves and block them before making all 76; they should lie flat with a distinct pointed tip and a clear centre vein.
Finishing & Assembly
Lay your blocked centre panel flat and arrange the leaves around all four edges with pointed tips facing outward, overlapping the panel edge by approximately 0.5 inch. Place 1 leaf approximately every 1.4 inches along each long side (29 to 30 leaves per long side), 1 leaf approximately every 0.8 inch along each short end (9 to 10 leaves per short end), and 3 leaves per corner fanned at roughly 45 degrees. Plan for approximately 76 to 82 leaves in total, and make a few extras to be safe.
Thread the 12 inch tail onto a yarn needle, align the leaf base along the panel edge, and whipstitch or slip stitch the base of each leaf to the panel edge, catching 2 to 3 edge stitches per leaf. Knot and weave in each tail on the wrong side. Work around the full perimeter, letting the corner leaves overlap slightly at their bases.
Weave in all remaining ends and trim them to approximately 0.5 inch after weaving. To block, soak the finished runner in cool water with a small amount of wool wash for 20 minutes, press out the water in a towel without wringing, lay flat, pin the centre panel to its finished dimensions, arrange and pin each leaf with its tip pointing outward, and allow 12 to 24 hours to dry completely.
For care, machine wash on a gentle cycle in cold water, lay flat to dry, do not bleach, and store flat or loosely rolled to preserve the leaf shapes.
Tips
For a shorter runner, reduce the centre panel row count in increments of 2. Every 6 rows removed shortens the panel by approximately 2 inches.
For a wider runner, add stitches to the foundation chain in multiples of 3, the waffle stitch repeat. Every 6 additional stitches adds approximately 1.5 inches of width.
For matching placemats, work a centre panel of approximately 30 stitches wide by 48 rows long. You will need about 30 to 34 leaves per placemat.
The centre panel uses only Yarn A and the leaves use only Yarn B, and all leaves are identical. Weave in ends as you go, and block the panel before attaching leaves, because aggressive blocking really opens up that waffle grid.
Sage Green Botanical Leaf Table Runner Free Crochet Pattern
Materials
Steps
- Crochet the cream waffle centre panel in 126 rows
- Block the centre panel
- Make 76 sage green leaves with centre veins
- Arrange leaves around all four panel edges
- Whipstitch each leaf base to the panel edge
- Block the finished runner flat
- Make and block 4 or 5 sample leaves before making all 76
- Block the centre panel before attaching any leaves
- Make a few extra leaves so corners fan neatly