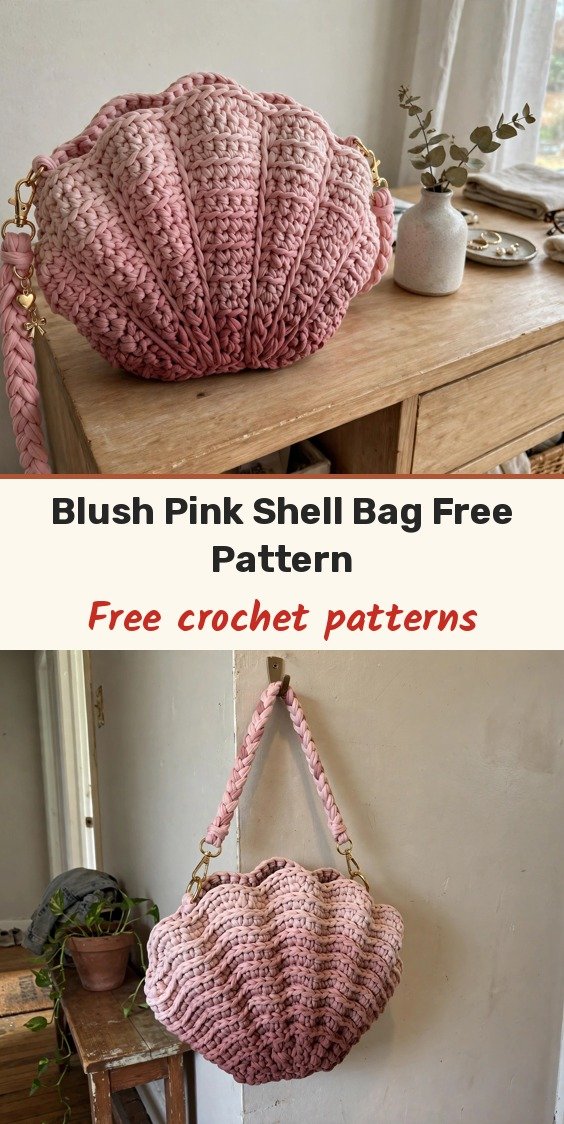
Blush Pink Feminine Shell Bag Free Crochet Pattern
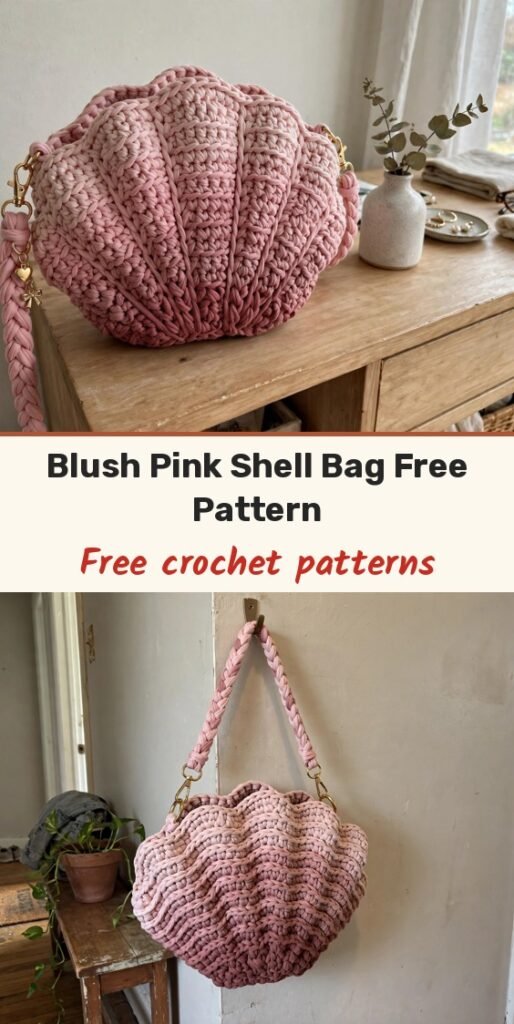
Table of Contents
There is something so satisfying about carrying a bag you made with your own hands, and this blush pink feminine shell bag is one of those projects that looks far more complicated than it actually is! The gorgeous ombre effect, the elegant shell shape and those sweet decorative charms combine to create a bag that genuinely looks designer — but I promise you can absolutely make this, even if you have only made a few projects before.
We start at the bottom centre and work outward in rounds. The shaping happens through strategic increases that create those lovely vertical ridges running up the sides, then we transition to the body and work even rounds until we reach the opening. This pattern uses basic stitches worked in continuous rounds — if you can single crochet and work in the round, you have all the skills you need, and I will walk you through every step.
Let me be honest: this is not a first project. But if you have completed a beanie or a simple market bag, you are ready for this shell bag. There is no complicated stitch pattern, no seaming required, and it works up quickly with bulky t-shirt yarn, with clear visual progress so you always know you are on track.
Materials
- Approximately 200 grams of t-shirt yarn or cotton tape yarn in dusty rose or mauve (Colour A, darker shade)
- Approximately 150 grams of the same yarn type in blush pink or light rose (Colour B, lighter shade)
- 8 mm or 9 mm crochet hook (adjust based on your tension)
- Stitch marker
- Tapestry needle
- Two lobster clasp hardware pieces in gold, approximately 25 mm
- Two D-rings in gold, approximately 20 mm
- One braided leather or faux leather strap in coordinating pink, approximately 100–120 cm
- Decorative charms: heart charm, bow charm, pearl dangles (optional, but they make this bag special)
- Matching thread or thin cord for attaching the charms
Abbreviations
- ch: chain
- sl st: slip stitch
- sc: single crochet
- inc: increase, work 2 single crochet stitches into the same stitch
- sc2tog: single crochet two together (decrease)
- BLO: back loop only
- st/sts: stitch / stitches
Gauge & Size
- Finished size: width across the top opening 22 cm (8.5 inches), height from base to top 18 cm (7 inches), depth at widest point 8 cm (3 inches) — roomy enough for your phone, wallet, keys and small essentials
- Gauge: 8 single crochet stitches and 8 rows = approximately 10 cm (4 inches) in t-shirt yarn with an 8 mm hook. Your gauge matters here because it affects the final bag size — aim for a fabric that holds its shape but still has a little give
- Construction: flat rectangular base, then continuous spiral rounds with back-loop-only ridge rounds and a gradual two-colour ombre transition
- Skill level: Confident beginner
- T-shirt yarn is that chunky, stretchy ribbon yarn that creates beautiful defined stitches (look for names like Zpagetti, Hoooked, or simply fabric yarn), comparable to super bulky (Category 6). I prefer working in a continuous spiral for t-shirt yarn because it avoids a visible seam line — just keep your stitch marker moving so you know where each round begins
Base Pattern
The base is an elongated oval that forms the bottom of your bag. We work this flat, then transition to rounds for the body. With Colour A:
Row 1: Ch 15. Starting in 2nd ch from hook, sc in each ch across. (14 sts)
Row 2: Ch 1, turn. Sc in each st across. (14 sts)
Rows 3–6: Repeat Row 2. (14 sts each row)
You should now have a small rectangle approximately 15 cm long and 8 cm wide.
Body Pattern
Now we work around the entire edge of this rectangle to begin building the sides. Place a stitch marker at the start of your round and move it up as you go.
Round 1: Do not turn. Work 1 sc into the side of each row down the short edge (6 sc), work 3 sc into the corner stitch, work 14 sc across the bottom chain edge, work 3 sc into the next corner, work 6 sc up the remaining short edge, work 3 sc into the corner, work 14 sc across the top edge, work 3 sc into the final corner. Join with sl st to first sc, or continue in spiral. (52 sts)
Round 2: Sc in each st around. At the corners (where you worked 3 sc), work an inc in the centre stitch of each 3-stitch group. (56 sts)
Round 3: Sc in each st around, working inc in each corner centre stitch. (60 sts)
Round 4: Sc in each st around, working inc in each corner centre stitch. (64 sts)
Your base should now be a nice oval shape with slightly raised edges beginning to form the bag sides. Now for the body shaping — this is where the magic happens. We create those beautiful vertical ridges by working in the back loop only on specific rounds.
Round 5: Working in BLO, sc in each st around. (64 sts)
This creates that defined ridge line where the base meets the sides — you will see it pop immediately.
Rounds 6–8: Sc in each st around (working through both loops as normal). (64 sts each round)
Round 9: Working in BLO, sc in each st around. (64 sts)
Another ridge line appears, creating that horizontal banding effect.
Rounds 10–12: Sc in each st around. (64 sts each round)
Now for the colour transition — time to introduce Colour B for that ombre effect. The transition happens gradually over two rounds.
Round 13: With Colour B, working in BLO, sc in each st around. (64 sts)
Rounds 14–16: Sc in each st around. (64 sts each round)
Round 17: Working in BLO, sc in each st around. (64 sts)
Rounds 18–20: Sc in each st around. (64 sts each round)
Round 21: Working in BLO, sc in each st around. (64 sts)
Rounds 22–24: Sc in each st around. (64 sts each round)
Top Shaping Pattern
Round 25: (Sc in next 6 sts, sc2tog) repeat around. (56 sts)
Round 26: Sc in each st around. (56 sts)
Round 27: (Sc in next 5 sts, sc2tog) repeat around. (48 sts)
Round 28: Sc in each st around. (48 sts)
Round 29: Sl st in each st around. Fasten off and weave in ends.
The slip stitch round creates a neat finished edge at the top opening.
Hardware Tabs Pattern
Make 2. These small tabs hold the D-rings that your strap clips onto. With Colour B:
Row 1: Ch 6. Starting in 2nd ch from hook, sc in each ch across. (5 sts)
Rows 2–4: Ch 1, turn. Sc in each st across. (5 sts)
Fasten off, leaving a long tail for sewing. Fold the tab in half with the D-ring inside the loop, and use the tail to whip stitch the tab securely to the inside top edge of the bag, approximately 3 cm from the centre on each side.
Finishing & Assembly
Weave in all ends using your tapestry needle. With t-shirt yarn, I recommend weaving through several stitches on the wrong side and then back in the opposite direction for security.
Attach the strap hardware: clip your lobster clasps onto the D-rings, and thread your braided strap through the lobster clasps at each end.
Add the decorative charms — this step is completely optional but really elevates the design. Using thin cord or matching thread, attach your heart charm, bow charm and pearl dangles to the centre front of the bag. You can loop them through a stitch in the top section and secure with a simple knot hidden behind the charm.
Tips
Tension matters with t-shirt yarn. This yarn has a lot of stretch, so try to keep your stitches consistent — do not pull too tight or your bag will curl and feel stiff. Working in BLO can feel weird at first, so take it slow on those rounds; the ridge appears on the right side of your work, which is the outside of the bag.
If your bag seems floppy, you can add a fabric lining for structure: cut a piece of cotton fabric slightly smaller than your bag interior, fold the top edge under, and hand stitch around the inside top edge.
Lost your place? Count your stitches at the end of every round until you feel confident. Every standard round should have the same count as the previous one unless increases or decreases are specified.
The ombre effect works best when your two colours are in the same colour family but clearly different values — the darker shade on the bottom and lighter on top creates visual interest and makes the bag feel more designed.
Blush Pink Feminine Shell Bag Free Crochet Pattern
Materials
Steps
- Work the flat base rectangle over 6 rows (14 sts)
- Work around the base edge to form the oval (52 sts) and increase at the corners to 64 sts
- Work the body rounds with back-loop-only ridge rounds at Rounds 5, 9 and 13
- Change to Colour B at Round 13 and continue the ridge pattern to Round 24
- Shape the top with decrease rounds to 48 sts and finish with a slip stitch round
- Make 2 hardware tabs, fold them over the D-rings and sew them inside the top edge
- Clip on the strap and add the decorative charms
- Keep your tension consistent — t-shirt yarn stretches and tight stitches will make the bag curl
- Count your stitches at the end of every round until the rhythm feels natural
- Add a fabric lining if your bag feels floppy and you want more structure


